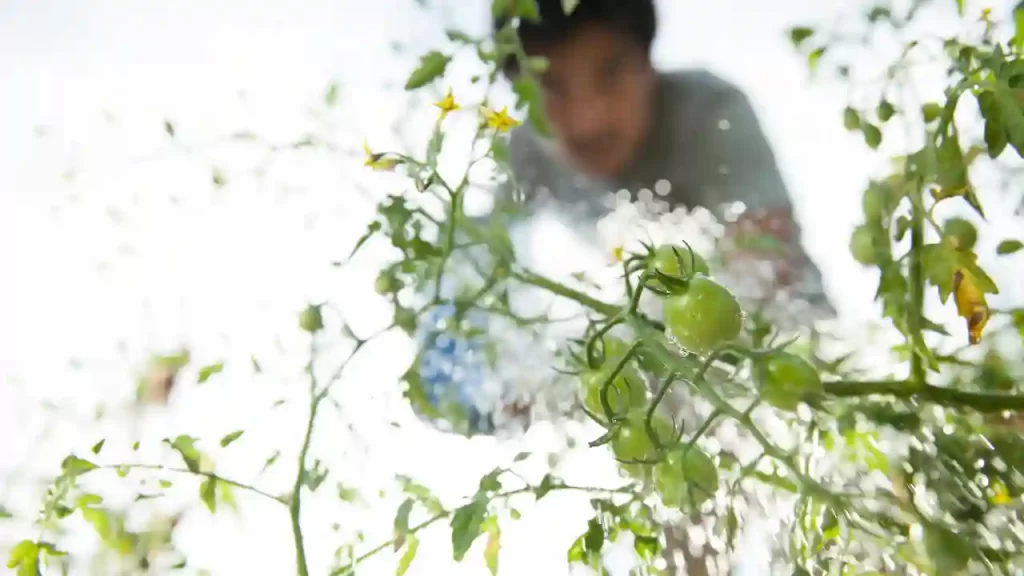
It is a famous controversial topic whether coffee grounds are good for tomato plants. Can it serve the purpose of resolving various problems while planting and growing tomato plants?
It is claimed to deal with pests and diseases and can be used as compost, mulch, and many more. But has it been proven by science?
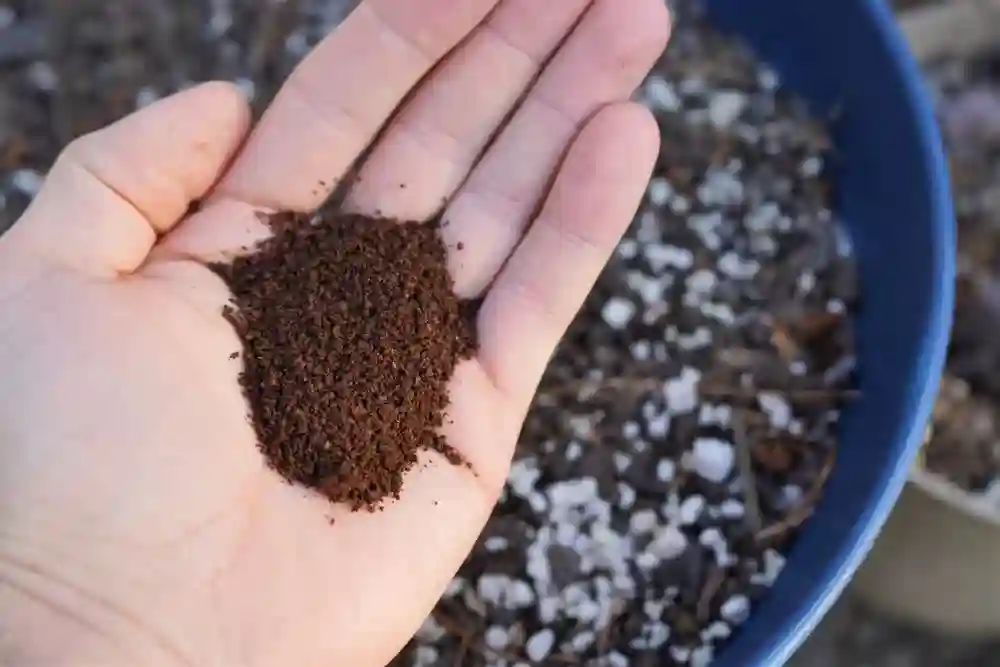
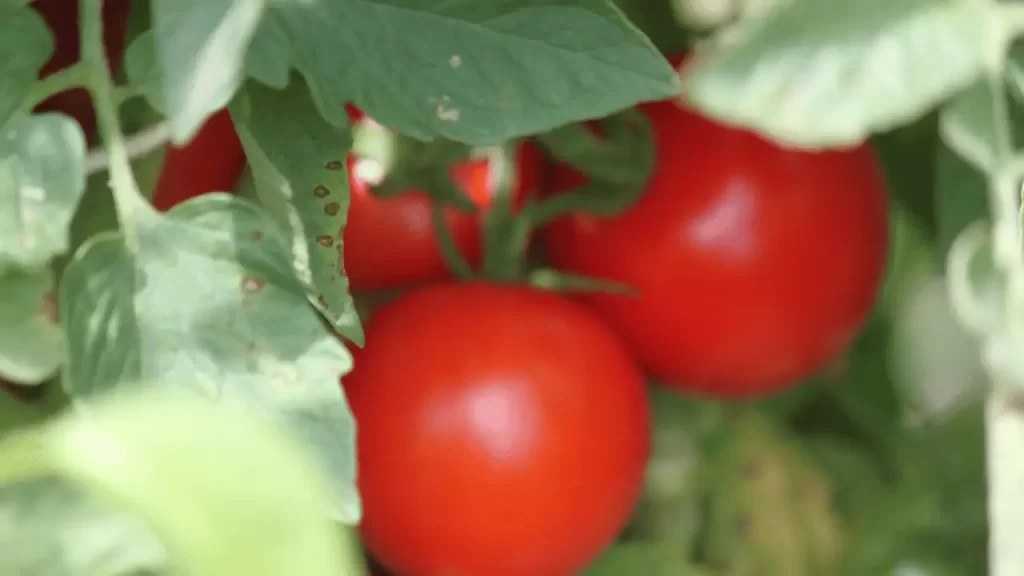
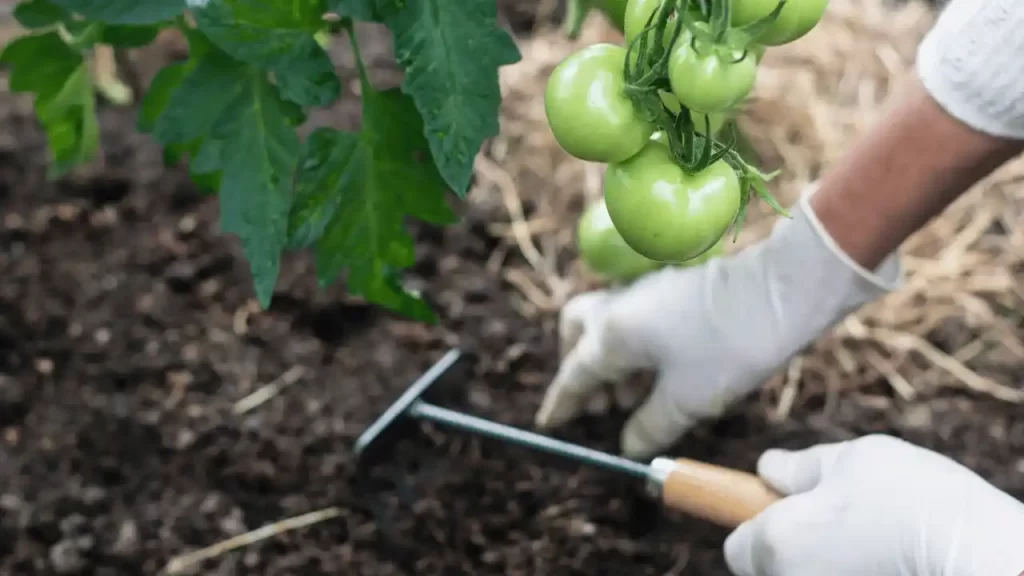
In short, adding a few coffee grounds to the soil below your tomato plants is an excellent way of providing essential nutrients for growth and flourishing. These grounds contain roughly 2% nitrogen, along with varying levels of phosphorus and potassium – all three being vital elements that tomatoes require in order to reach their full potential!
Many gardening myths have existed for years. Some of the myths are about the use of Epsom Salt, eggshells, and coffee grounds. Fortunately, some of the claims work best, while others are a myth.
In this article, I have discussed whether coffee grounds effectively resolve the tomato plantation issue or if it’s just a myth. So let’s jump into it!
Fact or Myth: Do Tomatoes Like Coffee Grounds?
In short, it can be said both yes and no. It is known to all that everything loves to be in a limited amount. Imagine if you are using too much fertilizer for your plant.
Obviously, it would create many issues for the plant. Thus, instead of benefiting the plant, it would put the plant into trouble.
The same rule applies to the application of coffee grounds too. You should use it in proper quantity only to benefit the plant by improving the soil quality and providing the best growing environment.
Increase nutrients:
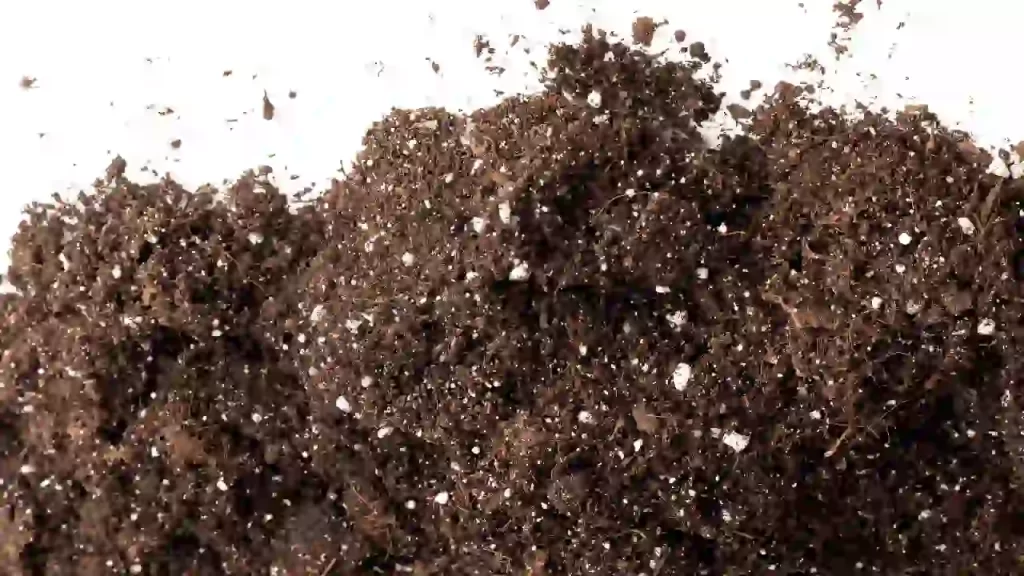
Coffee grounds are rich in nutrients like nitrogen, phosphorus, and potassium and micronutrients like calcium, copper, iron, magnesium, zinc, and boron.
Using it carefully for your tomato plants can add nutrients and contribute to healthy growth and development.
Slow release of nitrogen:
The microbes present in the soil break the protein in the coffee grounds, and nitrogen is slowly released for the plants.
Favorable pH:
Tomato is acid loving plants and prefer to grow in acidic soil, and the coffee grounds have an average of 6.5 pH which helps to acidify the soil and makes it favorable for the tomatoes.
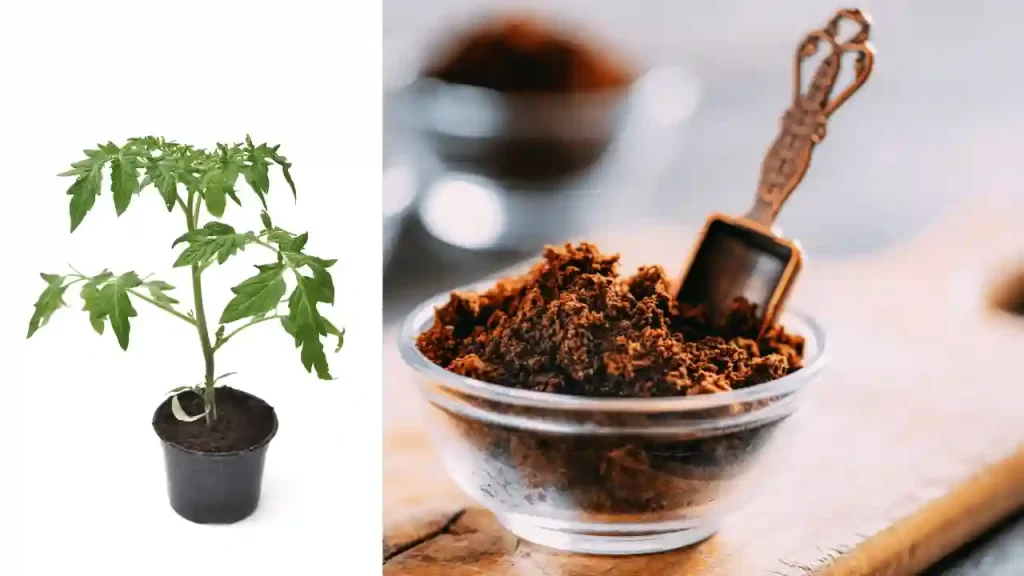
Compostable:
You can prepare an organic compost pile with 20% of coffee grounds, which is safe to use without harming the plant.
Fungal suppression:
Coffee Grounds can suppress some of the common tomato diseases like fusarium wilt, pythium, and sclerotinia with the application of coffee grounds.
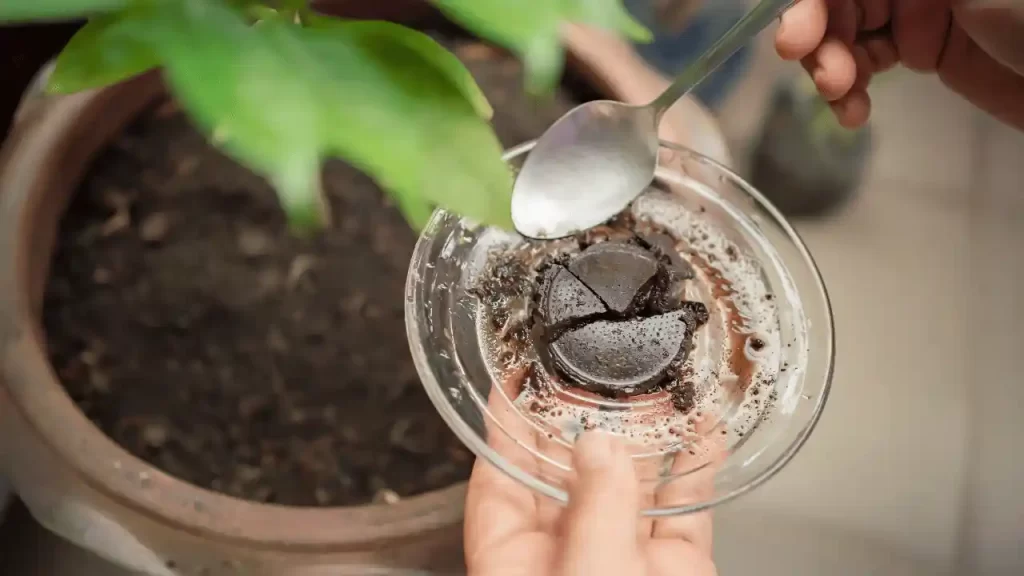
Should you use coffee grounds for tomatoes to fertilize tomato plants?
Most of the time, it is advised to use coffee grounds to fertilize your plants either as a nitrogen-rich fertilizer or to revitalize the growth of the tomato plants.
You can say it is overly hiked, yet it has some truth too. The most important nutrients for tomato plants are nitrogen, phosphorus, and potassium, which are needed for the plant’s growth, development, and fruiting. And coffee grounds contain 2% nitrogen and some variable amounts of phosphorus and potassium.
After the decomposition of coffee grounds in the soil, NPK nutrients are released, and the plant benefits.
Theoretically, it is said that mixing coffee grounds in the soil work as a slow-release fertilizer for tomato plants. Instantly no nutrients are provided. It increases the supply of nutrients in the soil after the coffee grounds become soluble slowly and steadily.
If you plan to use coffee grounds as a substitute for your regular fertilizer, then it’s not a great idea. You need to think twice before replacing your regular fertilizer.
Slow-release fertilizers work best with the plants to enhance their growth as they have better nutrients than coffee grounds, which contain only 2%.
It has not been scientifically proven that coffee grounds help grow and develop tomato plants.
Coffee grounds can fulfill the nutrient requirement of tomato plants in a very small amount but in the longer run. This effect is negligible when compared to regular organic fertilizer.
If you want to try it on your plant, you can go for it, but I suggest not applying coffee grounds if your plant is already going through a deficiency of any nutrients or is facing growing problems.
Should you use coffee grounds for tomatoes to acidify soil?
Tomato plants prefer to grow in slightly acidic soil, and coffee grounds are claimed to reduce soil pH. Thus, coffee grounds can favor the growth and health of tomato plants. Though tomatoes grow in acidic soil, coffee grounds cannot work best here.
Most people believe that as the coffee grounds are acidic, it can reduce the soil’s pH level and favor the acidic soil-loving tomato plants. But scientifically, it has not been cleared.
The coffee’s pH fluctuates; on average, its pH is 6.5, which is just neutral. The main concern is that even after being acidic, it is not guaranteed to have a drastic impact on the pH of the soil. It might not give the expected results.
You can find many gardening products in your local nursery store which can lower the soil pH in the desired way. But be specific about reading the product label instructions before its application.
In case of any soil issue, you should first do a soil test to diagnose the issue and take action accordingly.
Because unnecessarily decreasing or increasing the pH of the soil can develop other unsolvable problems for the plants.
Should you use coffee grounds for tomatoes as mulch?
You can find many options to mulch your tomato plants organically. It can be dried leaves, tree bark, grass clippings, straw, etc.; yes, fresh coffee grounds do not fall into these options.
Often, coffee grounds can best work as mulch as they can slowly decompose in the soil and release nutrients. As a result, the quality of the soil is enhanced, and it is also organic. But the truth is that it leaves a negative impact on the plant.
As discussed above, the great way to mulch your tomato plants is by using organic mulch. The ideal thickness of mulch should be 1-2 inches.
When coffee grounds are used as mulch, it forms a hard and thick layer on the soil. Instead of benefiting your plant, it would make the conditions worse by blocking the air to the soil and preventing its moisture. It also prevents oxygen from reaching the roots and disturbs the plant’s entire root system.
Yet there is a way to use these coffee grounds as an effective mulch and enhance soil quality.
20% of the mulch can be coffee grounds. So mix them with your other organic mulch before use.
Avoid using it too heavily, as it can soon compact and block oxygen and water to the soil. And in such a way, you can achieve maximum benefits without any of its side effects.
Should you use coffee grounds for tomatoes to stop weeds?
Just like mulch controversy, it is often recommended to use for removing and preventing weeds from your garden. But sadly, its use is not totally effective.
A heavy layer of mulch is effective in treating weeds, but as already discussed, a heavy layer of coffee ground can compact rapidly and block the oxygen and moisture in the soil.
But Some research suggests that it works on a few weeds like clovers and also helps to inhibit the germination of seeds. But yet, its ability to prevent many other weeds is not proven.
The quantity of coffee grounds is also not specified for its safe use to inhibit germination and reduce weeds. Thus I suggest opting for the tried, tested, and proven methods to get rid of weeds.
Should you use coffee grounds for tomatoes to kill slugs?
Slugs love to feast on tomatoes and get attracted to tomato gardens very easily. They are one of the biggest problems for tomato gardeners, and they do so many things to get rid of the slugs. Many of the remedies are claimed to be effective in preventing and controlling slugs.
There is a myth that coffee grounds can kill slugs.
As per the studies, slugs are non-resistant to high-content caffeine. A high concentration of caffeine was applied to the soil and leaves of plants to check whether it effectively killed the slugs, and the experiment was successful. So it is claimed that coffee grounds can kill slugs because it contains caffeine.
But the reality is that coffee grounds contain a very low level of caffeine which is not at all effective in killing the slugs.
The study also applied a very low concentration of caffeine, i.e., 0.01% level concentration, during the test, which was ineffective in killing the slugs, and coffee grounds contain even lower caffeine than 0.01%. Then obviously, it’s a flop idea to treat your slug problems with coffee grounds.
If you are dealing with a slug issue in your tomato garden, you should go for proven methods to deal with it instead of adding coffee grounds to kill them.
Should you use coffee grounds for tomatoes to prevent Fungal Diseases?
Fungal disease is very common in tomato plants; no gardeners want to face it. Unfortunately, there is no treatment for many fungal diseases, and you must destroy all the infected plants.
But you might have also got suggestions to use coffee grounds for tomato plants to relieve the infections.
Some studies have examined that you can control the fungal disease by applying coffee grounds. But a high amount of caffeine is essential to prevent slugs, and coffee has only 0.1% of caffeine.
This study says that microbial activity of the soil is increased with the application of coffee grounds, and fungal disease due to fusarium wilt is controlled. But it has indicated nothing about other kinds of fungal infections.
Research has indicated that adding spent coffee grounds directly to soil can reduce the growth of plants.
There might be some reality to treat the fungal disease in tomato plants, but it needs confirmation. Thus do not use it to treat the fungal disease in the plant.
Should you use coffee grounds for tomatoes in compost?
The most popular claim is that coffee grounds can be used as compost for tomato plants, and yes, it is right. Coffee grounds can be used as compost.
A correct combination of nitrogen and carbon makes a beneficial compost.
The good compost breaks slowly and supplies the required nutrients to the plant; coffee grounds contain a good amount of nitrogen.
Prepare a compost with 20% coffee mix for safer use, or you must face the unresolvable consequences.
Summary
You can get many suggestions to apply things to your plant for its betterment. But you should always go with logic and scientifically proven methods. The same goes for the application of coffee grounds to your tomato plant. It can help your plant in a few cases only. So apply it in the proven cases only and always ensure to apply it in the right amount.
Take advantage of your used coffee grounds to provide essential nourishment for your tomato plants, but don’t anticipate extravagant results from this single step.
You should avoid its excessive application; otherwise, instead of benefiting your plant, it can ruin it.
Do you want to enhance the growth and development of your tomato plants with Epsom Salt but are wondering whether it will benefit your tomatoes or worsen their condition? Yes! It is a controversial topic.
Tomato is a unique vegetable grown in home gardens. Its tangy and little sweet taste makes it delicious and also contributes vital ingredients in many of the recipes. It becomes more special and organic when you grow it in your own vegetable garden rather than purchasing it from the stores.
Most gardeners always try to find different ways to maximize their quality tomato production. It is often suggested to add Epsom salt before planting your tomatoes. But are they really good at growing tomatoes on your tomato plant more effectively?
There are certain myths and facts about using Epsom Salt for your tomato plant which I have cleared up in this article.
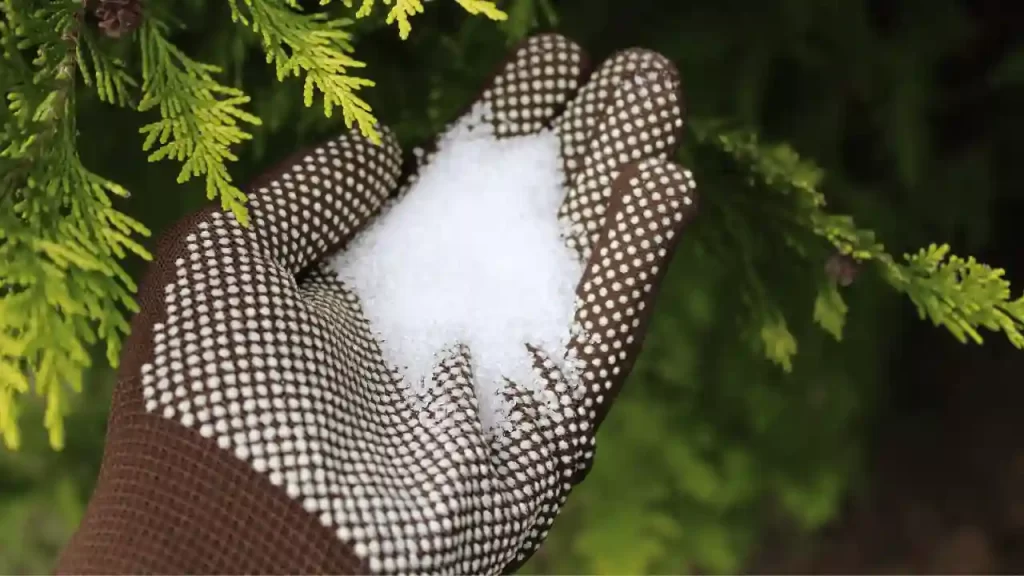
Before that, it is important to know what Epsom Salt is. It is a mineral salt containing Magnesium and magnesium sulfate and was founded 400 years ago in England. It is a non-edible table salt. It is used in baths to relieve stress or cure sore muscles and is sometimes used as a garden supplement.
Short Answer: Yes, it is true that tomatoes do extremely well when Epsom salt is used only when there is magnesium deficiency, but it may not be effective in other cases. It can fulfil the need for Magnesium for your tomato plants which helps to produce the chlorophyll necessary for photosynthesis. It also helps to uptake other nutrients like nitrogen and phosphorus, which plays a vital role in plant development and growth.
In this article, I have discussed whether it would suit your tomatoes and whether they would benefit from this uncommon salt.
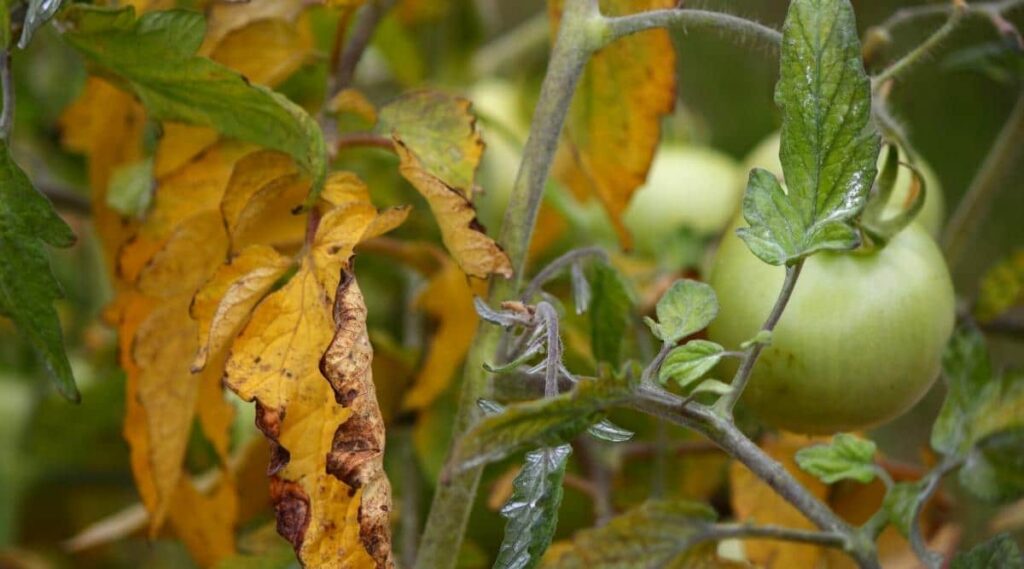
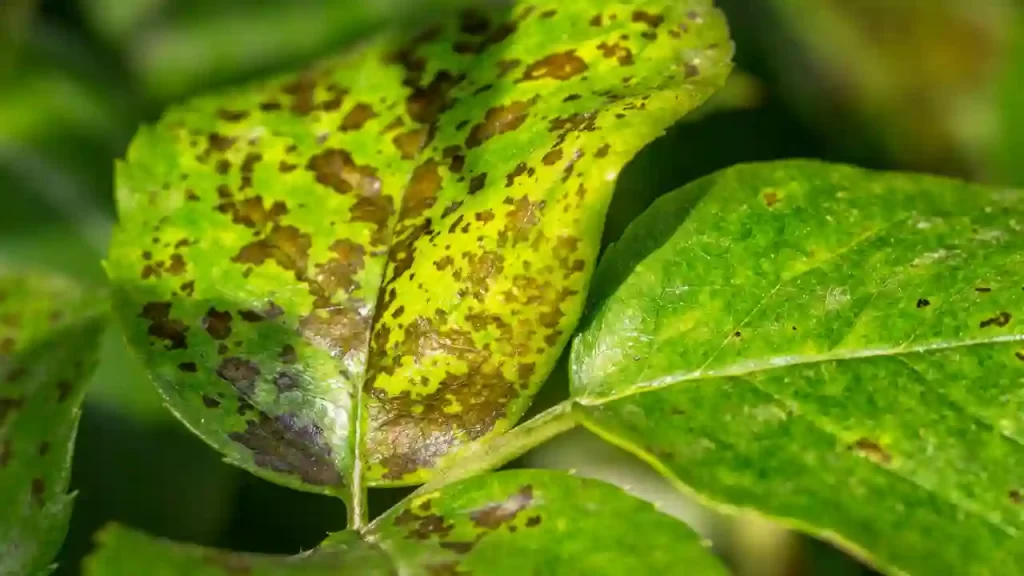
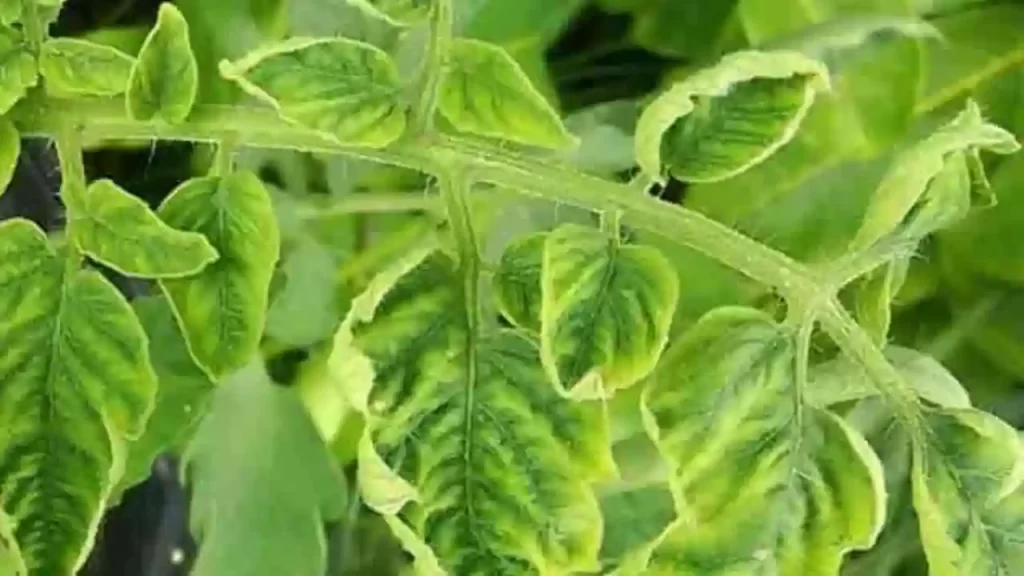
You would obviously feel sad to see your tomato plant leaves turning yellow. It can turn to yellowing leaves because of plenty of reasons. It may be over or under-watering, soil compaction, lack of other nutrition, insects, pest infection or diseases and many more. Most of these problems are solvable.
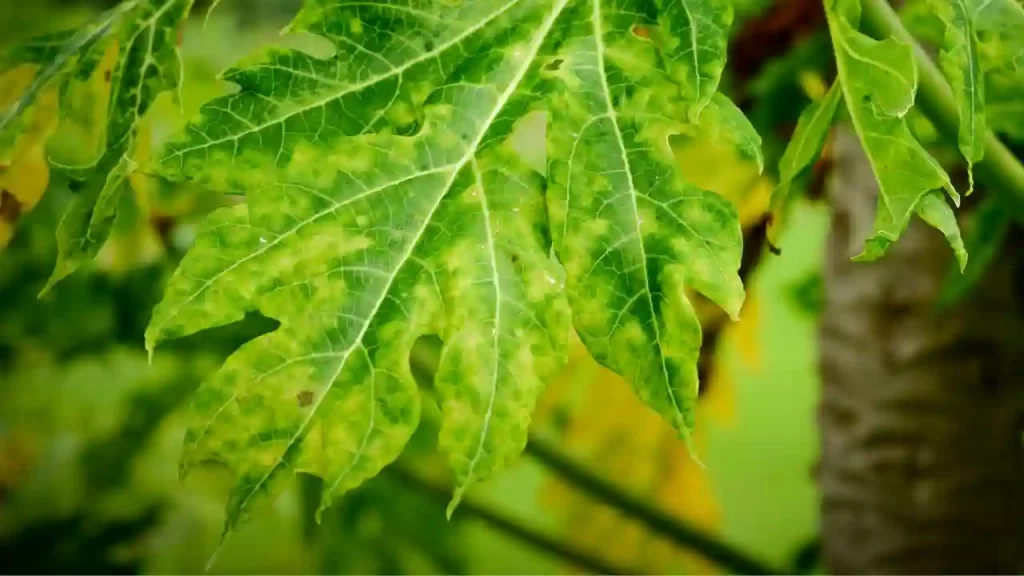
But when your tomato plants suffer from magnesium deficiency, the leaves would turn yellow very differently. Only veins of the leaf margin remain green, and other parts of the leaf turn yellow in a lighter shade. This kind of leaf becomes inefficient in directly generating chlorophyll and urgently require Magnesium at the earliest.
In such a scenario, adding Epsom salt to the soil removes the deficiency of Magnesium in the plants. It balances the magnesium level in the soil and helps restore the plants green leaves’ green color.
Its application is very easy. Add one tablespoon of Epsom salt with a gallon of warm water. And spray directly on the leaves and stem.
When the plant is entirely covered with Epsom salt solution, you can use the remaining gallon of water solution to water the soil. The best time for its application is in the morning as the plant has enough time to get dry, Epsom salt spray gets absorbed efficiently, and you can also avoid the risk of sunburn.
With the spray of Epsom salt, you can easily add Magnesium directly to the soil and tomatoes. It is best to purchase a soil test kit and check the level of Magnesium in your soil and confirm whether your tomatoes are getting good nutrition.
But please be specific about using Epsom salt in moderation, or else it would lead to magnesium toxicity which can worsen your tomato plants.
You can add Magnesium to the soil when planting the tomatoes, and later you can add it to tomatoes once every two weeks when they begin to fruit.
2. Improve Fruits flavor
Who doesn’t love flavorful and delicious tomatoes? A good addition of flavor makes the tomatoes tastier. Indeed, you usually cannot get flavorful tomatoes from the stores.
Adding micronutrient solids, including Magnesium and sulfur to the soil adds more flavor to the tomatoes and even results in healthier plants.
Your tomatoes become delicious, bigger and more flavorful if fertilizers are added consistently and in the right quantity. The tomato plants can easily absorb micronutrients with foliar spraying. It is good to use some Epsom salt when watering your tomato plant.
One tablespoon of Epsom salt is enough per one foot of plant height for the tomato plant height. Apply the salt in one of the plants in one week and another half the following week. It would work more efficiently and your plant can absorb all the micronutrients easily.
Your tomatoes would be incredibly delicious at harvest and benefit even the neighbor plants with the process. You would be rewarded with more delicious tomatoes.
Applying Epsom salt through Foliar spray or direct watering results in rapid absorption of micronutrients, making your plant more efficient to produce fresh, juicy and extremely delicious tomatoes at harvest time.
But always remember to apply only the right amount of Epsom salt to your plants to avoid any toxicity and harmful consequences.
3. Improve nutrient uptake
Nutrients and micronutrients play a vital role in tomato plants’ growth, health and yield. If they are not present in balanced quantities, they can endanger your plant’s life.
Essential micronutrients for tomatoes are nitrogen, potassium and phosphorus.
And essential macronutrients are Magnesium, calcium, sulfur and zinc.
I have listed the basic requirements of macros important for your tomato plants:
Nitrogen: The leaves of plants are totally dependent on the nitrogen component. High amounts of nitrogen can lead to bushy plants, which reduces fruit production or even leads to zero fruits on the plants.
Phosphorus: Promotes the growth and development of both roots and fruits both. Plants need it at the primary stage of growth and also at the fruiting stage.
Potassium: It is needed for the plant’s speedy growth and helps to set fruits and flowers on the plants. It promotes the process of photosynthesis by enhancing the level of chlorophyll and makes the plant disease resilient.
Tomato plants require a very small amount of Micronutrients, namely, Magnesium and sulfur. Still, you can never ignore these two micronutrients, as their scarcity can completely stress your tomato plants.
Due to the deficiency of these two micronutrients, the plant would become inefficient in absorbing macronutrients needed for leaf growth, a strong root system and fruit production.
Epsom salt helps to activate enzymes in plants involved in the uptake of important nutrients. Additionally, it contains sulfur which forms amino acids in the plants, building blocks of protein needed in chlorophyll production, and a green pigment in plants which is necessary to complete the photosynthesis process.
You can balance the deficiency of micronutrients in the soil with Epsom salt. It helps the plant uptake essential nutrients and makes your tomato plants healthier.
It is better to directly apply the Epsom salt in the soil when planting the tomatoes in your garden through foliar spray or at the time of watering.
You can only improve your plant’s nutrient uptake if it is going through Magnesium or sulfur deficiency. In such a situation, applying Epsom salt can work like a miracle.
4. Improve growth
Growing healthy, vigorous and flavorful tomatoes in a very short span of time is a wish of all tomato cultivators. They are ready to do whatever to speed up growing healthy and delicious tomatoes. But does adding Epsom salt can help improve the growth of tomato plants?
If micro and macronutrients are properly balanced, your tomatoes can thrive. Excess or less nutrition in the soil can cause many issues when growing tomatoes; the same rule goes for Magnesium.
The photosynthesis process of the plant is also interrupted. As a result, your plants grow dwarf; leaves turn yellow and fewer fruits are produced on the plants.
Magnesium also strengthens the plant’s cell wall, making them stress and disease-resilient; thus, the overall health and growth of the already healthy plant growth, are promoted.
When you use Epsom salt as a foliar spray or at the time of watering, it enhances the growth of the plants. But always remember to use it in moderation to avoid magnesium toxicity which can eventually stress your plant.
Epsom salt can be a useful supplement for your tomato plant. Adding it to your plant can fulfil the deficiency of Magnesium in your plant and help it thrive.
The caveat
There is a caveat key to successfully using Epsom salt on your tomato plants to avail the four benefits mentioned above. If your plant is going through a deficiency of Magnesium and sometimes sulfur, applying epsom salt can fulfill the deficiency of these two micronutrients.
Excessive use of epsom salt or when your plant is not deficient in Magnesium or sulfur can result in toxicity and be damn harmful to your tomato plants.
According to the study, excessive levels of Magnesium in the soil can stress the root system of plants. It results in an imbalance of micronutrients and causes environmental pollution to spread.
Thus, a soil test before applying epsom salt is best recommended. If you are unsure about magnesium deficiency and cannot even opt for a soil test. In that case, using general fertilizer rather than resolving the issue with epsom salt is much safer.
What Can’t Epsom Salt Do For Tomato Plants?
1. Prevent Blossom End Rot
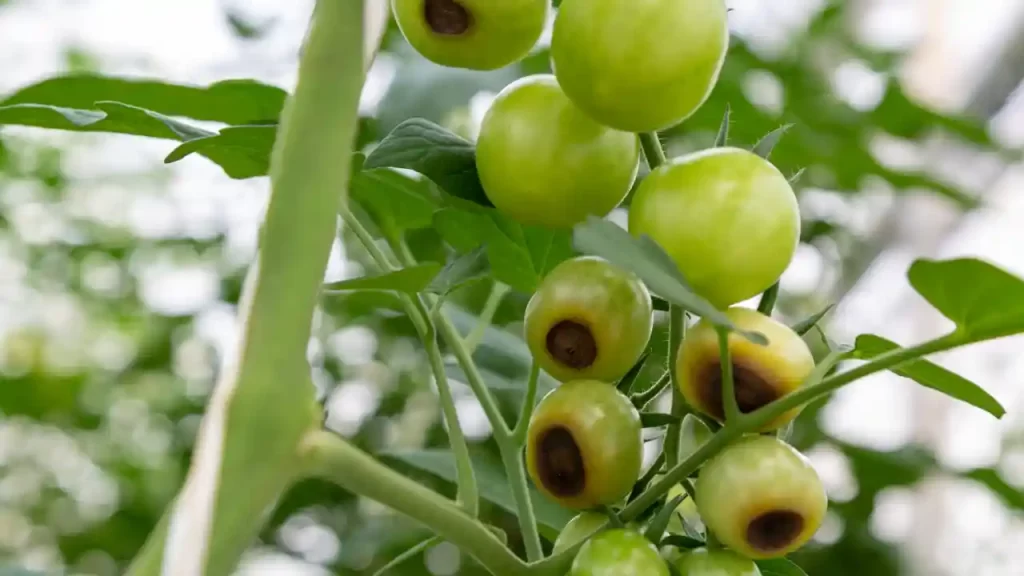
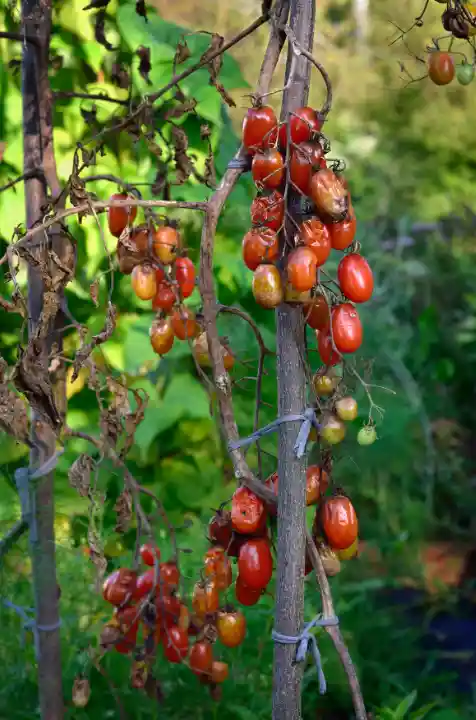
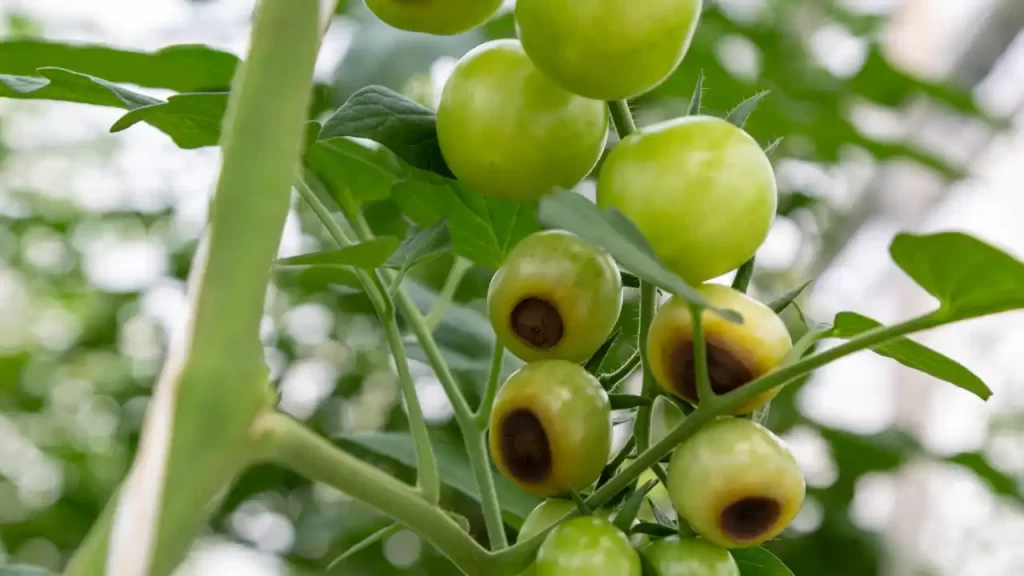
When you notice that your tomatoes are turning brown and rotting from the bottom, that means they are going through bottom-end rot.
When roots become inefficient in delivering calcium to the plant, the plant faces micronutrient deficiency. You might be disturbed seeing your efforts going in the vein as bottom-end rot destroys your tomatoes.
The reasons for calcium deficiency are:
Inconsistent or less supply of water to the plant.
Scarcity of calcium in the plants.
Soil pH imbalance.
Improper amount of nutrients in the soil.
So you must have noticed that blossom end rot has nothing to do with magnesium deficiency.
You might have a bad watering habit and cannot resolve this problem by adding Magnesium to the soil.
The Lack of Calcium content can also not be resolved with epsom salt as it does not contain calcium.
You can also balance the pH of the soil in some other ways. If you add a very large quantity of epsom salt to soil, then you can balance only its pH, but at the same time, it can create other problems which require a lot of effort to fix.
Adding epsom salt can be hazardous and even worsen the situation. Please note, using epsom salts, salt fulfills magnesium deficiency. Your plant can experience more blossom-end rot situations.
More absorption of Magnesium can result even less calcium absorption, in the competition of absorption of other micronutrients like calcium. So less amount of calcium is delivered to the plant, and blossom end rot occurs.
Thus, adding epsom salt to the plant when they go through blossom end rot can worsen the situation. So it is better to correct your watering techniques and consistently water them in adequate amounts, pluck the already affected fruits, and watch the result. Yet if the problem is not resolved, test your soil for calcium deficiency and pH balance.
It’s better not to add epsom salt when your plant has a blossom end rot problem.
2. Deter pests
Many remedies are available online to deter pests, and each one is promised to work 100% effectively. Some of the remedies might work, and some are just myths, and using epsom salt to deter pests is also one of the myths.
No scientific evidence supports the effectiveness of epsom salt in deterring hornworms, flies and other tomato pests. It is also not effective to treat any tomato diseases. It is better to opt for any method which is scientifically proven to be effective.
3. Aid tomato seed germination
Tomato seed is a unique thing in itself. It has almost all the nutrients in it required to germinate. Thus it is irrelevant to use any extra micronutrients. So adding Magnesium through adding epsom salt is also a waste of time.
But adding epsom salt to the soil can help to treat the magnesium deficiency while transplanting a seedling.
But when your seed is at the germination stage, it requires no extra nutrients from outside. The addition of epsom salt during the germination process can even harm your tomato plants.
4. Feed plants adequately
Epsom salt contains Magnesium and sulfur and fulfills the deficiency of these two micronutrients in tomato plants. But it cannot serve the purpose of complete tomato fertilizer.
In tomato plants, Magnesium is needed in a very small amount as it is a micronutrient. The plant requires fertilizers for a balanced supply of many other nutrients needed for its growth, thriving and production of fruits.
Thus, it is better to use general fertilizer, which can meet the needs of many other nutrients in your tomato plants and help promote the overall growth of the plant.
Only when your plant needs Magnesium, and sulfur application of epsom salt is worth it.
Summary
I have clearly explained all the claims made, which are true and which are not. Your tomato plant can only benefit from using epsom salt when it has magnesium and sulfur deficiencies.
It is best to do a soil test to check the level of these two micronutrients in your soil. Otherwise, excessive Magnesium can result in toxicity, and your plant can face many unsolvable complications. Excessive use can stress the root system of tomato plant and causes an imbalance of micronutrient absorption.
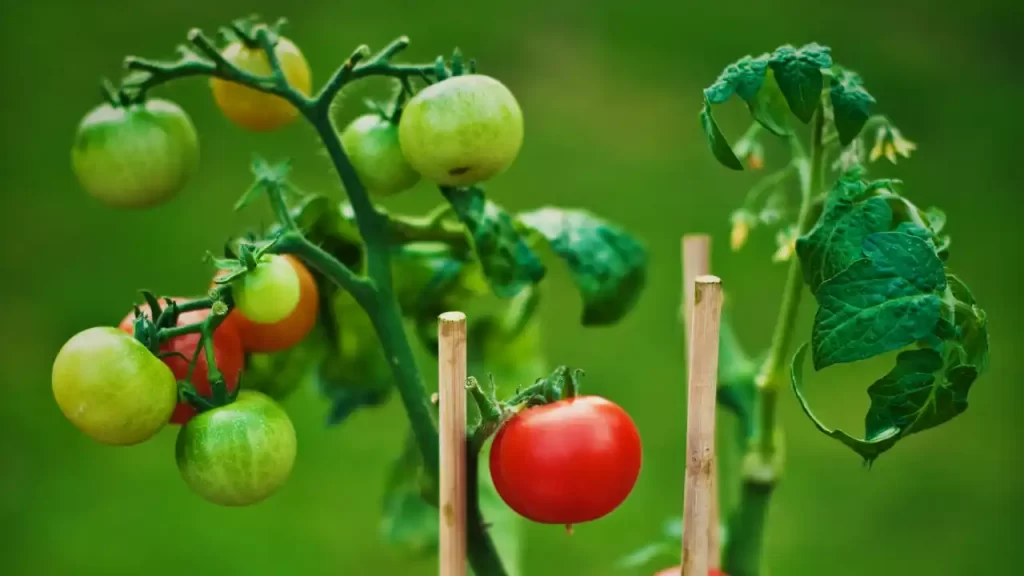
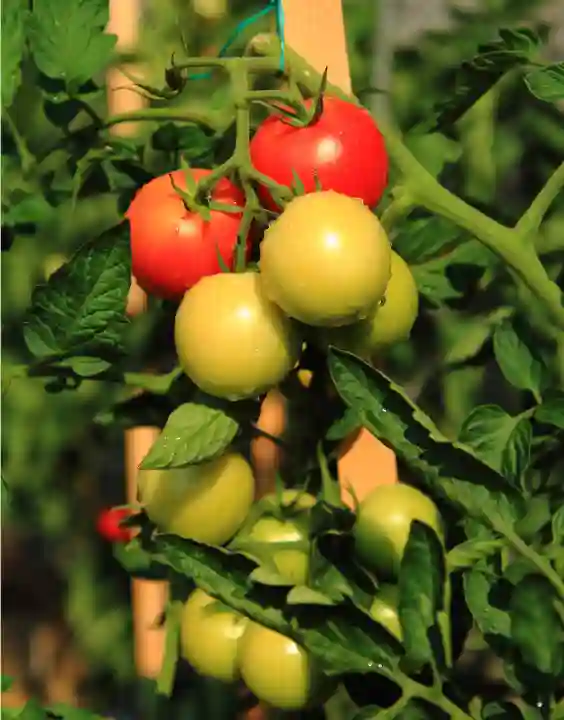
Are you planning to grow your tomatoes on your own? Then it is one of the best choices as tomatoes purchased from stores doesn’t seem to be so delicious and full of flavors.
Nature has given us a wide variety of tomatoes with different shapes, sizes, colors, and flavors. You can opt to grow beefsteak tomatoes or cherry tomatoes, according to your choice, and enjoy them.
Short answer: It is easy to grow tomatoes for tomato growers if they keep a few points noted before planting tomatoes:
Choose a sunny location.
Deeply dig the soil while transplanting (it enables your plants to develop a strong root system).
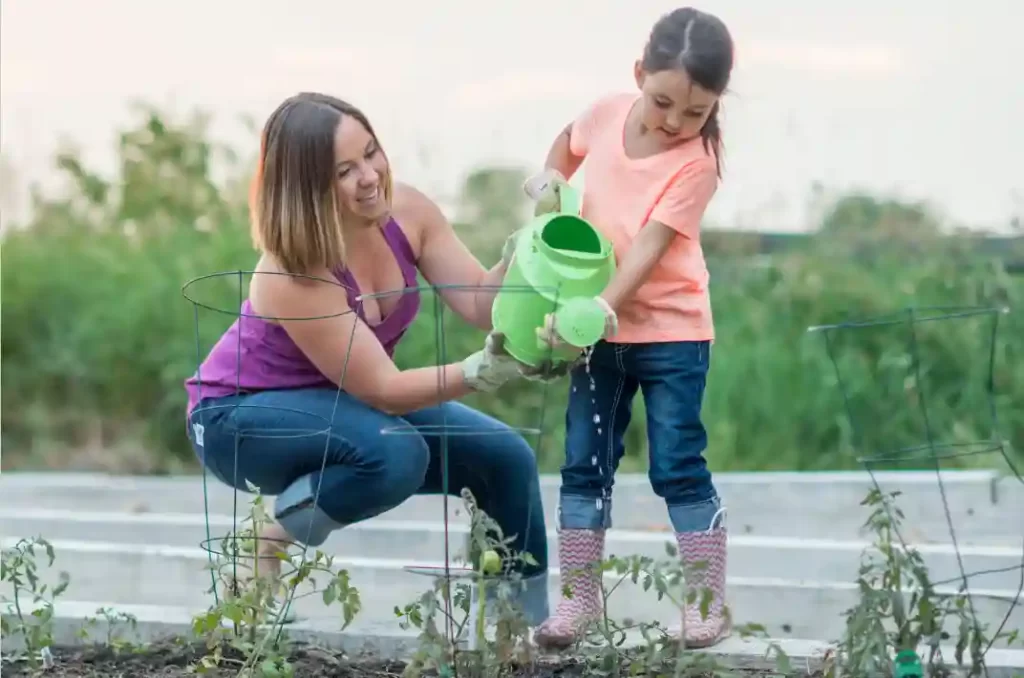
Add fertilizers and water in required amounts and support your plant with the help of stakes or cages.
I have briefly explained the ways of planting and growing tomatoes in this article.
But you can initiate the germination process of tomato seeds indoors 4-6 weeks before the end of frost. After the danger of frost has passed, you can bring your plant to the outer environment. You need to be extra cautious about spacing.
For a determinate variety of plants, at least 24 inches of distance is mandatory, whereas 36-48 inches are important for indeterminate plants.
Indeterminate plants continue to grow till frost begins. Rows distance must be at least 36 inches.
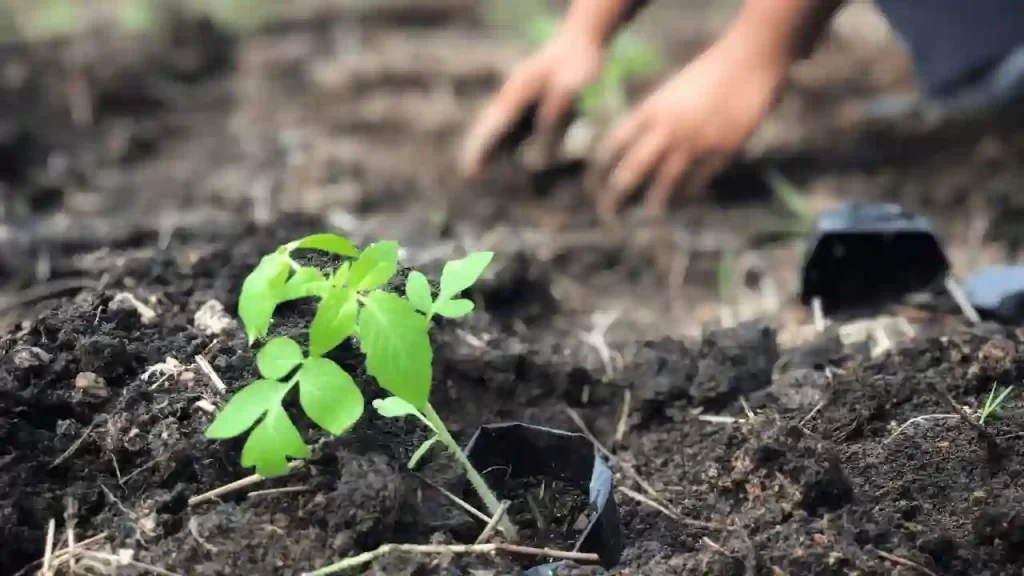
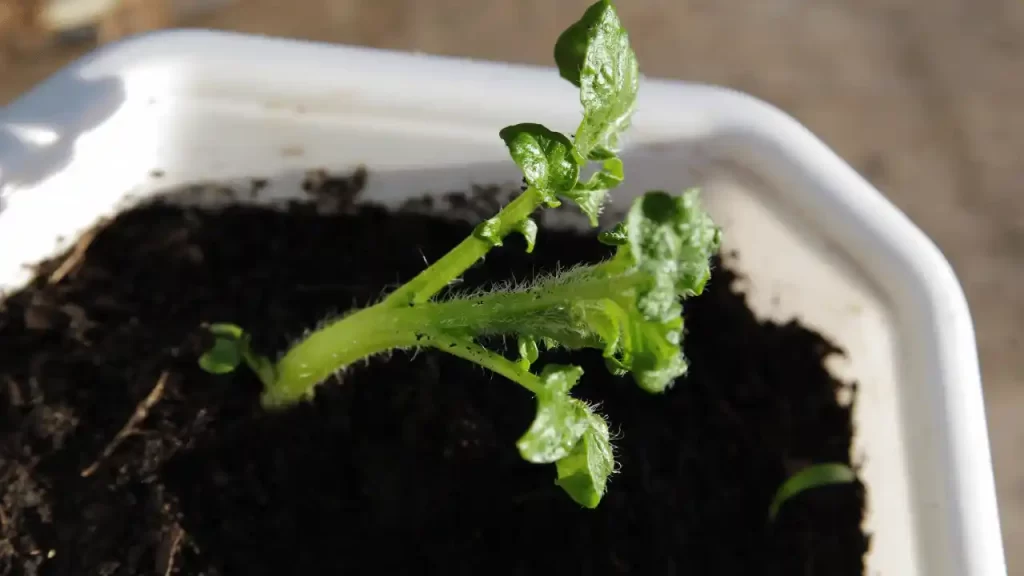
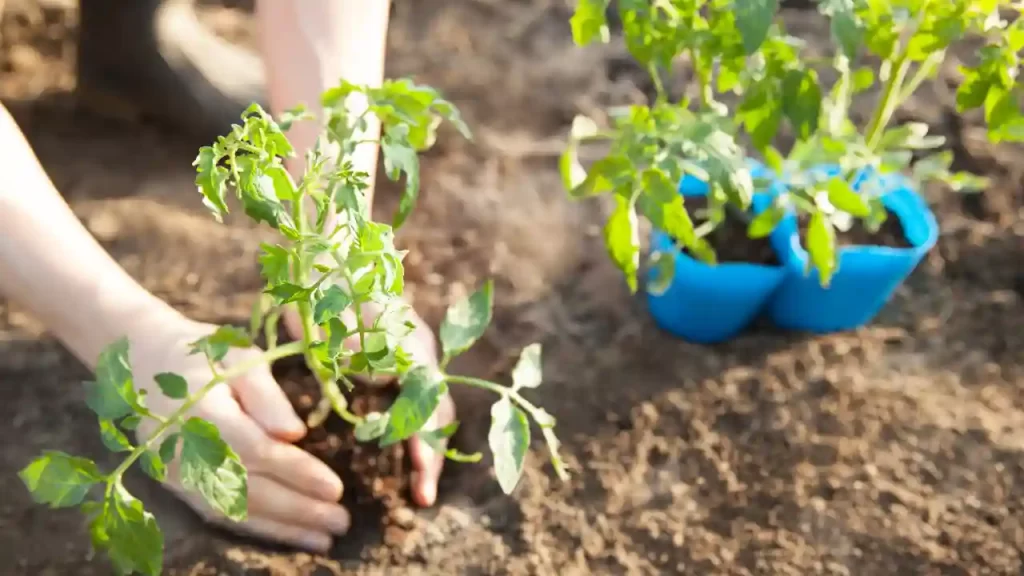
Dig Deep
Deep digging of tomato seedlings is quite important to develop a good plant root system.
Remove the lower leaves of the tomato seedlings and place the root balls in the hole so that only the upper leaves of the seedlings remain above the ground.
It helps the plant generate extra roots and prevent them from growing leggy, and the roots become more efficient to uptake water and nutrients.
Add Fertilizer and Water
It’s best to do soil tests and verify if any fertilizers are deficient; if such deficiency is traced, add some general slow-release fertilizer to the planting holes.
After this process, water them properly.
Support Your Tomato Vine Plant
Supporting your tomato plants while the growing stage helps them prevent breakage, maintain good air circulation, and maximize space.
It also prevents the plant’s leaves and fruits from touching the ground, which in turn results in preventing blossom end rot and makes your plant less prone to any diseases.
So you must support your tomato plant, especially the vine variety, just after planting them. You can use a stake, trellis, and cage to support them.
This step is unnecessary while growing a determinate variety of tomato plants as they only grow short.
This is how you should support your young tomato plants:
Choose 5-6 feet tall tomato cages to support your plant. Place the cage around each tomato plant to prevent uprooting during a storm. Or you can also use stakes to support your tomato plants.
Use a tall stake to support the plant until it is fully grown.
Place an 8-foot stake into the ground, and keep 12 inches away from the ground and 4 inches away from the growing plant.
Use a soft cloth or twine to tie the stake to the twin.
Ensure that the stems are not damaged at all.
Regularly check your plant to ensure that ties are not too tight and not cutting the stem of the plants.
How To Successfully Grow Tomatoes?
Most gardeners are well aware of how to grow tomatoes, but growing quality tomatoes with more flavor, tasty and juicy is not a cup of tea.
I have discussed this process step by step to meet the requirement of growing extraordinary tomatoes.
Choose the Right Variety
Nature has blessed us with various tomatoes, enabling us to get tomatoes in different shapes, sizes, and colors. Some choose the variety according to the climatic conditions in their area.
Some of the varieties are more heat or cold-tolerant. You can seek the varieties suitable in your area from a local gardener or USDA National institute of food and Agriculture. Tomatoes are mainly categorized as Determinate and Indeterminate varieties.
Determinate tomatoes variety are also referred to as bush tomatoes. They grow up to 3-4 inches tall and produce fruit only once during a growing season. They are also compact plants and die after making fruit for once. Thus it would be a great choice for container tomatoes.
Indeterminate tomatoes grow till the beginning of the frost. They can produce more delicious tomatoes and produce fruit till they are alive. Beefsteak, big boy, Brandywine, Sungold, and heirlooms only fall into this category.
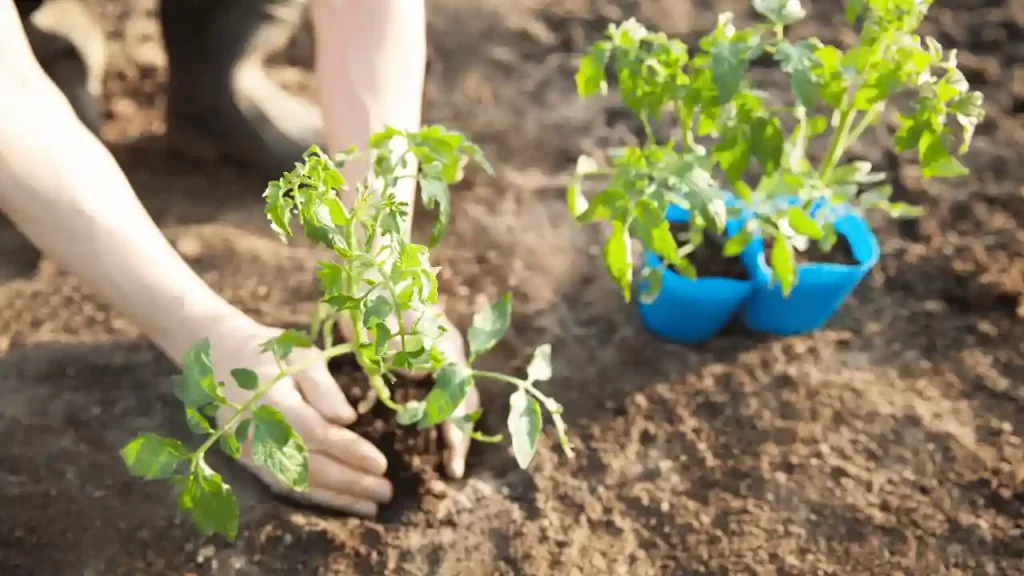
Planting Tomato Plants
Choose a sunny area and plant your tomato seeds to ¼ inches deep and 1 inch apart in flats.
When your seedlings generate their true leaves, take a plastic cup and insert its stems deeper than before.
This helps your tomato plant to develop a strong root system. Ensure to help your transplants purchased from the nursery develop a strong root system.
Before you bring your tomato transplant into the outer environment and put them in the ground:
Let the frost completely end, and the temperature becomes stable.
Find an area in your garden where your plant can get full exposure to sunlight. You should plant tomatoes in well-draining garden soil or potting soil.
Dig a planting hole in the soil, which should be enough to cover the bottom part of tomato transplants.
Place the plant in such a manner that only leaves remain above the ground.
Backfill the soil with compost. This generates maximum roots in the stem, making your tomato plants more productive.
Now water them thoroughly to maintain good moisture in the soil.
Mulch your plant with straw, wood chips, barks, or leaves. It helps to retain moisture in the soil and also suppresses weeds. Keep an eye on pests and diseases, if any, and take necessary actions accordingly.
Place Mulch Around Tomato Plant
Mulching of tomato plants helps retain soil moisture, weed suppression, regulate soil temperature, improve soil quality, and control pests and diseases.
Organic mulch your tomato plants with 3-4 inches-thick layers of leaves, grass clippings, straw, or bark chips can improve the plant’s health and growth.
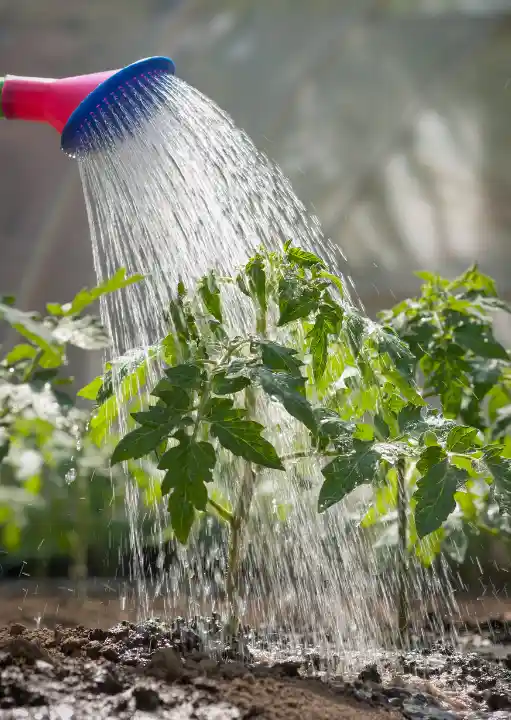
Water The Plants Regularly
The health and growth of your tomato plant mostly depend on your watering habit. Watering your plant one inch per week makes them healthy.
But always avoid overhead irrigation and direct water in the soil and base of the plant.
You need to water more often during an excessively hot climate to avoid wilting the plant.
Never let the leaves of your tomato plants wet; otherwise, it attracts insects and many other tomato diseases. You can use soaker hoses and drip irrigation to water your tomato plants.
Fertilizing
Fertilizers play a vital role in boosting your tomato plants’ growth and fruit production. After one month of planting, you can apply balanced liquid fertilizers like Nitrogen, potassium, and phosphorus (5:5:5) to your plant.
Then you can apply the 2nd dose of this fertilizer when your plant starts to set flowers and fruits. It encourages the plant to develop more quality fruits.
But always remember not to overuse fertilizers as they can stress your plant.
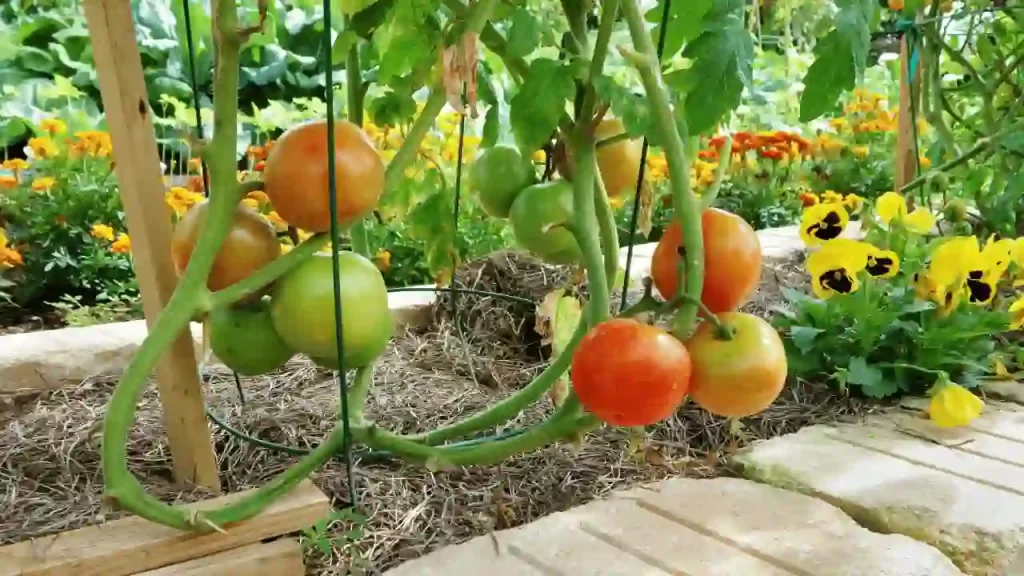
Stake Tomato Plants
You can use stakes or cages to support your tomato plants. Tie the stem of tomato plants with it. This prevents your plant from touching the ground, and the risk of pests and various diseases is also prevented.
Always ensure to check the ties if they are too tight and cut the stem of the plants.
Take a stake of about 5-7 feet. Dig the soil and insert this stake inside the ground up to 7 inches. You can also make your own cage with welded wires. They are easily available at any hardware store. The square you make should be enough to fit your hands.
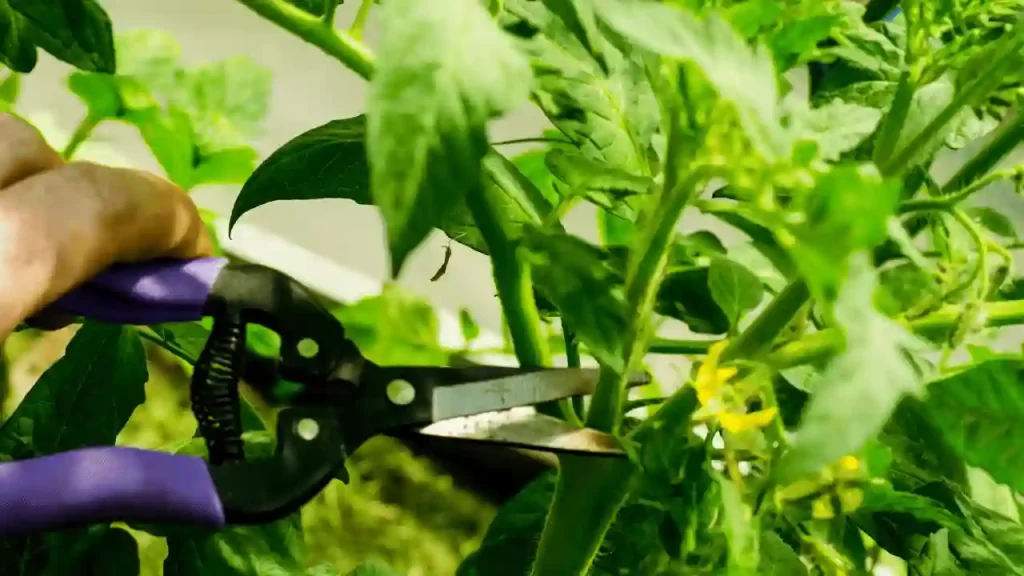
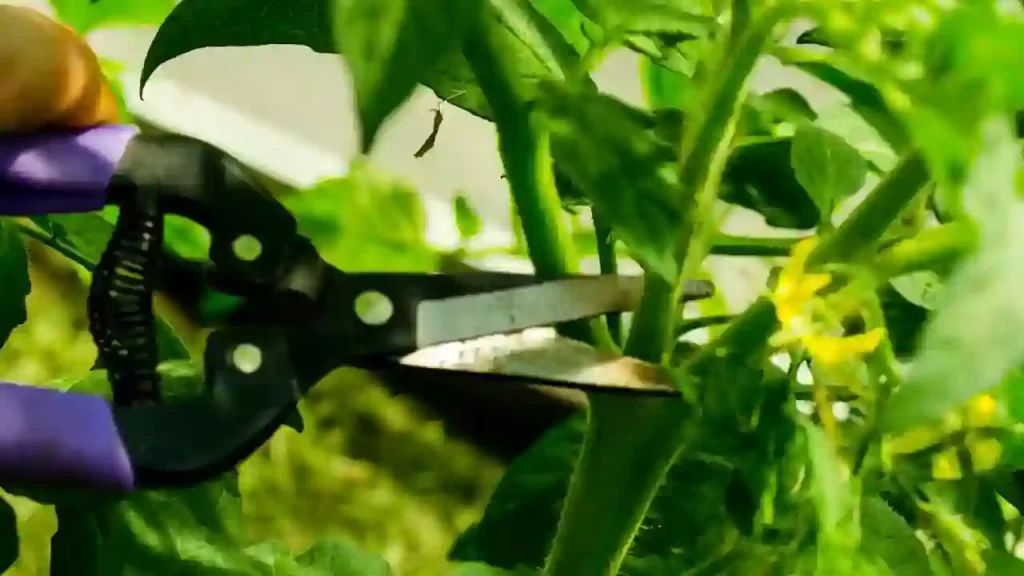
Prune Tomato Plants
Pruning is not essential for growing tomato plants, but it encourages plants to use their energy to produce fruits.
Suckers and shoots growing between the main stem and branch suck the energy of the plants.
So you can remove them to let your plant utilize its energy in the right place. Pruning helps to maintain good airflow in the plants.
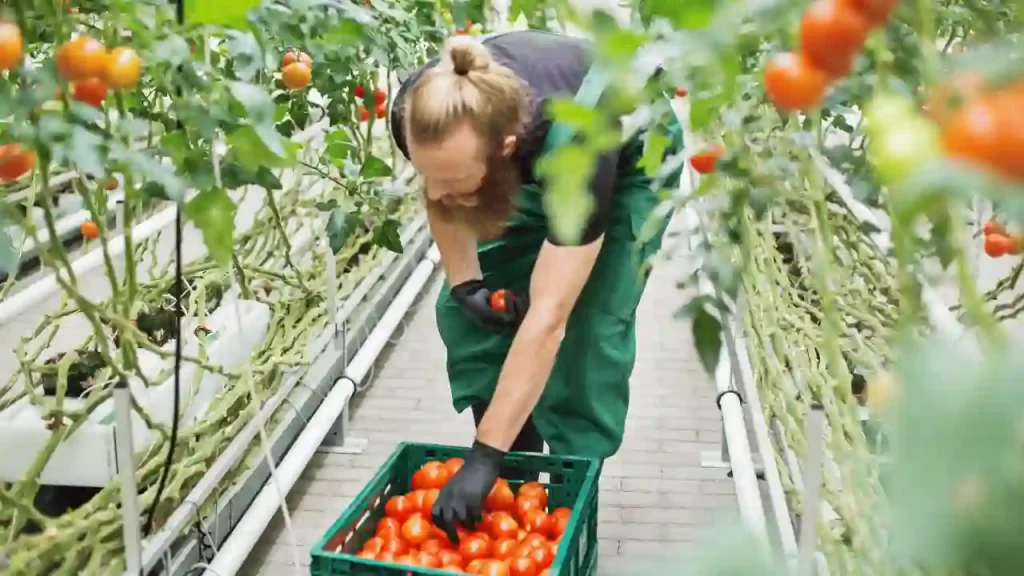
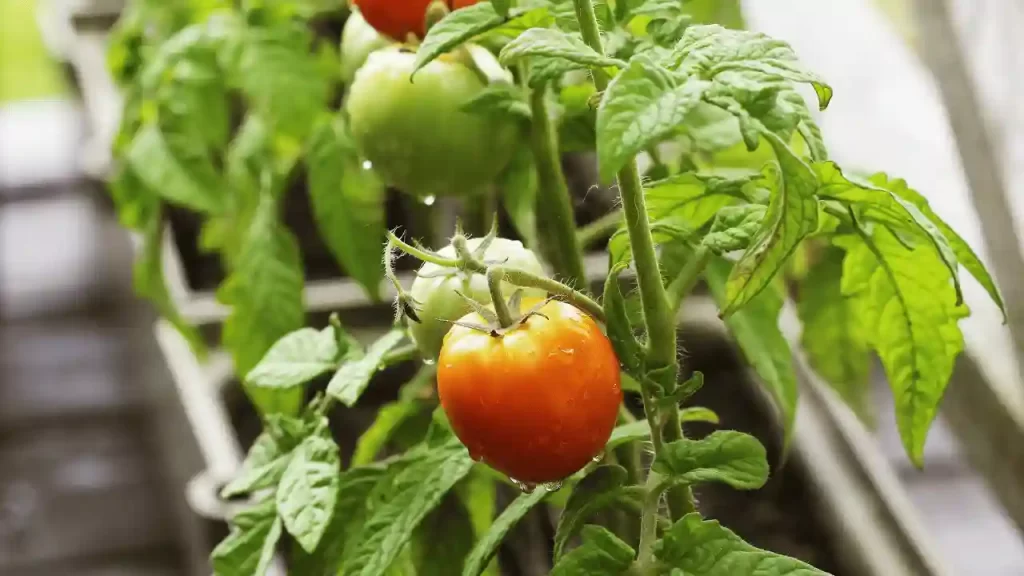
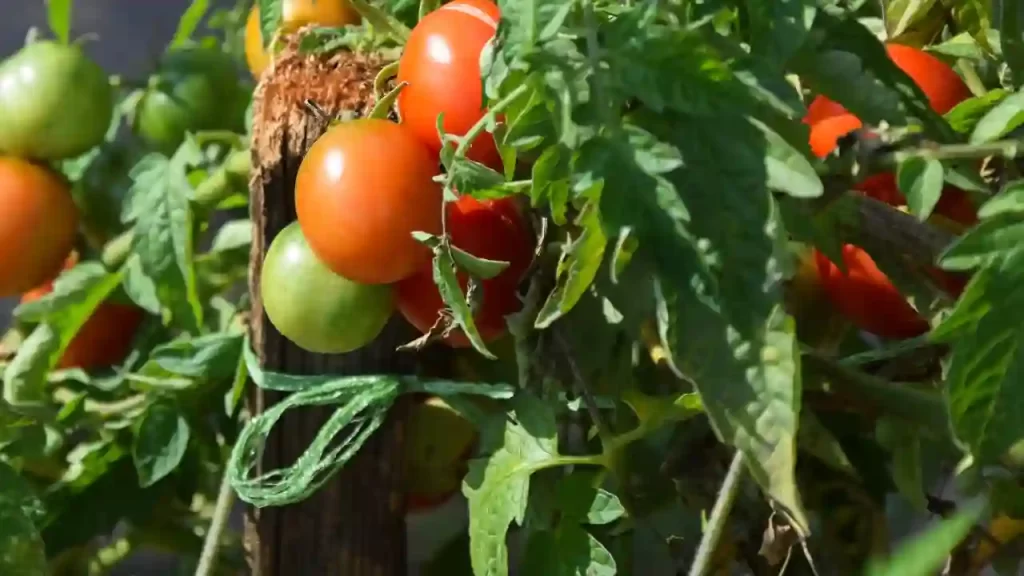
Harvest Your Tomatoes?
When you harvest your tomatoes at the right time, their flavor and taste are maintained. The tips below can help you properly take care of your harvested tomatoes.
Assess Your Crop
Before harvesting your tomatoes, you should know the right time and stage to harvest them. You can understand this with the texture of tomatoes.
If you find them fully colored and firm, then it is the right time to pluck them. The ideal temperature for ripening tomatoes is 75° Fahrenheit. But any temperature more than 90° Fahrenheit can harm your tomatoes.
As a result, they form a poor color and become extra soft.
If you want to pluck green tomatoes for any reason, you can store them and let them ripen indoors.
Protect Your Picks from Frost
Before the start of the imminent frost, try to harvest all your ripe or semi-ripe tomatoes. Keep them in the temperature range of 50-70 degrees Fahrenheit. Any temperature below 50 degrees Fahrenheit can lead to chilling injury to your tomatoes.
To complete the ripening process, you can put your green tomatoes in closed paper bags. You can also use them to make delicious recipes like tomato pickles or fried green tomatoes.
Examine your plucked tomatoes every week to ensure whether they are ripening. If you spot any rotten tomatoes, pick and dispose of them.
Also, you can take off the whole plant and place them somewhere in a warm location. It helps the fruits to ripen rapidly.
You can also keep your tomatoes near apples and bananas to speed up the ripening process as they generate ethylene gas which helps tomatoes ripen fast.
Store Tomatoes Properly
If tomatoes are stored properly, they can maintain their real taste, flavor, texture, and freshness.
You can store them at room temperature of 50-70 degrees Fahrenheit. Ideally, you can store them at room temperature only for a week.
You can also store them in your fridge, but their taste and flavor are definitely compromised.
Summary
Growing tomatoes might be easy, but growing incredibly tasty, juicy, and flavorful tomatoes requires much effort. If you choose the variety of tomatoes according to your area’s climate, mulch them properly, adopt good watering habits, and fertilize them only when your plants need them. Staking can give you quality and large numbers of tomatoes.
Limited pruning can also enhance the growth of your tomato plants.
If you follow all the steps in this article correctly, nothing can beat you to growing your special tomatoes.
Frequently Asked Questions
What is the best month to plant tomatoes?
The ideal time to plant tomatoes depends on your climate zone and the type of tomato you’re planting.
Generally, tomato plants should be planted outdoors in late spring or early summer when weather conditions are warm and settled.
In cooler climates, April or May may be the best month for planting tomatoes, while in warmer climates, such as the southern U.S., you can plant tomatoes as late as June or July.
Tomatoes are sensitive to cold temperatures, so wait for soil and air temperatures to warm up before planting them.
Should I pinch off tomato flowers?
Yes, it is important to pinch off tomato flowers to ensure that the plant has enough energy to produce a healthy crop of tomatoes.
Pinching off the flowers will prevent them from developing into fruit and redirect the plant’s energy toward growing more foliage and branching out. This will also help increase air circulation around the tomato plant and reduce the chances of disease.
Furthermore, pinching off the flowers will prevent overcrowding in the garden since too many tomatoes can lead to reduced quality and size.
Do tomatoes grow better in pots or in the ground?
Generally, tomatoes grown in pots have a better chance of being sheltered from extreme weather conditions and being easier to manage and water.
However, when planted directly into the ground, tomatoes have more access to nutrients and can grow larger. As a result, the best choice will depend on your growing conditions and preferences.
Planting tomatoes directly into the ground may be preferable if you have ample space in your garden or yard. This will allow them to spread their roots more and take better advantage of nutrients in the soil.
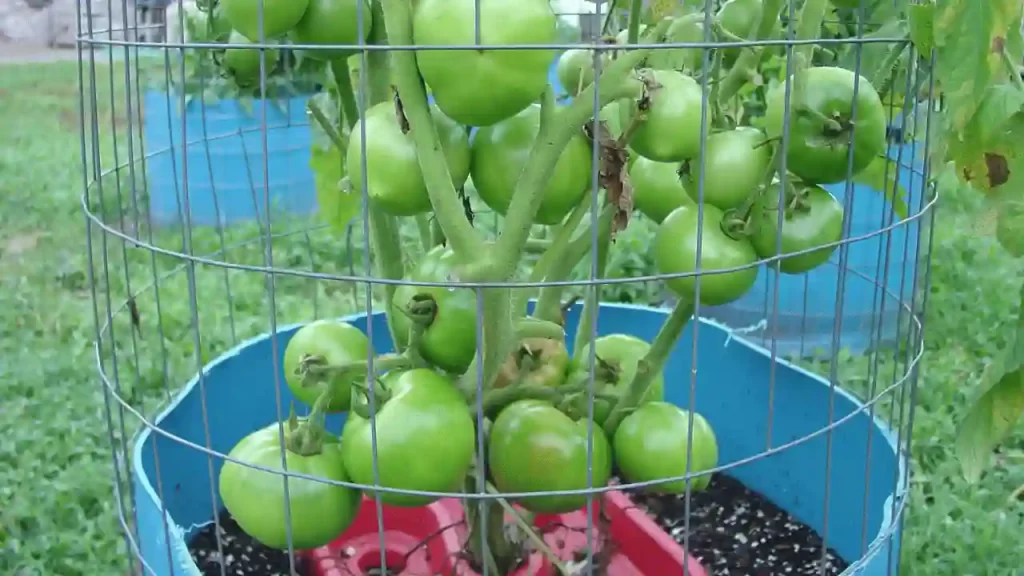
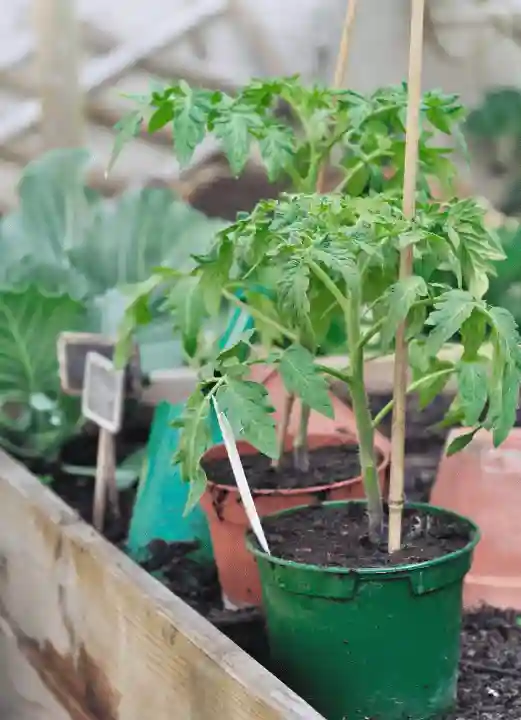
Don’t own a Garden and want to grow tomatoes? Don’t worry; it is possible to fulfill your dream of growing tomatoes. You can plant tomatoes even in pots, and yet you can have a high yield.
You just need to select a pot-friendly type of tomato plant, a good quality of potting mix, and good quality potting soil.
Benefits of growing tomatoes in pots
We have numerous benefits of growing tomato varieties and plants in pots. We can control things according to our ease needed in favor of tomato plants for healthy growth and high yield.
A few of the benefits of growing plants in pots are listed below:
Pruning of the plants becomes excessively simple if grown in pots. You don’t need to go far to maintain these necessary needs.
Temperature control is also possible. If it’s unfavorable climatic conditions outside, you can bring the pot inside and save your tomato plant from excessive heat, cold, or wind.
Your plant is escaped from outside animals. They won’t be able to eat or destroy your potted plants.
It becomes very easy to keep a close look at the tomato plant. It helps to determine if the plant is attracting any pest or developing the disease at the initial stage, and action can be taken instantly.
11 Tips for Growing Tomato Plants in Pots Successfully
When I want to successfully grow tomatoes in potted plants, firstly, I choose a place where my potted tomato plants can get 8-10 hours of direct exposure to sunlight.
Minimum 6 hours of direct sunlight is also good, but it grows more rapidly in maximum exposure to sunlight as tomato is a war-loving plant.
But if you have only shaded places, then you should go for the shade-tolerant varieties of cherry tomatoes, like Black Cherry, Evans Purple Pear, Golden Sweet, Juliet Hybrid (red), etc.
I have discussed a few tips and tricks to grow your potted tomato plants in limited space with a high-quality yield.
Choose the right type of tomato.
Tomato plants are of two types: Determinate and Indeterminate tomato plants.
Determinate tomato plants are shorter than the indeterminate tomato varieties of plants. Their maximum growth is 3-4 feet.
They are also called bushy, dwarf, and compact tomato plants. It also sets flowers and fruits in one go. Some examples of varieties are Cherry Falls, Italian Roma, Glacier, Rutgers, and celebrity.
But if you can arrange for a minimum of 20 Gallon Buckets and good support, you can also easily plant and grow indeterminate tomatoes or tomato plants.
Indeterminate tomato plants give you an immense harvest if they get an ideal growing environment.
Chocolate cherry, Green Zebra, and Black Krim are some of the indeterminate tomato plants which can be grown in pots or containers.
But it is always better to grow determinate plants only if you have time constraints like you have started late in the season to plant or have a short growing season.
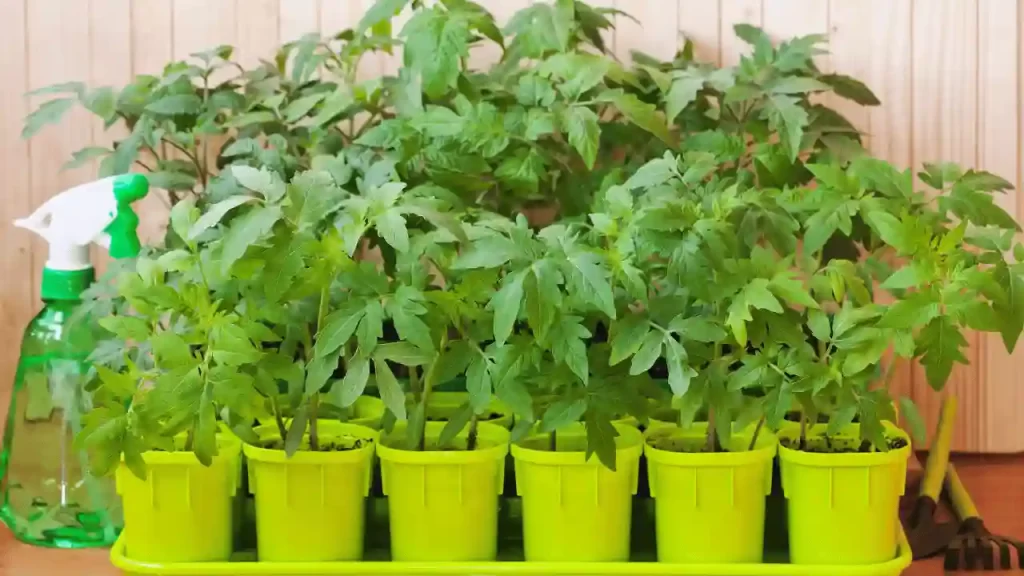
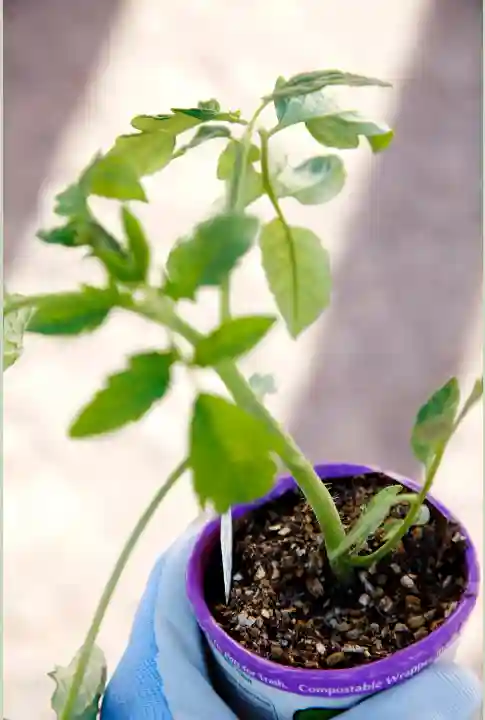
Start with a strong and healthy transplant.
Minimum obstacles are faced while transplanting a Strong and Healthy tomato plant. After germination, the tomato seedling should be repotted at least once (repotting the seedling three times is the best).
Hardening off your tomato plants before bringing them into the outer environment is essential.
The roots become stronger and larger with the repotting process. It also makes the root zone the plant transplant shock resistant less prone to disease and pests. It helps in the overall development of the tomato plant.
While purchasing transplanted tomato plants from the nursery, thoroughly check the plant. It should not have leggy and thin stems or yellow or curling leaves. It may be a sign of unhealthy tomato plants, which have rarely received any direct sunlight exposure, and there might be any disease in that plant.
The nursery transplanted tomato plant should have thick, strong stems with green and clear foliage.
Be bold about container size, and choose a fabric pot over a plastic pot.
The minimum container size for Determinate plants is 10 Gallons per tomato plant, and for indeterminate plants is 20 Gallons containers.
Tomato plants planted in Smaller sized containers may not be fully developed and can only produce fruit with less yield. Thus plantation of tomato plants should be done in bigger containers only.
Instead of choosing fancy plastic containers container gardening, opt for fabric pots. You can either plant in biodegradable or non-degradable containers. You can use this non-degradable container for your tomato plants.
Benefits of using fabric bags:
The roots in fabric pots are exposed to air, and root tips do not grow; rather, new roots are developed.
Fabric pots enhance the water drainage system and help the tomato plant’s roots to breathe properly, boosting the plant’s metabolic system. And plants become more efficient in producing a large number of quality fruits.
These fabric pots would naturally air prune the excess roots of the tomato plants. If the tomato plants are grown in plastic containers, the roots of the plant grow round and round in a twisting pattern and later get bounded.
On the other hand, black plastic pots and containers benefit cooler climates by providing warmth to the tomato plant’s roots and protecting them from temperature shocks. If containers are used in hot climates, shade them properly with the help of clothes or towels to protect the roots from excessive heating.
Use high-quality potting soil.
People often make mistakes while choosing the garden soil for the potted tomato plants. They bring the topsoil from the garden for their potted tomato plants.
But this soil, when used to grow tomatoes in pots, creates breathing issues for the plants, and the plants become more prone to fungus infection.
You can prepare your own soil mix with fresh compost, manure, and peat moss, or using potting soil can also enhance the growth and productivity of your tomato plant.
Putting potting soil or soil mix up to 3-4 inches in the bottom of the pot can enhance your tomato plant’s overall development and yield.
Feed your tomato plant well.
Tomato plants need plenty of nutrients for their growth and high yield. They are heavy feeders.
So mix some herbal fertilizer (read the label for quantity), bone meal, fish emulsion, and ground eggshell into the soil before planting. And later, put some 2-3 inches of potting soil on the top.
Bury the stem of the tomato plant.
Now it turns to get the clear stem of the tomato plant. Take off all the bottom leaves from the stem (you should remove around half of the stem leaves).
Now place the stem in the middle of the pot and fill the remaining pot with some extra soil mix till the last leaves in the stem. And settle the soil in the pot; you can put some extra soil in it if needed.
Water thoroughly and consistently.
Consistent watering plays a vital role in planting tomato plants. Water in such a way that it reaches thoroughly till the roots.
Do not add much water in one go. Take a pause and water again, repeat the process until the soil becomes moist. The soil might be drained soon, but the soil still needs extra water to moisten.
Both under or over-watering your tomato plants can be hazardous for the plant and lead to Blossom End Rot or and container tomatoes can also attract pests and diseases when stressed due to excessive heat and humid climate.
Avoid overhead irrigation and use soaker hoses while watering your tomato plants. This reduces the risk of over-watering your plants.
Always check the moisture level of the soil before watering your tomato plant. Dip your dry finger in the soil, if the finger comes out dry up to 3-4 inches, then it is the right time to water your tomato plant.
During summer or hot weather, you need to check the need to water your plant twice weekly.
Potted plants (especially those planted in smaller pots) need to be watered more frequently than bedded tomato plants. They need to be watered once per day. They need to be necessarily watered deeply as 90 percent of the fruit contains water only.
Protect young transplants from frost with “walls of water.”
The cultivation of tomatoes mostly gets impacted due to frost at night time. So it is best to bring your planted tomato plants outside when the temperature constantly exceeds 50’F.
But where you cannot predict the temperature or when you need to necessarily bring the plant outside, you can use Walls of Water to protect your plant from frost. It works best for me. I use it from spring end to the start of summer. It keeps the plant safe and protects it from frost.
Walls of Water activate your tomato plant up to 6 weeks of frost to get transplanted. They can easily make your tomato plant resistant up to 16 Degrees F. It is also useful for your delicate or baby tomato plants. It protects them from the wind and helps them to survive.
Walls of water is a long tube made up of good-quality plastics. You need to fill the tubes with water and place them so that it becomes a support for your tomato plant. Finally, it looks like a canvas. You can also check below video for better clarification.
They play their role as an affordable greenhouse for your tomato plants. They accumulate the heat from the sun and radiate at night, which helps to maintain a consistent temperature for your plants. You need to monitor the filled water as it may evaporate and refill it when needed.
You can remove the Walls of water when threats of frost are passed and later remove the water from the tubes and re-use them in the next season.
Add your support structure.
When the tomato plants grow longer, they need proper support or else they might be damaged.
Metal conic cage is enough to support your determinate tomato plants, but they are not pretty enough for indeterminate tomato plants as they grow longer than determinate plants.
You can check this cage and Ladder for your tomato plants. You can easily fold them, keep them when not in use, and use them next season. They look pretty and are strong and easy to use.
While securing your tomato plants with Walls of Water, you can first fasten the plant with a cage or ladder, whichever you prefer. They conveniently support your tomato plants.
Mulch the soil
Mulching is essential, especially for potted tomato plants, to suck the excessive moisture from the soil.
You can use wooden stakes, grass clippings, bark chips, or dry leaves on the top part of the soil. Do not overload the soil with mulches.
One layer of mulches lasts for one summer and is later shredded bark converted into compost at the season’s end.
Fertilize your tomatoes consistently throughout the season.
Though you have put enough material into the soil to boost its nutrients, it still needs extra fertilizer to enhance the nutrients in the soil just after six weeks.
High nitrogenous fertilizer would destroy the plant. So be specific about buying fertilizer that contains less nitrogen.
I recommend using this tomato fertilizer for better results. Read the instructions to use labeled on the packet of the fertilizer.
Summary
Growing tomato plants, even in pots, is an easy and interesting process. You can follow the above instructions, grow organic juicy and fresh tomatoes even in less space, and enjoy them. A little care for your tomato plant can increase the yield and maintain healthy growth.
Frequently Asked Questions
How deep do containers need to be for tomatoes?
The depth of a tomato container depends on the variety of tomato plants grown. Generally, dwarf and determinate varieties require an 8-10 inch deep container, while indeterminate and vining varieties need at least 12-16 inches of soil depth in their pot.
To make sure your tomatoes have adequate space to stretch their roots, use the largest container size possible for your variety.
Depending on the tomato variety, the pot’s diameter should be about 12-18 inches. Plants growing in containers need more consistent watering and fertilizing than those planted in a garden bed, as they have less soil to draw nutrients from and hold water.
What kind of pots do tomato plants need?
Plastic or terracotta/clay pots are great for tomatoes, as they retain moisture and heat better than metal or ceramic. Make sure the pot is at least 8 inches deep so that there is enough room for the roots to grow. Choose a pot with plenty of drainage holes in the bottom; if necessary, add more drainage holes.
Watering tomato plants can sound so easy, but what if I say it’s not so easy? Most gardeners make mistakes here only and wonder why their plants could be doing better.
Incorrect watering style leads to many complications and interrupts the plant’s growth, development and yield. Over or under-watering causes blossom end rot and wilting and also attracts diseases.
But the good news is that you can still make watering tomatoes easier by following a few tips.
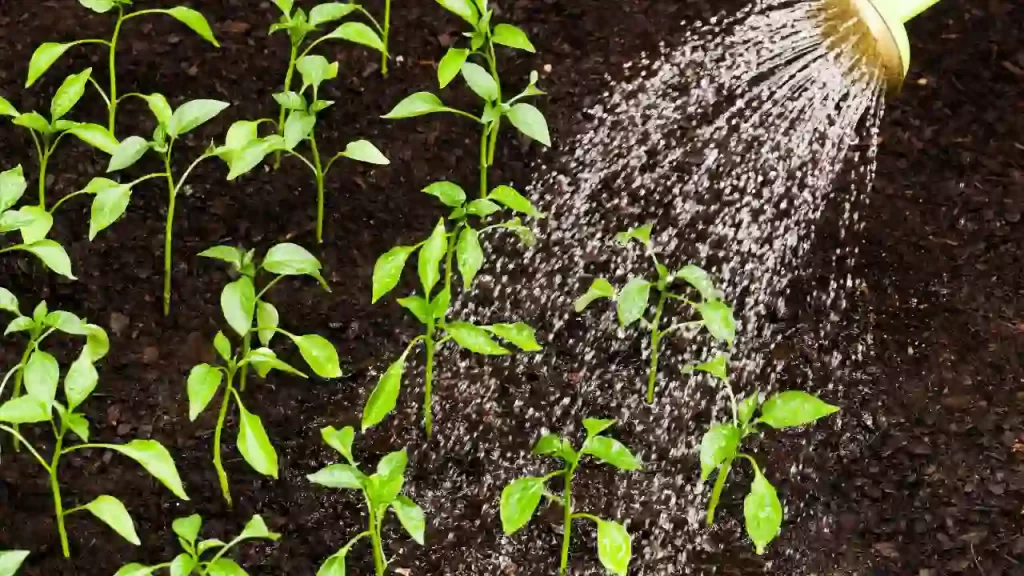
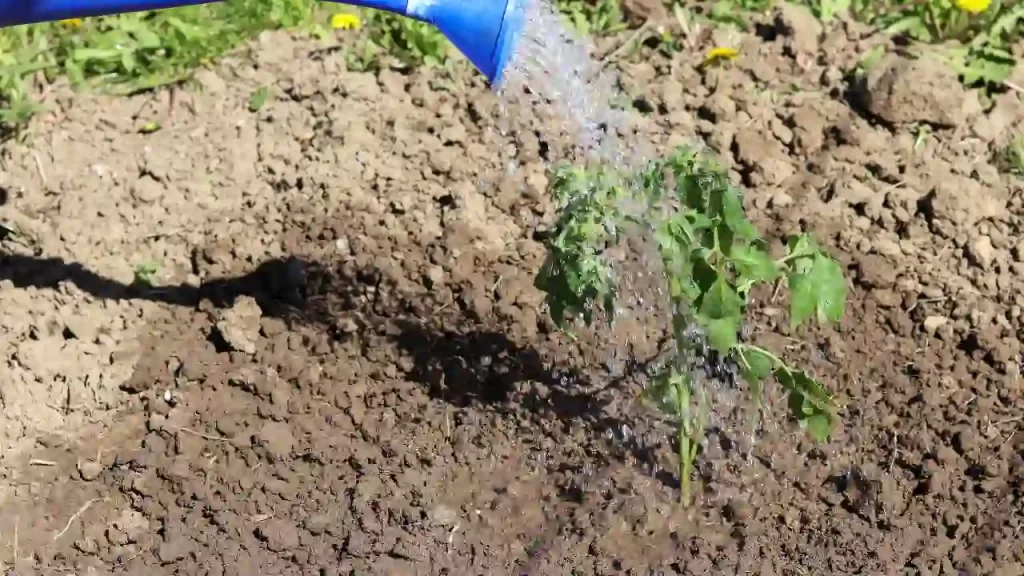
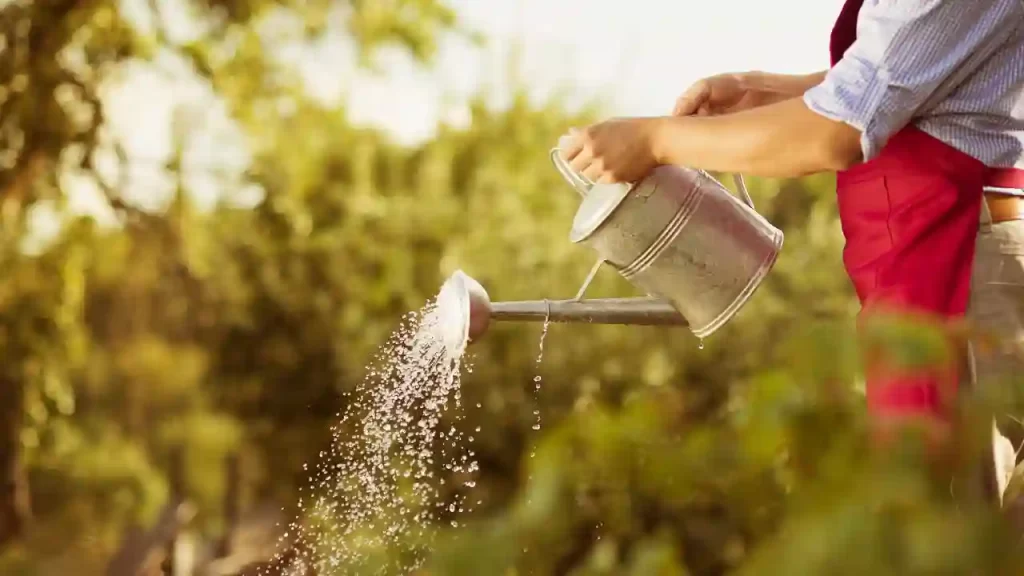
Water tomato plants early in the morning to ensure that the soil is sufficiently moist and ideal for growth. During the early stages of their growth, you should water them daily. As temperatures rise, it might be best to provide your tomatoes with twice-a-day watering sessions to make sure they are getting an adequate 1-2 inches of hydration per week.
Focus on watering in the base of plants, mulch your plants, and water slowly and deeply. Avoid overhead irrigation; instead, opt for drip irrigation.
Watering also depends on many factors like the size of the plants, planting stage and climatic conditions in your area.
Also, check the moisture content in the soil before watering.
I have briefly discussed these points in this article for better understanding.
Why is Correct Watering Important?
Watering plays a vital role in tomato plants growing and healthy development. It is obvious that any plant’s survival without watering is not at all possible.
But gardeners need to know the correct watering technique to maintain the plants’ long and healthy life. Or else an average gardener must face a bundle of issues associated with their tomato plants.
I have listed some problems that can arise if the watering habit is not up to the mark or the plants are over or under-watered.
Less capable of nutrient uptake.
Inefficiency for photosynthesis.
Short growth
Root decomposition
Less production of crops
Resistance to disease
Blossom End Rot
Cracking
Yellowing, curling and dropping of leaves
90% of tomato fruit is made up of water. Thus it can be clearly said good watering technique is a must for tomato plants.
The tomato plant requires the right amount of water to produce enough fruit. So the first step for starting tomato gardening is knowing and adopting the correct watering technique.
How To Water Tomato Plants?
You might think watering tomato plants is very simple, but watering is not enough. The method of watering is also important.
Thus, I recommend you understand the correct watering method because the health of tomatoes mostly depends on it.
Water slowly
A consistent water supply to your tomato plants is very important for their constant growth. Never make the mistake of flooding your plant at one go, and Never rush to water them.
Pouring a lot of water at one go and during a very short interval restricts your plant from absorbing it. And the water does not reach the roots too.
The tomatoes have deep roots, and when it is watered with too much water too quickly, there is a high chance that water won’t reach the roots properly.
When the plants are slowly watered, they have more time to absorb and soak in the soil. As a result, the roots can absorb water and nutrients properly.
You can install a drip irrigation system near your tomato plants, making watering easy. Installing this is worthy and easy.
Water deeply
Tomatoes have a deep root system. It is always beneficial to water them deeply so that the water reaches its maximum. As a result, a very strong root system is developed.
Deep and slow watering encourages the roots to absorb more water. Thus the roots become more efficient in delivering nutrients to the plants and also develop a deep root system to retain moisture. Thus plants become strong enough to exist during dry spells.
Water the soil as deep as 6 inches. You can also use drip irrigation to make your task easier. It supplies water consistently to the plants, and the soil gets easily penetrated into the soil.
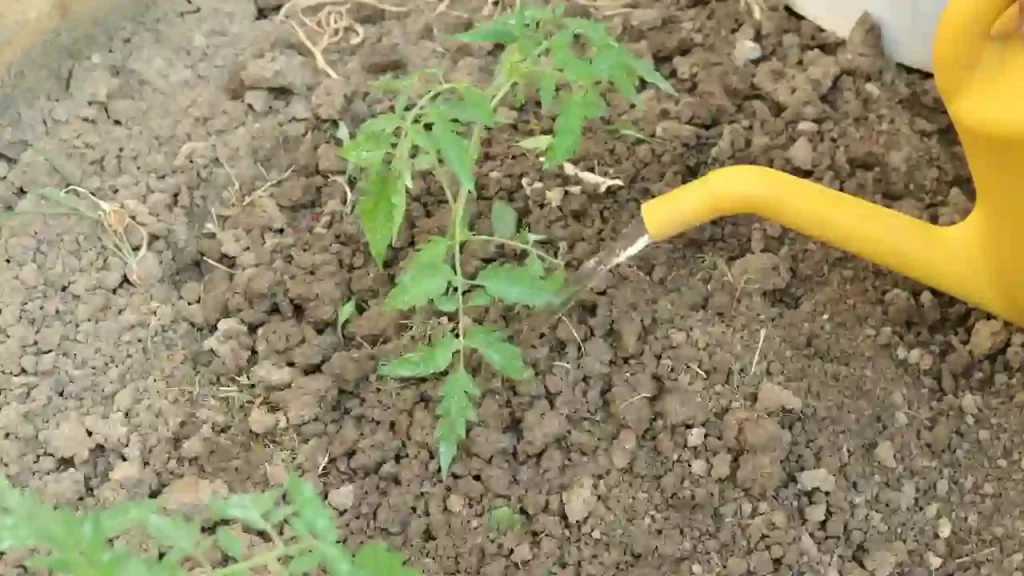
Water Tomatoes at the base
It is important to note that watering the soil is important, not the leaves. Overhead watering leaves the foliage wet, the soil retain moisture resulting in uneven watering in the soil.
The set water on the leaves eventually evaporates, and the purpose of watering is not met. When the water remains on the leaves for a longer period, it attracts many diseases, pests and infections, which can even destroy many plants.
So always water the base of the plants and not the leaves. Thus water can reach the roots and deliver to the required part of the plants.
You should also avoid direct watering on the stem. It can result in stem rot, and it can also wash away soil. So watering in the soil is important. Give a steady and deep supply of water to the tomato plants.
Mulch
Apart from a deep and steady water and maintaining consistent soil moisture supply in the base of the plants, you should also mulch your plants for better results.
Mulching can benefit your plants organic vegetable garden in many ways, but here the main role is to conserve water and maintain a good soil moisture level.
Create a layer of 2 inches of mulch on all sides of your tomato plants. It keeps the soil cool and reduces evaporation. Thus, water is preserved, and the need for frequent plant watering is also reduced.
You can create an organic mulch using dry leaves, hay, straw and grass clippings. Make a layer of mulch around the plant. Ensure to maintain a few inches of distance from the stems of the plants.
How Often To Water Tomato Plants?
Generally, people ask this question about how frequently you should plant tomatoes. I would say it cannot be answered very easily.
The schedule of watering the plants depends on various factors.
Tomato Plants Age and Size
At the initial stage, the young tomato seedlings require excess water to develop a strong root system. With the growth of plants, roots simultaneously go deep into the soil. And thus, the roots become less capable of handling more water if the soil is deeply soaked.
The plants which are bigger and have large root systems require water frequently as compared to the smaller plants. They absorb and deliver water to the plant very quickly.
Planting Time
At the stage of transplantation, the plant is transferred from the pots to the ground. In such a situation, potted tomato plants require plenty of water to grow stronger.
Outside Temperature
When the temperature is high, water your tomato plants more often as the water evaporates very quickly.
During summer or hot climate, always keep an eye on and inspect the soil regularly, once or twice per day, if they are dried out.
Fruit Stage
At the fruit-developing stage, tomato plants require more frequent watering. But you should reduce the water supply to the plant after the fruit is completely developed; otherwise, it can cause the skin of the fruits to split.
The flavor of the fruit is also enhanced if watered within the limit after the fruits are developed.
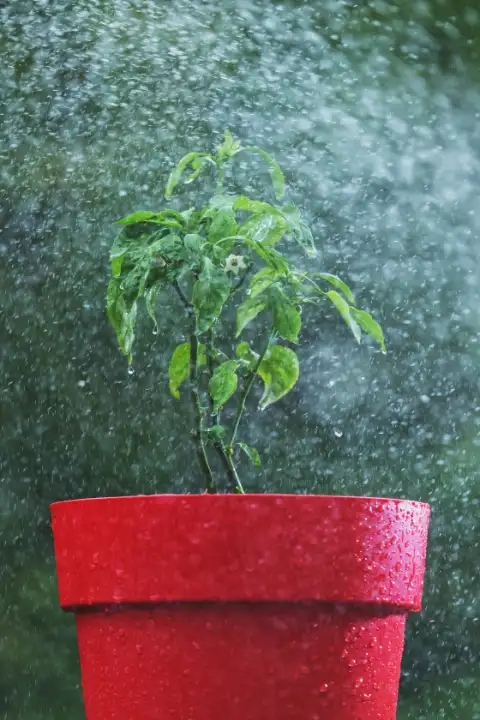
Rainfall
After your plant experiences heavy rain, stop watering as the soil already has enough water due to the rain.
If the rain continues for a longer period, the soil can become soggy and causes root rot. To maintain a consistent supply of water, work for the rain.
Containers
Container grown tomato plants need more frequent watering than bed plants because the soil in the containers dries out faster during hot weather.
You should keep the habit of checking the moisture level in the soil for watering. Do not establish any schedule to water the garden tomatoes containerized plants.
Deep your finger in the soil; if the 1-2 inches of the finger comes out dry, then you can water your plants. It reduces the risk of over or under-watering, and you can water your plants when they need it.
Morning time is considered the best time to water your plants. Watering your plants in the afternoon evaporates the water, and rarely any water reaches the roots of the plants.
And watering in the evening leads to fungal infections as the water on the leaves and stems does not get time to dry out.
How Much Water Do Tomato Plants Need?
No one can recommend exactly how much water do your tomato plants need. Generally, about an inch of water per square foot per week is good.
But the proper watering of your tomato plants depends on many factors. Some factors are climate, soil type, size of the plant, stage of fruits and rainfall. I have also discussed it above.
Due to all the factors, the amount of water varies. So setting any fixed amount of water for all the plants is not at all a good idea.
It is better to check the moisture content in the soil before watering and setting any fixed amount of water for your plants.
Keep watering your plant deeply and slowly and ensure not to leave the soil soggy to avoid any disease or fungal infection in your plants. The look of the soil also indicates when and how much water it needs.
Initially, you may face problems while watering your tomato plants, but at times you can develop the ability to understand when and how much water your plant requires.
What Problems Do Improper Watering of Tomato Plants Cause?
Improper watering of your tomato plants can result in many complications. I have listed the main problems below:
Dwarf growth and slow development
Blossom End Rot
Low yield
More prone to diseases, pests and infections
Weak root system
Bad fruit quality
Tomato Watering Tips
I have listed a few simple tips with the help of which watering your tomato plants can become a piece of cake for you.
Water in the base of the plant rather than watering the leaves, or your plants can become more prone to diseases.
Slowly and deeply watering helps to penetrate the water in the soil properly.
Morning is the best time to water the plants. It can keep the soil moist and helps the plants avoid various diseases and fungal infections.
Potted or contained plants should be checked frequently as the soil dries out quickly compared to bedded plants.
Give consistent water supply to the plants. Inconsistent watering can result in Blossom End Rot and cracking of tomatoes.
1-2 inches of watering per week is recommended, but it can vary depending on the climate in your area.
Apply some organic liquid fertilizers occasionally for flavourful, juicy and delicious tomatoes.
Summary
Watering tomato plants is like an art. You need to understand your plant, the climate, stage of fruits and develop a habit of watering them. Always check the moisture in the soil before watering your tomato plants. If the soil is soggy, avoid watering.
Do not water on the leaves and stem; rather, focus on watering the base of the plant. If you keep all these small silly things noted and followed, your tomato plants can do better, and your plants will reward you with juicy, plumpy and flavorful tomatoes.
Frequently Asked Questions
What are the signs of over-watering tomato plants?
Signs of overwatering tomato plants include wilting, yellowing, and dropping of leaves; stunted growth; brown spots on the leaves, stems, and fruit; root rot; and distorted or cracked tomatoes.
Additionally, if the soil feels wet when touched, it may be a sign that your tomato plants are being overwatered.
Can tomato plants be overwatered?
No, You can’t overwater tomato plants. When a tomato plant is overwatered, it can cause the leaves to turn yellow, wilt, and eventually die.
Overwatering also causes root rot, preventing the plant from absorbing water and nutrients.
If overwatering continues for an extended period of time, it can lead to fungal diseases and even plant death.
Therefore, it is important to be aware of the water needs of your tomato plants and provide them with just enough water without overdoing it.
Should you water your tomato plants every night?
Tomato plants should be watered deeply and infrequently—about once a week for most climates. If the temperature is very hot or dry for a while, you may need to water it more frequently.
During scorching and dry weather, you may need to water your tomatoes every other day or even daily.
Monitor the soil moisture levels around the roots of your plants, and if it starts getting dry, give them a good soaking.
Avoid watering every night, as this can lead to root rot. Instead, give your tomato plants a deep soak when they need it.
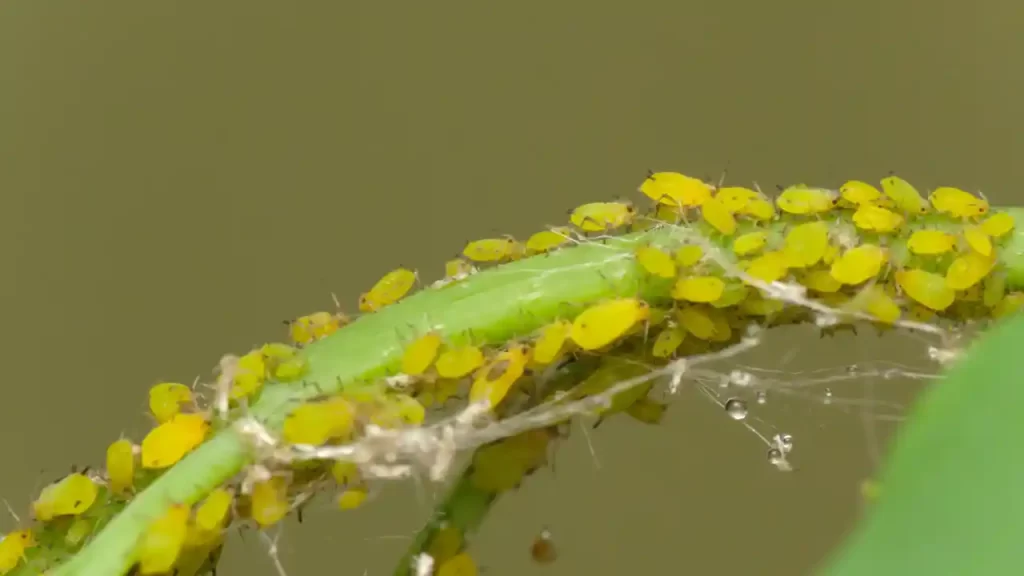
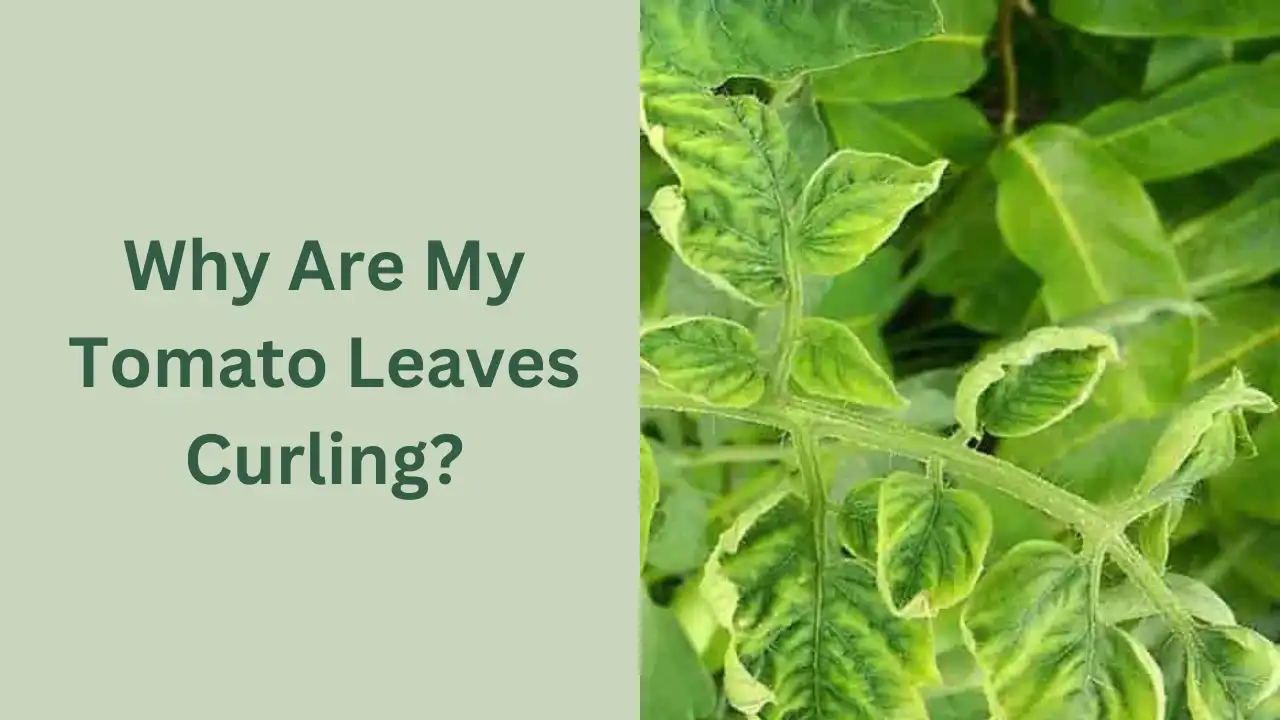
Aphids are the most annoying tomato pests, which are tiny in size, have soft bodies, and are pear-shaped. They are very commonly spotted in organic gardens, and mostly green color aphids are spotted. They can infect almost all sorts of plants and cannot be easily removed from the garden.
Stunted growth, curly or yellow leaves, and a large number of ants in your plant are the common symptoms of aphids in your garden. They can be organically controlled by hand-picking methods, natural repellent spray, and soapy water spray and can be prevented by companion planting, attracting natural predators and birds.
I briefly elaborated all the points in this article to better understand aphids and their controlling and preventing measures.
What are Aphids?
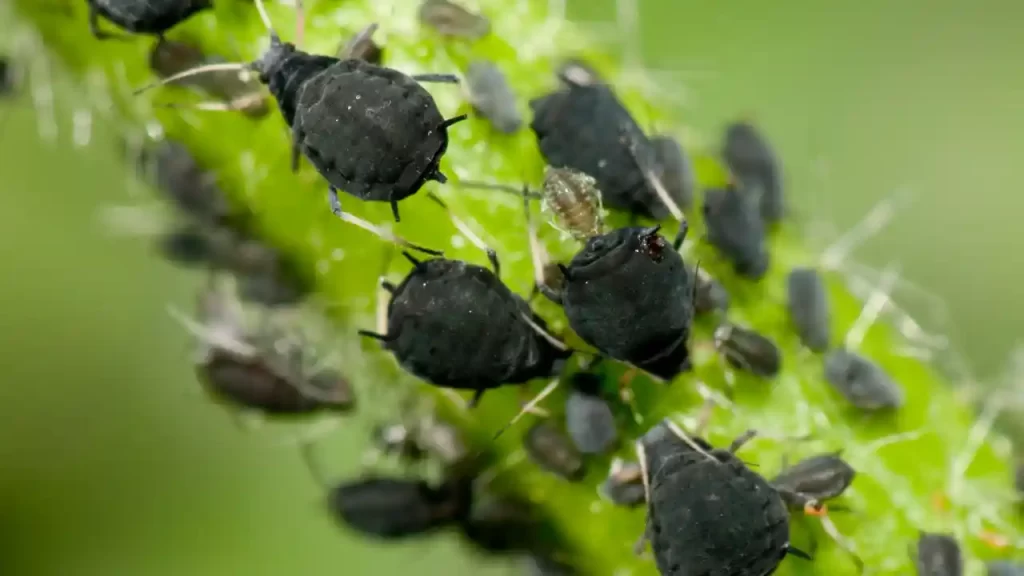
Aphids are from the Aphididae family have soft bodies and tiny in size and are even less than ¼ inch. These pests are generally green, yellow, brown, orange, and black. But the green aphids are more commonly spotted.
Aphids have around 4000 species worldwide and are more prone in moderate and warm climates. A single female aphid can reproduce 80 offspring per week.
They generally come in a group and hence can be easily spotted.
They reside underneath the tomato leaves and new stems. But their presence is not very harmful, and it is very easy to get rid of them.
Due to their rapid reproduction production process, the aphid population and infection both spread quickly. The reproduced aphids are called nymphs, which are very tiny and mature within three weeks of birth but remain smaller in size.
They form their territory in new areas like tomato gardens when they are big in number.
What Do Aphids Look Like?
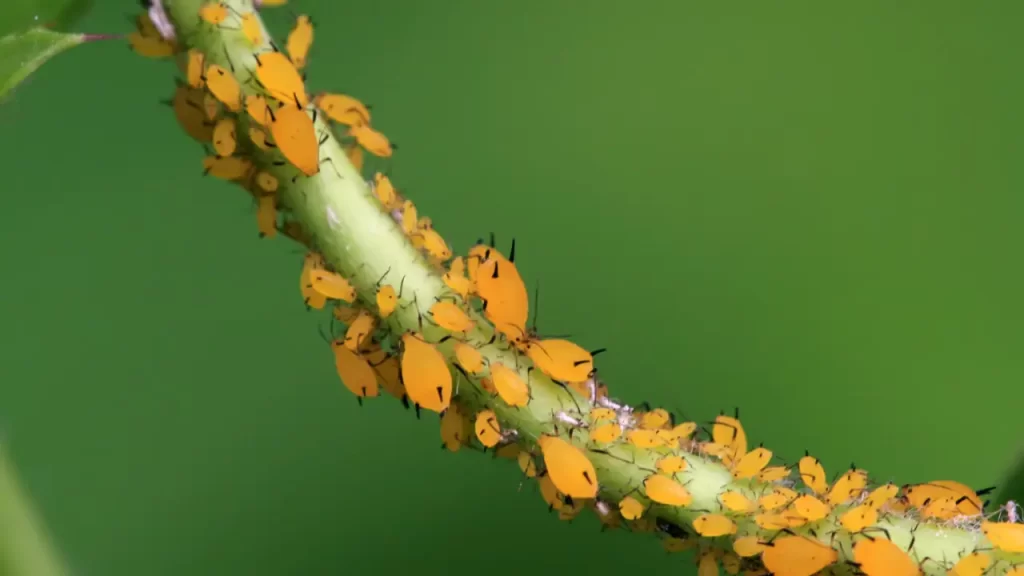
Aphids are very small in size, have very soft bodies, and almost have a peer shape. Their size varies from 1-10 millimeters depending on their species. They are green, orange, brown, black, or gray in color.
Generally, there are only two common species of aphids on tomatoes, the potato and green peach aphids.
However, Green Aphids are very commonly spotted. They might have a waxy or powdery coating on their bodies. They love to stay on foliage and stem and suck the sap of the plants.
Potato aphids are pink or pale yellow-green in color and attracted by tomatoes.
Symptoms of Aphids on Tomato Plants
If your tomato plant show the below-listed symptoms, then there might be a possibility of aphids in your garden plants.
Stunted Growths: The presence of aphids in your tomato garden can lead to short plant growth. It sucks the nutrients out from leaves and stems, which is one of the vital reasons for the stunted growth of tomato plants.
Curled or yellow leaves: The aphids suck sap from the plants, resulting in the curling and yellowing of leaves. If such symptoms are spotted, inspect the top and under the surface of the leaves along with the stems. Though you can easily spot them with the naked eye, sometimes it can become difficult.
Sticky honeydews: Sticky honeydews are produced due to aphids. It is clear, sweet, and sticky and covers the areas where honeydews are present. As it is sweet, it simply attracts lots of ants. Thus, the presence of many ants is a sign of aphids in your tomato plants. Thus it is advised to closely inspect for aphids if ants are there in your tomato plants. The Honeydew results in the growth of sooty mold, which causes the plants to turn black.
Why are aphids harmful to your tomatoes? How Destructive is It?
Aphids grow rapidly and multiply faster. So it is not that easy to remove them from the garden.
They spread many plant diseases, like tomato mosaic viruses and cucumber mosaic viruses. Then it is spread by host aphids, which suck juices from the leaves and spread to many other plants rapidly.
They harm plants badly as they suck sap from the leaves. So nutrients of the plants are taken out by them due to which plants are left wilted and leaves turn their color to yellow. It also causes stunted growth of the plant and badly impacts the tomato quality and its production.
When Honeydew, i.e., aphid wastes, are spotted, it clearly signifies the presence of aphids in your plants. As it is sweet, it attracts many ants. It also results in the discoloration of plants and turns them black.
7 Organic Methods To Get Rid Of Aphids On Tomato Plants
Yes, you heard it correctly. You can remove aphids organically without harming your plants—just use the methods below for aphid control in an organic and easy way.
Manual Removal
If only a few aphids are spotted, they should be removed by handpicking. Wear globs in your hand, pick them off, and put them in soapy water to destroy them completely.
Inspect the leaves’ undersurface regularly, as they mostly love to stay there.
If you spot many aphids, you can follow other methods to remove them from your garden.
Water Spray
If the hand-picking option is unsuitable because you have many plants or for another reason, you can remove aphids from a sharp blast of water from hoses. The aphids are swiped out from the leaves and stem.
Keep a regular check and repeat the process to remove them. This method has a drawback; along with aphids, it also removes the beneficial insects from the plants.
Plant Bug Repellent
You can also prepare organic repellent using garlic, rosemary, peppermint, water, and dish soap. This repellent won’t kill aphids, but its smell confuses and repel aphids and force them to change their shelter.
You can spray tomato plants with this repellant on the undersurface of the leaves and stem. Keep applying it every few days until they are completely gone.
Water and Dish Soap
You can also make an easy spray only with two ingredients, i.e., water and dish soap. Spraying this spray on the aphids can suffocate them and kill them.
Take one-quarter of water and put a few drops of liquid soap. Either spray it or wipe it on the leaves and stems. If the aphid infestation is vigorous, swiping would be the best option.
Please ensure to apply the solution on all parts of the plants to remove them completely.
Introduce Predatory Insects
Most gardeners attract some predatory insects in their garden, which can feed these aphids. Some of the predatory insects are ladybugs, lacewings and parasitic wasps.
But I would say to go for companion planting as predatory insects might go away from your garden before controlling aphids.
Companion planting with herbs, flowers, and vegetables naturally attracts predatory insects. This method also works to reduce other harmful insects along with aphids.
You should make your garden bird-friendly at the same time. Birds love to feed aphids which can help you to get rid of them.
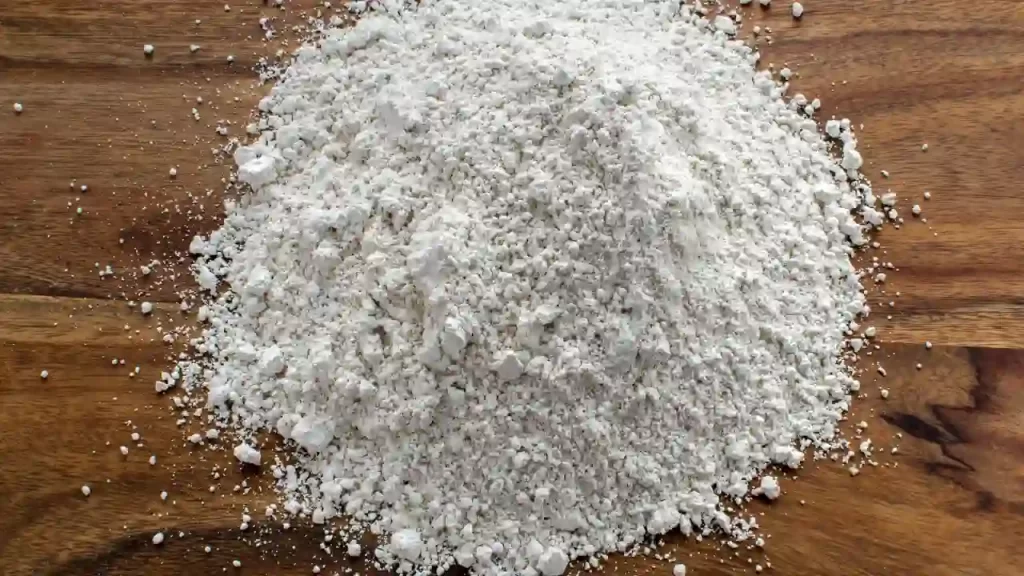
Diatomaceous Earth (DE)
Diatomaceous Earth is composed of silica-rich powder. It does not impact humans but is damn harsh to tiny aphids. The aphids are trapped in DE and cut, which results in their death.
Use food grade DE as it is human-friendly, and avoid using filter grade DE (not human-friendly). DE does not perform while it’s wet.
So it is best to sprinkle them early in the morning or evening after drying of dew on the soil and the plants.
But avoid using them when your plant is in the blooming stage, as they can also kill pollinating agents like bees. You can apply them in the evening when they are inactive and sleeping.
Neem Oil – A Natural Disinfectant
Neem works the same as soap. The application of neem oil can suffocate the aphids and destroy them. It disrupts their feeding and reproductive behavior.
But it should be your last choice as it can also impact the beneficial insects in your garden. Thus it is better to go for other methods to control aphids.
How To Prevent Aphids on Tomato Plants?
Healthy Soil and Healthy Tomato Plants:
Using nutrients and healthy soil to plant your tomato plants is best. Obviously, plants are grown healthy in such soil.
Even if aphids feed on healthy plants, they are not impacted at all. So using good soil should be the primary choice for pest prevention.
Aphids are also attracted due to their yellow color, and weak plants are also yellow. So aphids attack weak/yellow plants more often.
Companion planting:
Companion planting is always considered as the best option to control various pests, diseases, and fungal infections. You can plant herbs and flowers like basil and marigolds.
Planting trap crops like Nasturtiums can easily trap aphids. They attract aphids more than tomato plants. When colonies of aphids are spotted on the plant, pull the flowering plant and completely dispose of it to destroy the aphids.
Sticky Traps:
Yellow color attracts aphids. Sticky boards are a proactive way of preventing aphids from settling on your tomato plants – they attract and catch aphids before it’s too late.
So bring yellow sticky boards to trap aphids. They would definitely get attracted to this board and leave your plant eventually.
Attract aphids predators:
Grow maximum companion plants that can attract more predators, like lady beetles, syrphid flies, and lacewings. You can also develop some birdhouses and Feeders in or around your garden to eliminate the annoying aphids.
What is homemade aphid spray for tomatoes?
Aphids are small insects that feed on plant sap and can cause damage to tomato plants if left unchecked. Fortunately, there are some natural ways to get rid of them without resorting to harsh chemicals.
One such way is by making an effective homemade aphid spray. This homemade solution is made of ingredients such as garlic, pepper, and soap. The garlic acts as a natural repellent while the pepper works to kill the aphids upon contact.
Finally, the soap helps to spread the mixture evenly over your tomato plants so that all of the leaves are covered.
With a little bit of time and effort, you can keep your tomato plants aphid-free and produce a healthy bounty of delicious tomatoes!
Will vinegar kill aphids on tomatoes?
Yes, vinegar can be an effective solution for killing aphids on tomatoes. Vinegar is a natural and non-toxic substance that works by disrupting the insect’s nerve cells, causing them to die.
To use this method, mix one part white distilled vinegar with four parts water in a spray bottle. Shake the mixture well and spray the affected plants until they are thoroughly saturated.
The solution should be reapplied every few days for at least a week to ensure all aphids have been eliminated. It is important to note that vinegar can also harm beneficial insects, so it should only be used as an absolute last resort.
Additionally, this method may not work on especially large aphid infestations. In these cases, contact a professional pest control service for assistance.
Summary
Yes, aphids are one of the most irritating insects, which can impact your plant and ultimately affect the growth and yield of your tomato plants.
You can quickly and definitely get rid of them by using the tricks discussed in the article above. But prevention is always better than cure. So you should take all the preventive measures to avoid the risk of aphids.
Like always, prefer using the best nutrient soil for planting; create all possible means to attract predators and birds in your garden.
Plant companion plants around your tomatoes and you will probably never come across aphids and can save your lovely tomato plants.
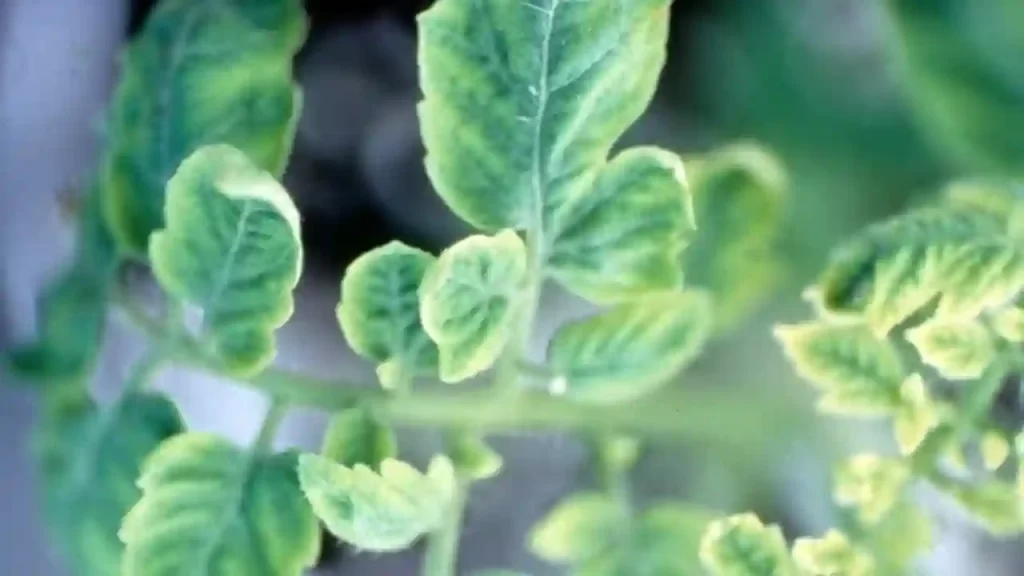
In short, it is a common problem associated with tomato plants and can mostly be treated and taken care of using nitrogen-content fertilizer, nutritious soil, giving the right amount of water to the plants, protecting them from diseases, and fixing climatic stress protects the tomato leaves from discoloration.
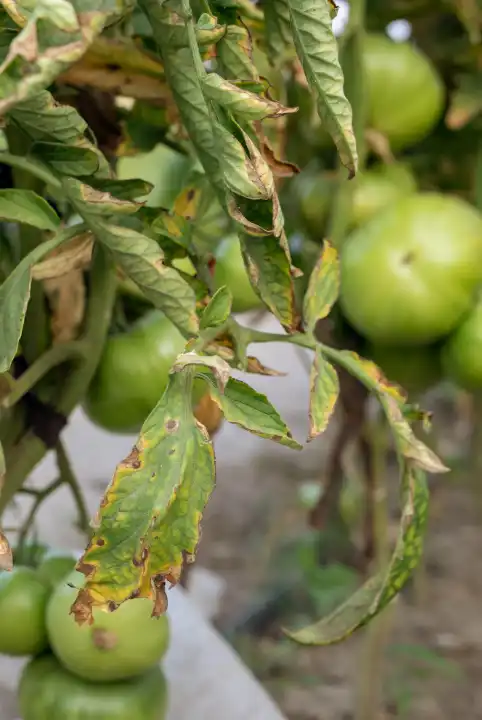
Tomatoes plants are very delicate, and even a small mistake can make them struggle. Sometimes you might notice discoloration in their leaves.
It may involve several reasons like diseases, nutritionless soil, use of excessive fertilizers, too low nitrogen content in your soil, or unfavorable climatic conditions.
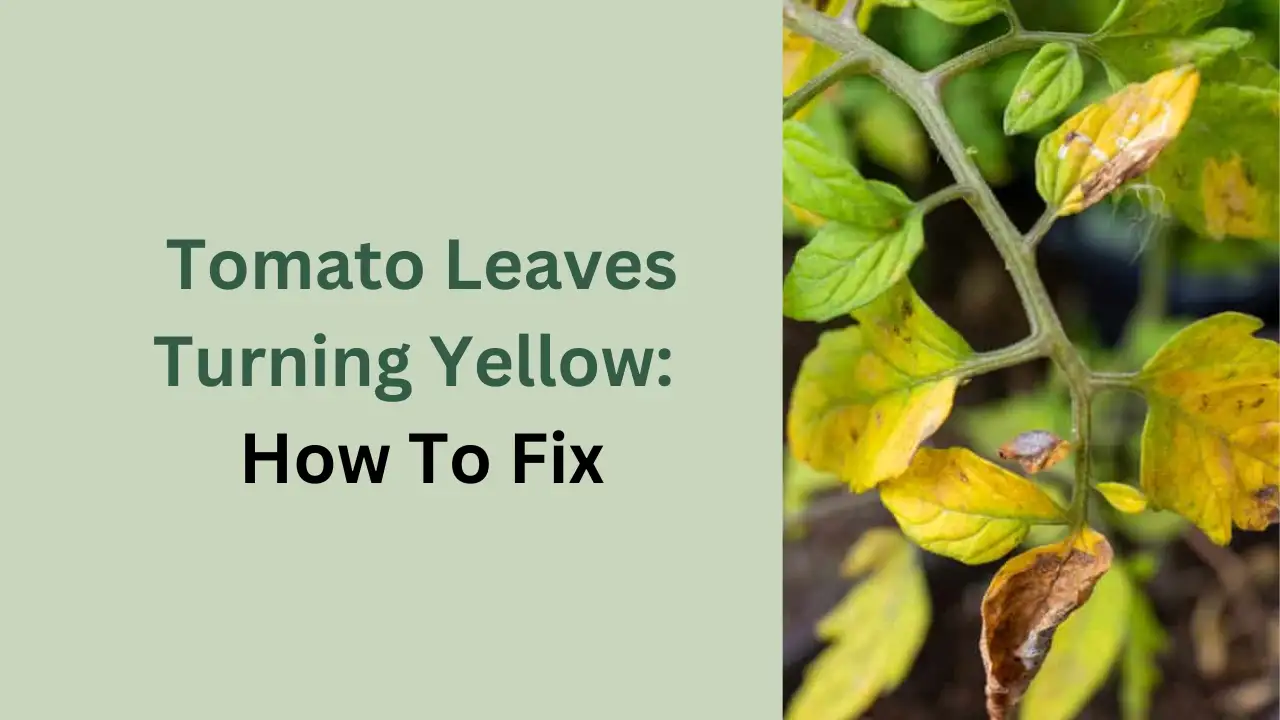
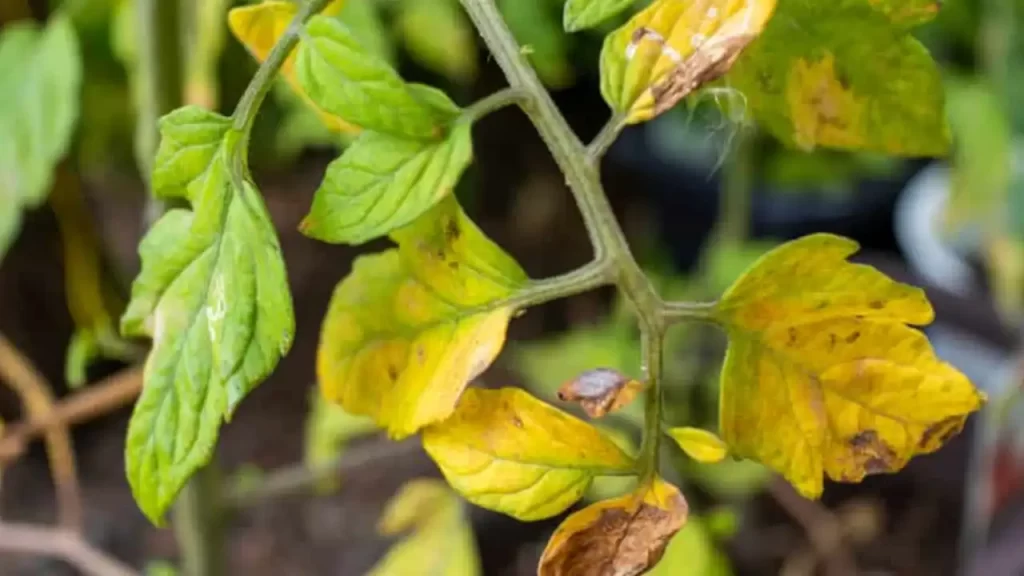
Why are the Leaves on My Tomatoes Turning Yellow?
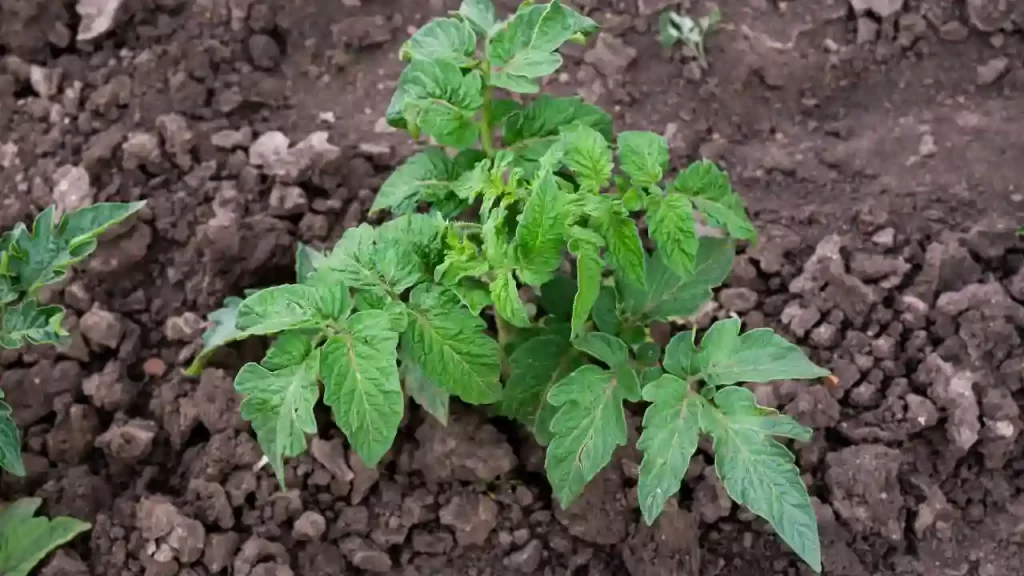
Yellowing of tomato leaves indicates various problems occurring in your plant. But it is a very common problem and needs to be handled patiently. Firstly we need to identify whether the problem is really big. At some points, the yellowing of tomato leaves is common.
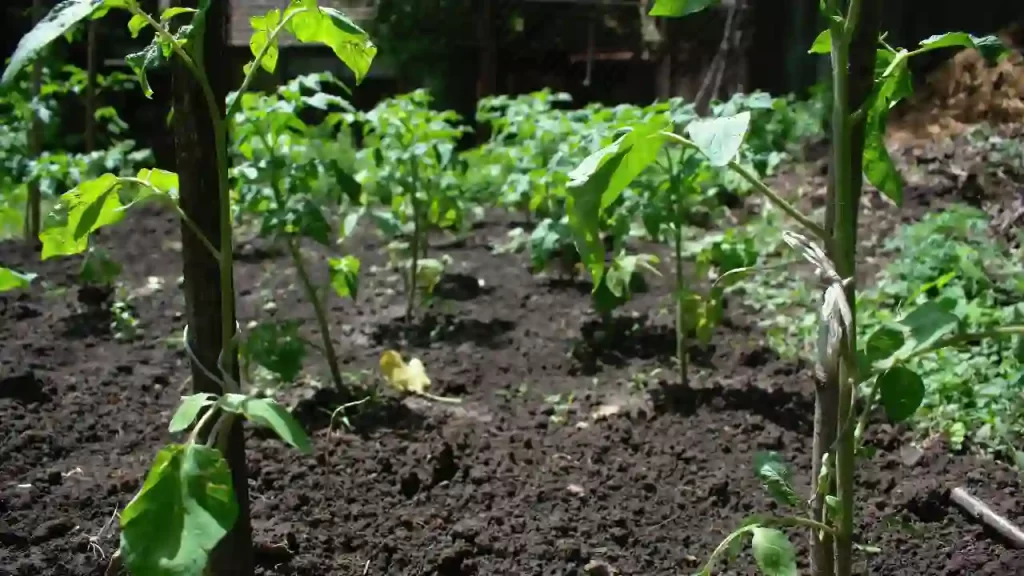
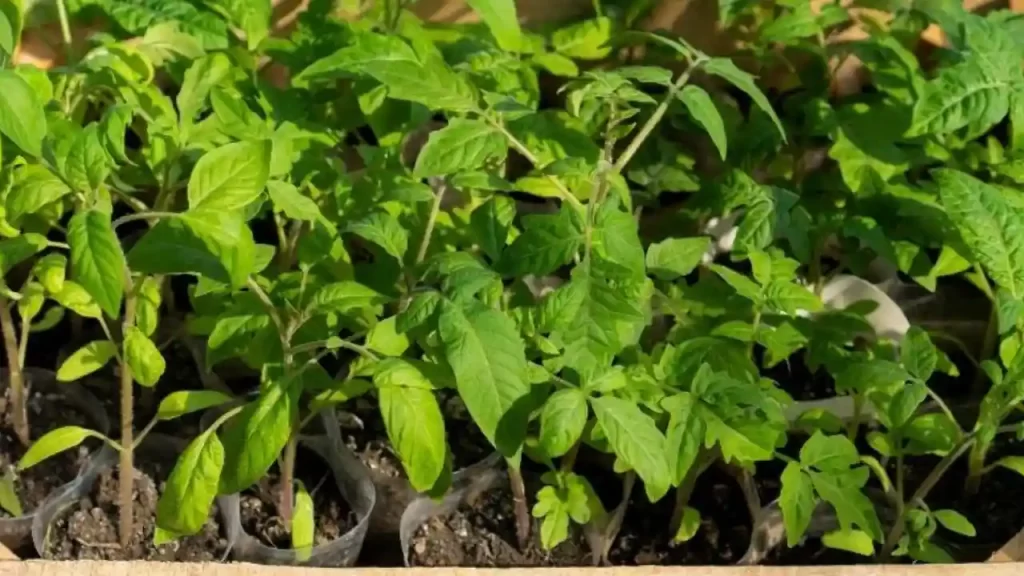
If you are planting new tomato plants directly from the pot in the garden, you can find yellow tomato leaves in their lower stem. This happens because in nurseries, they are grown in lesser space, and sometimes they are also grown in less nutrient soil.
They face a lack of sunlight due to high inch growth and are shaded by their neighboring plants. This also results in bad airflow facility; their lower leaves turn yellow and may be shaded afterward.
When you bring them and plant in a better environment with adequate space, nutrient soil, sunlight, and airflow, they grow normal leaves and come out as healthy plants.
But sometimes yellow tomato leaves may be due to some serious issues. They might have caught diseases from some other plants and may be contagious to your other plants.
So be sure to purchase only healthy, spotless, and green leafy plants from your nearby nursery.
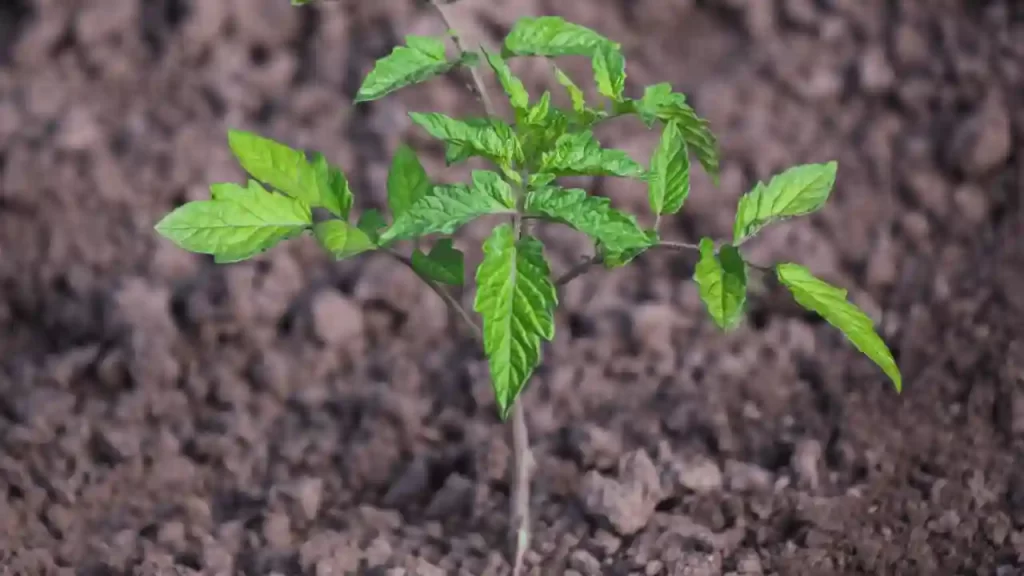
Sometimes transplant shock also leads to the yellowing of tomato plants. Do not rush to bring the baby plants into the outer environment. Wait at least two weeks after they reach the height of 2-3 inches. Proper hardening off the plant should be done to escape this problem.
Both points mentioned above are common and not so dangerous problems. You can resolve the problem after bringing the plants into an ideal environment.
The concerning reasons for yellowing tomato plants are inconsistent watering, less nutritious soil, too low nitrogen in the soil, and diseases.
8 Reasons For Yellow Tomato Leaves and How To Fix This!
Your tomato plant leaves may turn yellow for various reasons. I have listed the common 8 reasons why your Tomato Leaves are Turning Yellow and their solution.
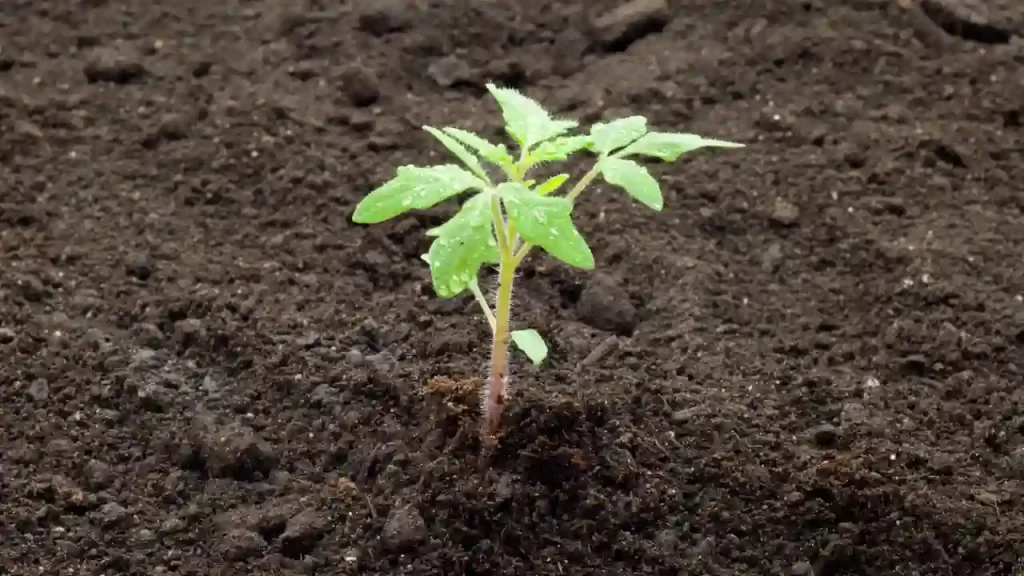
#1 The Seed Leaves Are Turning Yellow
It is natural to get yellow leaves of the seeds; it is a plant development. Cotyledon leaves are first grown on the plant after germination, and their job is to provide nutrition to the plant. So they are not needed after this process is done.
At this stage, their color turns yellow, and the plants later shade them. At the same time, the tomato plants generate new leaves to provide the necessary nutrients to the plants.
How To Fix
As this is a natural process and part of the life cycle of the tomato plant, you cannot fix it. With the growth of tomato plants, seed leaves are shaded, and new leaves grow.
#2 Over or Under Watering
Water consistency is very important for tomato plants. Even after providing nutrient soil, leaf yellowing is noticed in the plans because the plant’s root can only deliver nutrients to the plant when watered in adequate amounts.
Ideally, 1 inch of water per week is needed in the plantation stage, and 2 inches of water per week is needed while the plant produce fruit.
Similarly, if the plant is flooded with water, it can cause root rot. The roots are soaked in the water and die soon if not drained on time. And the proper nutrients are not delivered to the plant, which causes yellow leaves on tomato plants.
How To Fix
I have listed some tips to handle the situation:
During the plantation stage, you should water only when the surface is dry. A spray bottle for watering is best recommended as a limited amount of water is spread, and the risk of overwatering is also reduced.
Consistent watering habits should be encouraged while transplanting tomato plants.
Water plenty when the weather is too hot. Don’t let the soil lose its moisture.
Avoid overhead water irrigation as the sun may damage the plants, and they become more prone to disease, rather, use a soaker hose to water your tomato plants.
Be extra cautious while watering your potted tomato plant. They require twice as much watering per day.
A deep irrigation system is proven to be more efficient than a sprinkler system. It also reduces the risk of diseases. If you cannot afford this, be extra cautious of the changing weather. Avoid watering during heavy rain and increase watering during hot weather.
#3 Transplant Shock
When newly transplanted tomato leaves turn yellow, it must be because of transplantation shock. They are very critical and delicate and get damaged easily when brought into a new environment.
Never break up the roots; even a small root break can result in leaf curling, yellowing leaves, and wilting.
Little transplant shock is normal and natural, and it gets recovered with correct watering techniques, soil nutrients, and regular plant care.
How To Fix
Tomato roots are very delicate, so gently transplant them into the soil. Put the entire root ball and lower stem into the soil without touching the roots. Then put some soil in and water them properly.
Do not stress if your baby plant is already undergoing transplant shock. Let it recover on its own.
#4 Poor Soil Aeration
Poor soil Aeration is associated with a lack of oxygen in the soil. Due to this, the roots of tomato plants are suffocated and become inefficient in delivering the plant’s needs like water, oxygen, and nutrients to the entire plant.
As a result of which, the leaves start turning yellow. As the plants won’t get their food, it gets damaged and dies after a certain period.
The problem arises when the soil is too tight and never loosened. This creates uneasiness for the young roots. Walking around the near area of your plant can also raise this problem.
How To Fix
Transplant your tomatoes in nutrient soil. While transplanting, dig 2-3 times to keep your soil aerated. Later, put some nutrient-enriched soil.
A good garden naturally has aerating agents like worms. They keep the soil naturally aerated.
If you are going through compaction, you can use aeration spikes. But mind this may cause harm to the root of the plants and may damage them. So be extra careful while doing the process. You can also opt to plant your tomatoes in a container. This will never raise the problem of soil compaction.
#5 Disease
Once your tomato plant catches a disease, you can’t cure it easily. So it is always best said that prevention is better than cure.
Not maintaining a good soil drainage system is the main reason for the spread of disease in tomato plants.
A few tomato diseases are briefly discussed below:
Early Blight
Blight is tiny in size, very hard to identify on the plants, and are also called plant lice, and they are generally found on older leaves.
They form a ring, round pattern spots, and create holes in the leaves. The near spot area of leaves turns yellowish. They damage more foliages in hot and humid weather.
They also damage the fruits, and infected fruits drop from the plants.
Prevention: The blight issue can be resolved to a certain extent by following the points below.
Plantation should be done where direct sunlight exposure is available, especially in the morning sunlight. This would help the foliage to be dry.
Avoid overhead watering, and do not water your plant in the afternoon time.
Good quality and disease-free seeds should be used while the cultivation of tomatoes.
Discard the diseased plants and do not use them as compost.
Septoria Leaf Spot
The Fungus Septoria Lycopersici causes septoria leaf Spots. The leaves, stems, and petioles of the plant are affected due to the disease, but the fruit is not affected.
The disease starts showing spots in the lower leaves when the fruits are set on the plant.
Older leaves are mostly attacked.
Small round spots with dark brown borders can be seen on the affected leaves. The affected leaves turn yellow and die after some time. The plants are more prone to get infected with this disease when the temperature is between 68-77 degrees F, and the plant remains wet due to rainfall or overhead irrigation. The ultimate goal of the disease is to reduce the quality of fruits, and a large number of fruit production weakens the plant and leads to sunscald.
Treatment:
Maintain at least three years of crop rotation. Avoid overhead irrigation of your tomato plant. The use of chlorothalonil or copper fungicides prevents this disease.
Fusarium Wilt
Fusarium oxysporum is responsible for the occurrence of Fusarium Wilt. They are more active in warm weather.
Their impact on small plants can be seen as the shedding and wilting of leaves, the green color of the plant starts to fade, and in the end, the plant may not survive and dies.
Generally, only one side of the affected leaves turns yellow. The stems are internally affected, and discoloration in the stem can only be seen when the stems are cut. This fungus is only born in the soil and transferred to the plants from its roots.
Treatment:
Plantation should be done in soil free from pathogens.
Maintain the pH level of the soil from 6.5 to 7.00.
Use nitrate nitrogen like calcium nitrogen, and avoid using ammoniacal nitrogen. This helps in the prevention of the disease.
Verticillium Wilt (not found)
It is a soil-borne fungus caused by Verticillium Alboatrum. They are more prone to spread in the garden’s cooler northeast side.
Mainly the lower leaves are attacked and form yellow patches, then develop into brown spots and finally, they curl up and die.
Treatment:
The affected leaves cannot be cured. So you need to pull and discard the plant as soon as possible. It is a highly contagious disease and can be easily spread to other plants too. So never use the infected plant as compost.
#6 Nutrient Deficiency in Tomato Plants
Yellow leaves in developed plants are a sign of nutrient deficiency. As tomatoes require a high amount of nutrients for their proper growth, they are known as heavy feeders.
Nitrogen, phosphorus, potassium, calcium, sulfur, magnesium, zinc, copper, and iron are needed for the complete and healthy growth of tomato plants.
Nitrogen deficiency is mainly responsible for the yellow leaves of tomato plants. But before providing a high dose of nitrogen, it is very important to identify which tomato plant is going through the deficiency of exactly which nutrient. Excess of any nutrient can harm your plant.
To identify the exact nutrient deficiency, check which part of the leaves is turning yellow, and it is also best to do soil tests to identify your plant is deficient in nutrients.
How To Fix
First, it is important to identify which part of the leaves is discoloring so you can understand the exact nutrition deficiency.
Yellow older leaves indicate a nutrient deficiency in nitrogen, potassium, and magnesium. Old lower leaves of the plant turn yellow.
Nitrogen deficiency is the main reason for the yellowing tomato leaves, and the whole leaf becomes yellow. Still, high nitrogen can only develop more leaves, and the plant has to compromise its production of flowers and fruits. So enrich your soil with the right amount of nitrogen to eliminate the problem.
When the leaf’s outer edge turns yellow, it is a symptom of potassium deficiency. Later the leaves turn brown. The use of potassium-rich fertilizers helps to better the leaves’ situation, and in turn life of the plant is also ensured.
Yellow leaves with green vines are signs of magnesium deficiency. Solution of Epsom Salt with water application would turn the yellow leaves into green almost within a week.
If new and younger leaves turn yellow, it is a sign of calcium and iron deficiency.
Calcium deficiency can also cause Blossom End Rot and discoloration of leaves in tomato plants. You can mix crushed Eggshell and shell meal in the soil to fulfill the calcium deficiency.
Iron deficiency can cause yellow leaves along with green veins. Apply 2 ounces of iron Sulfate with 3 to 5 ounces of water to eliminate iron deficiency in tomato plants.
Before doing any remedy, it is best and important to do a soil test. It would help to identify the nutrient deficiency and pH level of the soil. Fertilizers responsible for curing yellow color leaf should be only used.
#7 Pests
Tomato plants are more prone to attract pests, and some can cause the leaves to turn yellow. If you have identified any fungal disease or pests, You should take measures to control and resolve the issue.
How To Fix
Go through your state extension program website regularly to check if any tomato health issues are general in your region.
Healthy soil and crop soil rotation can help to reduce pests ultimately.
Planting companion plants like pepper, garlic, and basil can also reduce the problem.
Using neem oil in the evening once a week can also help solve the problem.
The organic spray also helps to control pests.
#8 It’s the End of the Tomato Season
At the end of the season, it is quite natural for your tomato plants to turn yellow and fall from the plant.
When the leaves of tomato plants turn yellow or brown at the end of summer, it is part of the plant life cycle. Leaves help the plant to get their food.
Leaves responsibility is done when the plant sets fruit on it.
When you notice such a situation, it is better to prune the yellow leaves. It helps plants to utilize their energy in the development and ripening of fruits.
How To Fix
No remedy can be done as it is a natural process of the plants and part of their life cycle. Instead, you should be happy that your plant has successfully completed its task.
Final Thoughts
Yellow leaves on your plants may occur due to numerous reasons. So handle the situation patiently and try to identify its main reason, as discussed above in this article. Take measures to solve the issue, as you can resolve most of it.
Keep a closer look at your tomato plants to identify the pests or spread of fungal diseases when you observe tomato plants turning yellow.
Tomato Hornworms, one of the most circumcised diseases, are caused due to Manduca quinquemaculata, which can harm the nightshade family like tomatoes, potatoes, pepper, and eggplants.
They are large caterpillars with horn-like tails which chew leaves and stems and sometimes chew holes in the fruits. It isn’t easy to spot them as they blend with green tomato leaves.
Physical removal is the most effective way to get rid of tomato hornworm. Using natural pesticides, rotating crops, tilling the soil, and planting companion plants can also help reduce and prevent Hornworms.
What Are Tomato Hornworms?
Tomato hornworms are one of the most destructive pests, which can destroy all nightshade families, including tomatoes. It consumes leaves, new stems, and pieces of fruit, especially the nightshade family.
They are green-colored caterpillars, 5 inches long, with horn-like tails. They are commonly found in North America & Australia.
It is challenging to spot them because of their appearance on the plants as they blend in green color. They cause defoliation in the plants and destroy them.
Adult Tomato Hornworms are also known as Adult Moths. They are large, have yellow spots on the sides of the abdomen, narrow front wings, and widespreads of 4-5 inches, and the hindwings have light and dark bands.
How To Identify Tomato Hornworms?
Tomato hornworms are Green colored, 4-5 inches long, and probably the longest caterpillars in the vegetable garden. They have seven v-shaped white stripes on their body. A red or black horn is spotted on the last abdominal segment.
The young caterpillars are spotted in your plants which become adults and turn into a moth with 5 inches wingspan.
Their green color makes tomato hornworms identifying easy, however, due to their appearance, they easily get mixed with the green leaves of the plants.
Tomato Hornworms vs. Tobacco Hornworms
Tomato Hornworms and Tobacco Hornworms are very similar in looks as they belong to the same species and mostly impact the nightshade family of plants. So it is very tough to differentiate between them.
The Tobacco hornworm possess red-colored horns and have diagonally white stripes, whereas tomato hornworms have black horns and V-Shaped White Stripes.
These are the only two differences that help to identify both categories.
Understanding the Tomato Hornworm Life Cycle
A Tomato Hornworm life cycle consists of 4 parts, but mostly; we notice larvae stage only.
But it is very important for gardeners to know how these pests grow and increase in number.
I have briefly discussed all 4 parts below:
Eggs: After Mating, Female Sphinx Moths lay oval, smooth, light green eggs on the upper and lower surface of the leaves of nightshade family plants, namely, tomatoes, potatoes, pepper, and eggplants.After 3-5 days of lay off, the eggs hatch, and caterpillars grow rapidly and begin to feed. They are fully grown within 3-4 weeks.
Larval Stage: Mostly, hornworms come to the gardeners’ notice on the plants at Larval Stage as they become big, fat, and green.But it is hard to believe that despite their huge appearance, they do not become adults in the Larval Stage. The Larval Stage is split into five stages known as instar stages. This Stage takes almost 3-4 weeks to get fully completed. Finally, the caterpillars grow up to 5 inches and weigh 10 grams.
Pupae stage: after becoming large caterpillars, Tomato Hornworms fall and get burrow into the soil to form large red-brown pupae.
Adult Hornworm: Adult is the last stage of Tomato Hornworm. At the end of the spring, five-spotted hawk moths or the sphinx moth are formed.
They are difficult to spot as they do not come out during the day and feed on the nectar of different flowers from the evening till morning.
Later the adult Hornworms also lay off the eggs to continue their life cycle.
Damage Caused by Tomato Hornworms
Most of the time, hornworm damage is seen before the hornworms in the tomato plants. The signs of hornworms are very similar to other weeds.
Some signs can help you to identify the damages caused due to the hornworms.
Black Droppings:
As the hornworm keeps feeding on the plants, they leave dark green or black droppings on the plants.
Check in The Evening:
Tomato Hornworms do not come out during day time. They feed on the plant from evening till morning. So checking them in the evening with the flashlight can help you to spot them in your plants.
UV flashlights are the best to use as they glow in UV flashlights and seem like a bulb on your plant.
Large Holes in the plant leaves:
Tomato Hornworms eat the leaves unevenly and leave holes and open spots where they feed. They leave the plant weak by removing the green foliage and chewing the fruits, which leads to holes in the fruit.
Keep checking for these dangerous hornworms, or else they can destroy the whole plant.
How To Get Rid of Tomato Hornworms Naturally?
You can use a natural rather than a chemical method to remove Tomato Hornworms.
Tilling of soil
Gardeners should till the soil at the beginning as well as at the end of the season to destroy the larvae. The success rate in killing the hornworms is seen to be up to 90%.
Tilling of soil also brings out the pupae, which is killed when it comes in contact with cold weather.
Use companion planting
Planting companion plants in your garden can prevent the invasion of hornworms. Making basil plants, a neighboring plant of tomatoes, can not only prevent them from hornworms but also enhance their flavor.
Planting borage can prevent hornworms and attract pollinator insects in your garden, which increases the yield also.
Trap plants are planted near the infected plants to repel the pests. You should plant it in such a way that you are pulling pests far from your garden.
Planting flower tobacco plants as trap plants for hornworms can work best. It attracts sphinx moths.
Rotate Crops
Crop Rotation is another efficient way to prevent hornworms in your garden. It would reduce the number of pupae.
So they cannot lay eggs on the plants, which would result in the prevention of Hornworms.
Hand Pick Tomato Hornworms Off Your Plants
Nothing works as great as picking off the Tomato Hornworms from your plant. But it would be worse to touch them directly. So wear gloves while removing them.
If you have chickens, you can give them these Hornworms as they love to eat them.
If you do not have chickens, you can put them in a soapy water bucket or crush them from your foot to destroy them.
While handpicking tomato hornworms, inspect your plants twice weekly as they can simply deceive you about their appearance.
Release Natural Predators and Beneficial Insects
Welcoming beneficial insects and Natural Predators reduce the number of hornworms in your garden. A couple of effective ones are Ladywing and green Lacewings.
You can easily get them from nurseries and garden stores as they eat eggs of many pests in the garden.
Releasing paper wasps also reduces the hornworms in your garden as paper wasps eat all caterpillars.
Spray Plants with a Homemade Cayenne Pepper Spray
You can easily prepare homemade spray with Cayenne, pepper, water, and soap and spray it on your plants instead of using any chemical spray.
A substance called capsaicin is found in Cayenne peppers which pulls the hornworm on the ground and can also kill them.
A regular spray of this homemade garden spray works well to destroy the tomato hornworm from your plants.
How To Get Rid of Tomato Hornworms with Chemicals?
If the stubborn Hornworms are not going from your garden through natural remedies, you should now opt for a chemical treatment to get rid of them. And yes, it is true that all chemicals are not hazardous.
Use BT: Bacillus thuringiensis, also known as BT, is a very useful chemical that can help you to get rid of tomato Hornworms. It is a very useful and natural chemical that treats your plant without causing any harm and destroys especially young caterpillars.
When this natural bacterium is found in soil, if consumed by Hornworms or any other pests, their digestive system gets paralyzed, and they become totally inefficient to feed, which results in death.
BT is best to use as they never impact humans, pets, and kids. The best recommended BT is Monterey BT Concentrate.
Use Garden Insect Spray:You can use Monterey Garden Insect Spray to get rid of Tomato Hornworms. It controls many pests, including Tomato Hornworms.
The best part is it never smells and functions great in removing weeds.
Use Garden Dust: I recommend using Safer Brand garden dust to throw Hornworms from your garden. It is also OMR certified. At the same time, it is safe for your beneficial insects in the garden and would never harm them.
Use Caterpillar killer Concentrate:Caterpillar killer from safer Brand kills caterpillars from plants, trees, and shrubs. And the good thing is it never harms honey bees and ladybugs in your garden.
Spray Neem Oil: Gardeners often use Neem Oil as the last option. If nothing is working, then spray Neem Oil. But the main disadvantage is it kills bad pests along with beneficial insects in your garden. So it should always be your last option.
How To Prevent Tomato Hornworms?
There are various measures to prevent and control Tomato Hornworms and keep your garden safe from them.
I have discussed some measures that can help protect your garden and plant from these caterpillars.
Use Row Cover: The most effective way to prevent the risk of Tomato hornworms is restricting the invasion of these caterpillars.
While planting nightshades, try using floating row coverand remove them while pollinating the plant, and moths won’t be able to lay eggs on the plants.
Use black plastic: Covering your garden with black plastic can break the lifecycle of the tomato hornworm moth, and it would prevent them from emerging in spring. This would result in the death of the Tomato Hornworms before they lay any egg on your plants.
You can also substitute black plastic with cardboard, and it can be used around the plants to avoid the risk of tomato hornworms.
Use of Diatomaceous Earth: The use of Diatomaceous Earth can control and prevent Tomato Hornworms. It would not harm humans and pets until and unless inhaled.
So you should always wear a mask while using it. It can kill the caterpillars when they walk on it; it feels like broken pieces of glass when they crawl on it and dehydrate them, resulting in their death. It can tremendously kill young caterpillars.
Where do tomato hornworms go during the day?
During daytime, the hornworms hide beneath the leaves and comes out at dusk to feed on fruits and leaves.
Summary
Though Tomato Hornworms are a curse for gardeners, don’t be impatient if you spot any hornworms. Follow the tips discussed above, and you can easily eliminate them.
At the same time, always take necessary steps at the beginning of the cultivation to restrict the entry of the hornworms into your garden, and you will always be blessed with healthy cultivation and a large harvest of tomatoes.
Who doesn’t want to keep their tomato plant free of diseases? But they are very delicate plants and may catch serious disease and pests even if you neglect to care even a little.
First, you must be proactive, so your healthy plants don’t catch any disease. You need to keep a close look at your tomato plant to identify the disease, if any, at the initial stage only. Your tomato plant may struggle with a physiological disorder due to different types of Viruses and pathogens.
You can choose a disease-resistant variety of tomatoes, identify and remove the leaves with signs of disease, do not stress the plant while tomato foliage is wet, keep a good airflow facility and mulch them properly.
Types of Common Tomato Plant Diseases With Pictures
Tomato plants can get infected by various pathogens, which can cause vital diseases, and some of the diseases even kill the plants.
I have explained some of the diseases in this article caused by different types of pathogens.
So firstly, it is better to discuss different types of pathogens and their preventive measures to keep your garden safe from their attack.
There are several viral, fungal and bacterial pathogens that cause tomato diseases. Their spreading rate varies on the wind, temperature, water stress, disease resistance capacity of your tomato plant, the health of your plant, and many more.
If you diligently care for and keep your plant healthy, they become more resistant to disease.
Tomato Plant Diseases Caused by Fungal Pathogens
Fungal pathogens are a great threat to tomato plants and they can damage all the parts of the tomato plant, including its flowers and fruits.
Alternaria Stem Canker, as the name suggests, attacks the stems of tomato plants, but it also damages the leaves and fruits of the plants. It is similar to the disease which spreads early blight in tomatoes.
The cankers are developed on stem, fruit, and leaves and turn their color dark brown and sometimes black. This happens as the toxin produced damages the tissue between the leaf veins. They are developed on the stem near the soil line or aboveground.
Alternaria Stem Canker often develops concentric rings on green fruit.
When airborne spores come in contact with tomato plants or when the soil reaches the plant, Alternaria Stem Canker is spread in the tomato plants.
The plant is impacted due to this disease in excessive heat, especially when the temperature is above 77F.
Avoid overhead watering; instead, ensure to water in the soil line; use a soaker hose or Drip irrigation to water your tomato plants.
Watering the tomato plant at night keeps the plant healthy as the risk of overmoisture in the soil is reduced.
Resistant varieties of the disease are Phoenix & Mariana. Though these plants can also get impacted due to the disease, it would be the first step towards a good start for your plantation.
Using chlorothalonil as a fungicide before 4-6 weeks of your expected harvest can protect your tomato plant from the disease.
Other fungicides might be needed if your harvest is maturing in the fall.
Anthracnose
Anthracnose disease is a curse for varieties of plants that directly attack their leaves, fruits, and flowers, and in the case of tomato plants, matured tomatoes or over-ripened tomatoes are impacted.
Anthracnose is caused by Colletotrichum coccodes and spreads in the lower part of the leaves, which are infected by early blight. Later, spores are developed on the tomatoes.
The disease is spread in immature and green tomatoes, and the impact is traceable when the tomatoes are ripened. Slightly sunken, small ring spots are developed on the tomatoes. These ring spots expand to half an inch and form concentric rings. The lesions seem like blacky patches.
The lesions become vigorous during moist weather, and many spores are formed in the lesions.
Tomato plant Root rot due to Anthracnose is called black dot root rot.
The tomato plants become more prone to disease when they are wet. Avoid overhead irrigation, especially when the tomatoes are maturing and ripening.
Crop rotation each year is the best way to prevent the disease. Facilitate your plant with a good drainage system to avoid the risk of this disease.
The fungicides depend on the climatic conditions of the region where you are located. Fungicides are not needed in dried climatic conditions, whereas in humid climatic conditions areas like New York, fungicides are recommended to be applied.
Black Mold
Ripened tomatoes are prone to Black Mold disease, which becomes active in late-season rainfall. It is caused by Alternaria alternata.
The symptoms are seen as light to dark brown lesions on the ripe tomato’s surface, vary from small to large in size, and destroy the epidermal tissue of the tomatoes in circular sunken lesions and spread deep into the fruit.
The lesions formed are like black velvet on the surface of the tomatoes. The fungus encourages forming wounds at the sunburned surface of the fruit.
If you find the spread of this fungal diseases in your garden, harvest the tomatoes as and when they are ripened and stop overhead irrigation.
Fungicide application is needed in heavy rainfall and for a late harvest of tomatoes. As discussed above, you can use the same fungicide used to treat Alternaria Stem Canker.
Botrytis Gray Mold is caused by one of the most vigorous pathogens, which can destroy more than 200 varieties of plants, vegetables, fruits, and ornamental plants.
It is caused by Botrytis cinerea and causes postharvest decomposition of tomatoes.
It infects all parts of the tomato plants, like flowers, fruits, stems, and leaves, and is a matter of concern in the greenhouse.
The wind spreads the spores caused by the fungus. When the plant is moist due to rain, fog, or irrigation, Botrytis Gray attacks the plant.
The fungus can infect immature and green tomatoes, form white ring spots, and the color turns yellow when the tomato ripens.
Maintaining a good airflow system, disinfecting the gardening tools, and avoiding overhead irrigation habits are the best measures to prevent your tomato plants from Botrytis Gray Mold.
It is best to check for fungicides with your country’s extension person to determine the effective fungicide for your area if you want to use them.
Alternaria solani promotes Early Blight. Tomato leaves, stems, and fruits are mainly impacted, and small brown and black spots are formed in classic concentric rings.
Your tomato plant becomes more prone to get infected with Early blight, especially during rainy weather. The spores are spread when the plant is wet and even spread by wind.
Early blight resists tissues from infected tomatoes, nightshade weeds, and potatoes. It is better to destroy the infected plants and discard them.
Please do not use them as compost, as the fungus may spread in your garden and simply destroy the harvest.
The fungus can sometimes vanish in dry weather conditions. You can also use fungicides chlorothalonil and fenamidone to control the disease.
Fusarium Wilt
Tomatoes with Fusarium Wilt by F. D. Richards
Fusarium Wilt is spread by the fungus Fusarium oxysporum f. sp. Lycopersici. It causes wilt in the tomato plants, and the fungus survives in the soil for several years.
The affected leaves turn yellow and wilt. The impact of the Fusarium Wilt is seen only on one side of the plant, denoted as the “Yellow Flag Effect.” The impacted plant is totally destroyed.
Wilts caused by Fusarium and Verticillium are almost similar. So gardeners often need clarification to confirm the type of wilt. It can only be confirmed with a lab diagnostic.
It is best to plant Beefmaster and Better Boy as they are resistant to Fusarium Wilt. But other pathogens can impact these varieties of tomato plants. So it is always safe to choose the variety resistant to your area.
Fusarium Crown and Root Rot
Fusarium oxysporum f. sp. Radicis-lycopersici is the main cause of the Fusarium Crown and Root Rot. It stays in the soil for so many years.
Bad soil drainage facilities and cooler temperatures between 50 -70F result in the spread of infections—in various crops and weeds, including tomato plants. Pepper and eggplants can be destroyed due to the infection.
The infections affect the oldest leaves and turn the color of the leaves, including their margin, to yellow. You can also notice discoloration and lesions of dead tissues in the stem. This infection is enough to destroy the roots of the plant and results in the death of the plant.
Fusarium Crown and root rot cause stunted seedlings, root rot, wilting, and discoloration of the stem, ultimately killing the plant.
Rarely is there any treatment for the disease? It is better to plant a resistant variety to the disease. You can refer to the listed varieties on Cornell University Vegetable Website. For planting tomatoes in greenhouses, sterilize the soil before planting.
Pull the infected plant from the roots and dispose of them. Do not use them as compost in your garden to reduce the risk of spreading the infection.
Oidium neolycopersici causes Powdery Mildew which mainly impacts leaves. It turns the leaf color yellow, making it dry and causing necrosis and defoliation.
Dead tissues on the lower and old leaves are also found. They do not infect stems and fruits, but 50% of the crop can be destroyed due to the fungus.
Solanaceae family crops and weeds like tomato, potato, pepper, and eggplants are infected due to the fungus. The ideal temperature for the infection is 60-77F, and a humid climate also encourages powdery Mildew.
Planting resistant varieties like ‘Geronimo F1’, ‘Granadero F1’, ‘Massada F1, and ‘Striped Stuffer’ can reduce the disease risk. The use of fungicides, neem oil, and Bacillus pumilus can help to prevent the disease.
Septoria Leaf Spot
Septoria lycopersici causes Septoria Leaf Spots, also known as Leaf Canckers. It infects tomatoes and other Solanaceae families like potatoes, pepper, and eggplants.
The disease can infect plants at any stage of their development. But mainly older leaves are impacted when the plant is setting fruits on it. Small circular water-soaked spots are formed on the older leaves.
After some time, the spots enlarge and coalesce. The disease forms pimple-like structures which are dark brown in color called pycnidia. This helps to distinguish the Septoria leaf spot from Early Blight.
The spores of the infection are spread in the rain, wind, insects, and gardening tools. Always clean and disinfect your gardening tools before and after use.
The spores can stay on the debris of the infected plants. Always clean your garden at the end of the season and discard all the infected plant debris thoroughly to reduce the risk of disease spread.
Remove the infected leaves and dispose of them, maintain good airflow, and keep proper mulching. The application of fungicides helps prevent infection.
Southern Blight
Southern blight is caused due to Sclerotium rolfsii fungus. Due to its resting structure, it can stay in the soil for longer. The ideal temperature for the disease is above 85F.
Lesions on the steam or near the soil line are formed, which develops lesions and results in wilting of the plants and spreads rapidly.
Mycelia white mats are developed on the stem and in the adjacent soil.
Rotation to non-host crops like corn, sorghum, rice, or small grains for a couple of years helps to prevent the disease.
Pull and destroy the infected plants and do not use them as compost. Simply burn and discard the infected plants.
Keep the soil surface dry to reduce the risk of spreading the disease.
Verticillium Wilt
The disease is caused by Verticillium dahlia and V. albo-atrum.
There is hardly any treatment for the disease as it survives in the soil because of its resting structure and can infect many plants and crops.
The infection turns the color of the leaf to yellow in its V shape, then turns brown, and finally results in the death of the leaf, which leads to sunscald on the tomatoes.
The production of fruits is mainly impacted due to the disease, but the plant may not die.
It is very difficult to differentiate between the Verticillium and Fusarium wilt. Only a lab test can tell the difference.
Ensure to clean and disinfect the gardening equipment and tools between the pants and rotating crops to avoid spreading infection.
Maintain a good drainage facility of the soil, and plant the resistant varieties of the tomatoes with VF indication in the plant description. It is resistant to both Verticillium and Fusarium wilt.
White Mold (Timber Rot)
Sclerotinia causes White Mold, an uncommon but very severe disease for tomato plants and affects rotten flowers falling on the plant’s stem.
This disease is also known as Timber rot, as water-soaked lesions are developed on the stems that dry out and appear bleached.
It possesses a resting structure, due to which it can survive in the soil for many years. The spores of the disease are formed in cooler climates and spread mainly by wind.
Ensure maintaining limited soil moisture by using drip irrigation. The spores of the fungus are less likely to develop in dry soil.
Tomato Diseases Caused by Water Molds
Water Mold is a type of fungi as well as Oomycetes. They possess destructive pathogens dangerous to tomato plants.
Late Blight
Phytophthora infestans cause Late blight in tomatoes and potatoes. It is a very dangerous pathogen that resulted in Irish potato famine. Millions of people were killed due to the infection.
The ideal temperature for the occurrence of the disease is 60-78F. It can occur in 10 hours in a high-humidity climate.
Older foliage develops small oily dark purple spots which are round and brown and can increase up to half an inch in diameter. Large spots are more prone to forming concentric rings. Water-soaked leaves are the targeted leaves.
It results in the death of the leaves and the spread of the disease in new young stems.
The upper surface of the fruit is infected as the spores are spread from the upper side and the color of the fruit is turned to brown.
It is a highly contagious disease that can spread not only to its neighboring plants but also to its neighboring gardens.
They can survive in the debris of tomatoes: potatoes, and some other nightshade plants.
Pull the infected plants and burn or dispose of them. Also, ensure to remove the neighboring plants even if it is not show any symptoms.
Ensure not to use the infected plants as compost to reduce the risk of spreading the disease.
Phytophthora Root Rot/Buckeye
Phytophthora parasitica and P. capsici cause Phytophthora Root Rot/Buckeye. They infect the plant at the stage of development when the soil is excessively moist.
The disease is spread in hot climates. Wilting and root rot of the plants is the main symptom of Phytophthora Root Rot/Buckeye. Damping off in the seedling stage can also be experienced.
Keeping the soil moist in the right amount and consistent water supply to the plant can prevent the spread of infection.
Also, maintain a good drainage system of the soil to keep your plant stay away from infection.
Brown spots with lathery tan are formed, which is called buckeye rot.
Application of fungicides and crop rotation with cereals can help reduce the disease risk.
Diseases Caused by Bacterial Pathogens
Bacterial Pathogens mainly attack outside-grown and greenhouse-grown tomato plants. The bacteria are multiplied through infected seeds and transplants and spread through water, insects, and gardening equipment.
To reduce the risk of the spread of the disease, clean the gardening tools and equipment regularly and keep your garden insect free.
Bacterial Canker
Clavibacter michagensis subsp. Michiganesis causes Bacterial Canker and mainly attracts greenhouse plants and destroys the crops drastically.
It impacts tomato plants’ home gardens and commercial fields, especially during wet weather.
Sometimes the seeds from infected fruits are used for transplanting the tomatoes. Obviously, it would result in an infected plant.
Sometimes certified disease-free seeds can possess the bacteria, or infections are spread to the seedlings even after germination.
Two types of infections are there. The primary one is a systemic infection that badly impacts the plant.
Wilting in the plants can be seen, and the development of plants is also stopped. It prevents new growth in the oldest branch of the plant first.
The leaves start curling, then become yellow, wilt, turn brown again, and finally collapse. Sometimes green stripes on the stem are visible, which later turn brown.
In secondary infection, the root, stem, and fruits are infected. Due to this, spots on leaves and fruits are developed, also called “Birds Eye Spots.” These spots later turn into lesions.
Wet weather and gardening in damp situations attack Bacteria Cankers.
There is hardly any treatment for the infection; it is better not to plant the infected seeds. This would prevent Bacterial Cankers from occurring in your garden.
Properly sanitize the gardening tool and disinfect the greenhouses if previously impacted by the disease around ten months. You can apply bactericides in infected plants during wet weather.
The use of Copper might be helpful in secondary infection but does not show any benefits for systemic infections.
This bacteria can easily stay in tomato debris, but if it decomposes in the soil, it can never survive and get destroyed. But decomposition of all the infected plants in the soil is not that easy. So avoid planting in the same garden for at least a year.
Bacterial Speck
Bacteria Speck arises in cold weather and gets destroyed when the temperature rises 75F.
Pseudomonas syringae pv. Tomato is the bacteria that causes Bacterial specks. And it can resist the soil because of its resting structure.
The disease can stay in the debris of dead plants and on the surface of seeds.
The infection impacts tomato fruit, leaves, and stems and forms dark brown and black lesions, and its outline looks yellow halo.
Avoid overhead irrigation and use drip irrigation methods and soaker hoses for consistently watering your tomato plants. The copper spray helps to reduce the infection in the plants.
Rotation of unsusceptible crops like corn helps prevent the disease for a couple of years. The plantation is recommended in the spring when the weather warms up.
Consult your local extension office to find out the effective fungicide in your area, as some races of bacteria are now resistant to copper spray.
Bacterial Spot
Xanthomonas campestris pv. vesicatoria bacteria causes Bacterial Spots in tomato plants. It attacks mature plants and seedlings.
It is very difficult to distinguish between Bacterial Spots and specks. Only lab tests can diagnose the disease.
It continues from one season to the next season and survives in dead tissues and debris.
The infection spreads from seeds, and it is very tough to control if spread in the garden or field. Leaves of infected plants are shaded. And it mainly attacks the water-soaked leaves. You can spot spots on leaf margins because of the disease.
Cultural controls and copper spray can help to reduce the spread of Bacterial spots in tomato plants.
You should avoid overhead irrigation and use soaker hoses to irrigate the plants. Always choose disease-free certified seeds for planting tomatoes.
Rotate your crop with corn to prevent the subsequent disease with corn as it belongs to the Solanaceae family.
Diseases in Tomato Plants Caused by Phytoplasma
Phytoplasmas are parasitic and act like viruses, and are smaller than bacteria. They can only exist in live hosts.
Tomato Big Bud
Photo by Dr Parthasarathy Seethapathy, Tamil Nadu Agricultural University, Bugwood.org, via CC BY-SA.
The beet leafhopper causes Tomato Big Bud. The infected plant has large, swollen green buds that cannot form fruit. The plant appears to be bushy with small yellow-green leaves.
The Beet Leafhoppers in your garden can stress your tomato plant, reduce their capacity to produce fruit and impact their development.
Using insecticides and attracting insects like butterflies and native bees can prevent Bett Leafhoppers from existing in your garden.
Tomato Plants Diseases Caused by Viral Pathogens
Many viruses affected plants brutally damage and result in discoloration of leaves, leading to underdevelopment or slow development of tomato plants and making them inefficient in producing quality fruits.
Insects spread the disease to the tomato plants. Thus it is very important to keep your garden insect free.
Alfalfa Mosaic Virus
Image by saillog.co/AMV.html
Never plant your tomato plant near Alfalfa as the plant is more prone to get Alfalfa Mosaic Virus.
In the USA, so many Alfalfa fields are impacted by Alfalfa Mosaic Virus and are contagious. So they easily get spread to the neighboring plants.
The affected plant’s leaves molt, and their color changes to yellow. Dead tissues in a circle shape are formed on the tomatoes. The plant becomes incapable of delivering nutrients as the phloem is also destroyed and turns brown.
Alfalfa Mosaic Virus can not be treated or controlled even with insecticides or chemicals. Prevention can only save your tomato plants from Alfalfa Mosaic Virus; it is better not to plant your tomato near Alfalfa.
While planting, use silver reflective polythene as a mulch to protect your plant from Alfalfa Mosaic Virus.
If any plant is already infected, it is better to discard the plant to protect other plants from spreading the disease.
Tobacco Mosaic Virus
Tobacco Mosaic Virus is consistent in nature. They can exist for around 100 years in dried plant debris. It infests tomato plants and damages gardens, files, and greenhouses, and they can also spread from tobacco.
The TMV-infected tomato plants look stunted, leaves develop a mosaic pattern of yellow and light or dark green, and leaves have malformation and leave yellow spotting. The disease is commonly seen in young plants and fresh tomatoes available in the market.
Avoid using the infected plant as compost, as you can easily spread the disease to the rest of the plants.
Maintain proper hygiene while gardening. Disinfect all your gardening tools. Bring the disease-resistant variety seeds like “Geronimo” and “Arbason” to ensure preventive measures against TMV diseases.
Tomato Spotted Wilt Virus
Tomato Spotted Wilt Virus is a very uncommon type of Virus in plants as TSWV is also spread to ornaments.
Only in tropical areas, this disease is traced, but it is alarming the world now. Mainly new leaves are impacted due to TSWV and turn their color to brown with some dead tissue spots on them. The affected tomatoes develop ring-yellow spots on them, but you can trim the affected areas and use them normally.
The Virus is spread by insects called thrips, such as flowers, onion, and chili thrips. Infected plants should be removed immediately from the garden to reduce the risk of spreading the disease to the neighboring plants.
Keep your garden sanitized, weed free and use reflective mulches as a prevention of the disease.
Summerpick and Quincy can be planted as they can resist the disease.
Tomato Plants Diseases Due To Physiological Disorders
Gardeners often make mistakes in identifying the physiological disorder of tomato plants and infections in the plants.
Changes in Environmental conditions like climate change, changes in climate, pollution, poor care of plants, and poor watering techniques lead to physiological disorders in the plants.
Blossom End Rot
The first tomatoes of the season are more prone to Blossom End Rot. The Main reason behind Blossom End of Tomatoes is calcium deficiency in the plant.
Even if you have planted the tomatoes in the most fertile soil, BER can happen in the tomato plants. It mainly happens because of improper moisture.
Blossom End Rot usually happens in drought conditions and produces lesions forming concentric rings on the surface of tomatoes.
You can prevent it by providing proper support to the plant before the roots of the plants are developed.
Also, do not walk or cultivate in nearby areas of the tomato plants. This would help not to stress the root system.
Mulching can maintain adequate moisture in the soil, and drip irrigation and soaker hoses can also ensure the adequate water supply in the correct way.
Catfacing
When tomatoes form puckered surfaces and distorted shapes with brown line-type scars, it is the symptom of a cat facing disorder. The disorder can be minor or large.
This disorder is common in large-sized tomatoes and the earliest harvest of the season.
The disorder happens when flowers are unnecessarily stressed while blooming, sudden cold or hot temperatures shock, and too much nitrogen content in the soil.
If your tomatoes are facing this disorder in every crop season, choose the resistant varieties of tomatoes like Countil, Duke, and Walter.
You can easily prevent the disorder by watering your tomatoes in the right amount and in the right way, not using excessive fertilizers, and stop pruning.
Fruit Cracking
Fruit cracking and catfacing look very similar to each other. But both disorders happen because of different reasons.
Suddenly, when plenty of water is delivered to the plant, the developing and developed fruits crack.
This happens due to heavy rainfall or overwatering in the plant. The roots deliver too much water to the plant and the flesh of the fruits swells. As a result, the skin of tomatoes is cracked.
Growing resistant varieties like Marglobe and Daybreak can prevent the disorder.
Consistent water supply to the tomato plants and maintaining proper soil drainage facility by mulching can prevent the fruits from cracking.
Preventing Tomato Plant Disease and Saving Infected Plants
It is well said that prevention is better than cure. I always take preventive measures to make sure my tomato plants won’t catch any disease.
The below tips can help you prevent diseases in your plant:
Do not plant your tomatoes in the same place each season. Keep rotating your crop and this helps to save them from different pathogens already present in the soil.
If you have traced any infected leaves in your tomato plant, pin them off and discard them immediately. This prevents the spreading of infections.
Avoid working in the garden while the tomato foliage is wet; otherwise, it would spread pathogens from one plant to another.
Choose the variety of tomatoes that are more resistant to diseases at the time of seeding your tomatoes.
Dispose of all the diseased tomato plants and do not use them as compost to prevent the spreading of disease in your uninfected tomato plants.
When you plant to keep the same tomato plant for the next season, ensure that the plant is free from any disease.
Maintain around 18-24 inches of spacing between each plant to maintain good airflow.
Mulching your tomato plants keeps the soil moist adequately. You can use leaf mold, compost, or straw to prevent soil fungus during excessive rain.
Keep tomato plant foliage dry. You should avoid overhead irrigation; instead, you should use hand irrigation or Soaker hoses to water the tomato plants, and water directly reaches the root of the plant. Thus wet foliage is not experienced by the plants and the risk of the fungus spread is also reduced.
If you are growing tomatoes in pots or containers, disinfecting and cleaning the pots is a very important step.
Final Thoughts
Various types of tomato diseases can destroy the entire plant. It is very important to take preventive measures before and during the plantation process so that your tomatoes never get attacked by any disease. Research which disease is common in your area and choose the resistant variety of tomatoes to plant them.
Many of the diseases are contagious in nature. If you are discarding the infected plant, never use them as compost; simply dispose of them. This would reduce the risk of the spread of infection in other plants as well as in your garden.
By following all the above preventive measures, you can keep your tomato plant free of any infection and disease and get rewarded with fresh and juicy tomatoes every harvest.
Diagnosing and Controlling Fungal Diseases of Tomato in the Home Garden, Andy Wyenandt, Extension Specialist in Vegetable Pathology, Rutgers University, Peter Nitzsche, Agriculture and Natural Resources Agent, Morris County
When you see curling tomato plant leaves, you should know it’s a sign of sickness. It reflects the state of distress of your tomato plants and can happen for several reasons. It may be your watering style, soil quality, extremely low or high temperature, or sometimes pests attack on your tomato plants.
If you take the correct measures to take care of your plants, like using appropriate fertilizer, rich soil mix, watering them timely, keeping the soil moist, etc., you can save them and give them a healthy life.
What Does Tomato Plant Leaf Curl Mean and Its Types?
Many challenges are faced while planting tomatoes as they are very delicate and more prone to getting infected and caught by diseases and pests.
Non-heirloom varieties of tomato plants are more prone to get infected. When their leaves start curling, it means they are infected, and it is time to cure your plant to save them.
But let me make it clear that every time curling is not a negative thing. This article has covered how to track when curling is a bad sign for your tomato plants. (1)
Here are the the types of curling seen in Tomato plants:
Leaves Curling Up
Almost 98 percent of the time, tomato leaf curl due to sudden weather changes, like exposure to excessive heat due to increased temperature, water deficiency, or increased wind.
It is the inherent capacity of plants to curl up their leaves in order to protect themselves from environmental stress.
Leaves curling up is very general for tomato plants; they automatically get into a normal state when the environmental stress becomes normal.
Leaves Curling Down
When you notice the leaves of your tomato plant are curling down, then this is alarming because it is a sign of the root rot of your precious tomato plants.
The leaves start curling down when your plant is overwatered, and the drainage system of the soil needs to be better.
In this situation, the roots try to hold the pressure of water to save the plant. Due to this, the root starts decomposing and becomes inefficient in delivering adequate water and nutrients to the plants, leading to the curling down of leaves.
To fix this problem, wait for your soil to be moist only up to 2.5 CM before watering them again and arrange a better soil drainage system.
Leaves Curling at the bottom
Curling leaves at the bottom is a symptom of a deficiency of micronutrients. This happens when the soil loses its nutrition, and adequate nutrition is not delivered to the plants.
You can also track this problem when yellow leaves are seen on the plants.
You can quickly fix this problem using Azomite clay, which contains the necessary nutrients. The use of rich soil mix also helps to reduce this problem. Compost and Trifecta+ are safe to use and help enhance soil nutrition without damaging the plant.
Leaves Curling on the Top
Leaves start curling on the top due to the attack of the pest or bug. The leaves would be small and curled on the top, and this disease is called a curly top virus.
This disease stops the plant growth, but fortunately, it does not spread to other plants.
If the plant has already produced fruit, it grows to maturity. It is always advised to dispose of the plant after the harvest and use that space to plant new tomato plants.
Sometimes, it takes a lot of work to resolve the top curling issues.
Causes of Tomato Plant Leaves Curling
The tomato plant is very delicate, and harvesters face plenty of challenges while cultivating tomatoes, and leaf curling is one of those common and major problems.
This leaf roll situation is not always dangerous. It happens due to various reasons, and the distressed environment is one of those reasons.
This problem is not that tough to be resolved when identified.
When the leaves curling is due to environmental plants, your plants return to healthy conditions when the environment becomes normal
Besides environmental stress, if the leaves start curling, it becomes damn difficult to save the plant.
But if you can detect the problem at an early stage, you will be able to solve and maintain the health and long life of your tomato plants.
Here are some other causes responsible for the tomato leaf curling.
Incorrect Watering
We all know that watering is very important for any plant and tomato plants are no exception. It is very important to water your tomato plants in the correct amount as both overwatering and underwatering are dangerous for the plant.
Due to underwatering, plants won’t get enough hydration, and overwatering results in root rot.
The leaves curl inward when you don’t water tomato plants correctly.
If your plant is overwatered, it will give many other signs before curling up the leaves, but under-watered tomato plants are more prone to get their leaves curled as enough water is not supplied to the plant.
The ideal temperature for tomato plants is 21-26 degree Celsius. When the temperature goes beyond the ideal temperature during the summer, the plant goes through underwater stress. This happens when the temperature rises and plants are more exposed to the sun.
Stomatal transpiration is caused due to excessive heat, and leaves start curling inward to prevent more water loss and protect themselves from the sun. You can also have this problem when your plants don’t get adequate water.
To save your plant from excessive heat, you can create physical barriers with the help of clothes and arrange shade for your plants in extreme heat.
If you have potted tomato plants, bring them indoors during excess heat. With the temperature fall, the leaves start getting normal automatically.
Too Much Nitrogen
We use Nitrogen-content fertilizers when we first plant tomatoes. Fertilizers containing nitrogen, phosphorus, and potassium (18:18:21) are best recommended at this stage.
But at the fruit-producing stage, only phosphorus and potassium-contained fertilizers should be used as these are the nutrients tomato plants need for flowering and fruiting.
Using nitrogen at this stage leads the leaves to curl inward, as the plant focuses more on producing leaves rather than fruits.
If your tomato plant’s leaves are curling due to excess nitrogen, it can be naturally resolved over time.
In this situation, always opt for the right and good fertilizers and avoid overuse of nitrogen-rich fertilizers to maintain a good nutrition level in the soil.
Excessive Pruning
Anything beyond the limit causes the worst impact only. The pruning of tomato plants is good, but only if it is limited. The problem of tomato leaf curl is more common because of excessive pruning.
The plants face more direct sunlight after pruning which causes heat stress to the plant, and the curling of leaves happens due to dehydration, as discussed before.
You should do very little cutting of leaves from the lower and upper stems if you have planted indeterminate plants, as it improves airflow and growth. But never opt for pruning of determinate tomato plants.
If your plant is going through the stress of pruning, just leave the plant as is and let it recover itself. With the growth of new leaves, this problem will resolve itself.
Transplant Shock
We can also notice the tomato leaves curling after transplanting (due to transplant shock).
If these plants are transplanted, the chances of root damage are high. The damaged roots become inefficient in delivering adequate nutrients and water to the plants; you notice wilting and yellow leaves.
When plants go through transplant shock, we should be calm and allow them at least two weeks to recover on their own.
Herbicide Exposure
Tomato plants cannot bear herbicide exposure as it causes leaves to curl when it comes in contact with the plant.
In this situation, leaves curl downward, which is a dangerous sign for the tomato plants as it causes severe loss to the plant, and there is no remedy to overcome this leaf curling situation.
Plants can still grow with little damage, but the yield is negatively impacted. And if the plant is heavily impacted by herbicide exposure, they do not even survive.
But the best part is that this problem is very rare; therefore, you should refrain from using herbicides in your garden.
Tomato leaves also curl down because of various diseases and fungus infections.
Viral Diseases
The disease is a curse for any plant, and when it comes to leaf curling causing due to viral disease, it feels like a nightmare for any harvester.
When the tomato leaves turn yellow or pale green at the edges and start to curl upward, it is a sign of infected plants due to a viral disease called tomato yellow leaf curl virus.
The newly grown leaves turn into a cup shape and cause the leaves to curl upward. This stress is caused when the viruses have already attacked the plant.
The other reason is the whiteflies, whichare the enemy of tomato plants, spread the disease all over the plant in your garden. The plant’s growth is inhibited, and fruit production is also reduced.
You can use horticulture oil and insecticidal soaps to control the whiteflies, which in turn helps reduce the disease’s spread.
When the fruit color changes to brown, and you notice spotty leaves in the plant, it is a sign of tomato mosaic virus.
Due to the spread of this virus, the leaves curl inward, and newly grwing leaves grow small in size. This virus is transmitted by aphidswhich are also known as plant lice.
Unfortunately, there is no treatment to save the plants when infected due to the viruses. The only way is to dispose of the infected plant.
The only mantra to save your plants from these viruses is to keep your garden weed free, as they are one of the main reasons for the transmission of viruses in tomato plants.
How To Save Your Tomato Plant Leaves From Curling?
Tomato plant leaves curl due to various reasons and it is a sign which shows that the plant is sick. It happens due to environmental stress, wrong choice of fertilizers, watering issues and many more. Sometimes the plants die even without producing the fruits.
Firstly we need to figure out the number of leaves curling, curling direction, is it getting recovered on its own within a few days, whether new or old leaves are curling and even the fruit is also getting any adverse impact at the same time. After giving a close observation, you can take appropriate action against it.
We can overcome some of the curling reasons by using certain tips which are discussed below in brief.
Save them from Excessive Heat and Stress
Tomato is a warm environment-loving plant, but when the temperature goes beyond ideal, the leaves start curling inward due to excessive heat. It happens especially in summer when the temperature goes beyond 26 degrees Celsius and plants struggle a lot for survival.
Due to excessive heat, underwater problems arise, and plants do not get enough water. Due to lack of water, the leaves curl down to protect the plant from excessive heat.
Leaf curl also happens due to loss of soil moisture, sudden heat waves, and other environmental stress.
Actions to be taken:
Water your plant properly to overcome heat stress. Before watering, always measure the soil moisture. If it’s dry till 2.5 inches deep, then it’s right to water your plants.
Avoid frequent watering during the rainy season as it may cause root rot which leads to leaf curling.
Create some physical barriers with clothes to provide shade to your plants if it is going through heat stress. You should keep potted plants indoors during excessive heat.
Short-term environmental stress won’t harm the plants, and they recover naturally when the environmental condition is normal.
Use fertilizer containing a good mixture of nitrogen
Using good fertilizers for tomato plant cultivation is an excellent option. Always choose fertilizers containing nitrogen, phosphorus, and potassium in the ratio of 18:18:21.
You should stop the use of nitrogen at the time of fruit producing season. Otherwise, lumpy, thick, and bad-quality leaves would develop on the plant, and curling of leaves happens.
I always recommended limited use of the best fertilizer for tomato plants.
Water Them Well if Pruning
Over-pruning tomato plants can leave the plant in danger; therefore, you should always avoid over-pruning.
Plants get energy from their leaves, and when they are pruned, they feel an excess loss of energy, and the growth and longevity of the tomato plant are compromised.
If you have already over-pruned your tomato plants, water them in adequate amounts to keep them hydrated and allow at least two weeks for the plant to recover on its own.
Minimize transplant shock
After germination and seedling, the next process is transplanting the tomato plants. Due to transplanting shock, the delicate roots of tomato plants get damaged, and they are unable to supply proper nutrients and water to the plant. As a result, the leaves start curling up.
Points to remember:
The plant recovers from transplanting shock on its own for almost within two weeks.
You should water the plant properly for its speedy recovery.
Don’t rush hardening off your tomato plant. Slowly and gradually, bring them into outside environments after seedlings.
Create physical barriers with the help of clothes to provide shade.
Prevent Exposure To Herbicide
Tomato plants cannot bear herbicide exposure. It causes curling of tomato leaves when it comes in contact with the plant.
In this situation, leaves curl downward, which is a very dangerous sign for the tomato plants as it causes severe loss to the plant, and there is no remedy to overcome this leaf curling situation.
Plants can still grow with little damage, but the yield is negatively impacted. And in case the plant is heavily impacted with herbicide exposure, they do not even survive.
But the best part is that this problem is very rare. It is best not to use herbicide in your garden. Tomato leaves also curl down because of various diseases and fungus infections.
Use Weed Killers
If you are using manure and compost for your tomato plants and at the same time curling tomato leaves problem is also identified, then it must be because of the use of weed killers in the manure and compost used.
Always use good quality manure and compost and try buying it from a trusted source. You should avoid the use of weed killers near tomato plants. Plants affected due to this die without even producing fruits.
Identify and Remove the Leaves (Plant With Viral Disease)
Leaf curl is a dangerous disease for tomato plants. The edge of the leaf becomes pale yellow or green and curls. The virus forces the leaves to curl upward and form a cup-like shape when stressed.
Whiteflies are the main reason behind the cause of this disease in tomato plants or even in any of the plants.
The tomato leaves are rolled inward due to Tomato Mosaic Virus. They impact the leaves by forming spots on the leaves, and fruits turn their color into brown from the inside.
If you have figured out this virus in any of your tomato plants, pull the plant and destroy or dispose of them.
Do not even use them as compost, or the disease would spread in your whole garden.
Summary
Curling of tomato leaves is a major problem that can be taken care of easily if identified early. So always watch your tomato plants to detect any such issues.
With the above-discussed tips and trips, you can keep your plant long & healthy and save them from curling.