How To Plant And Grow Tomatoes?

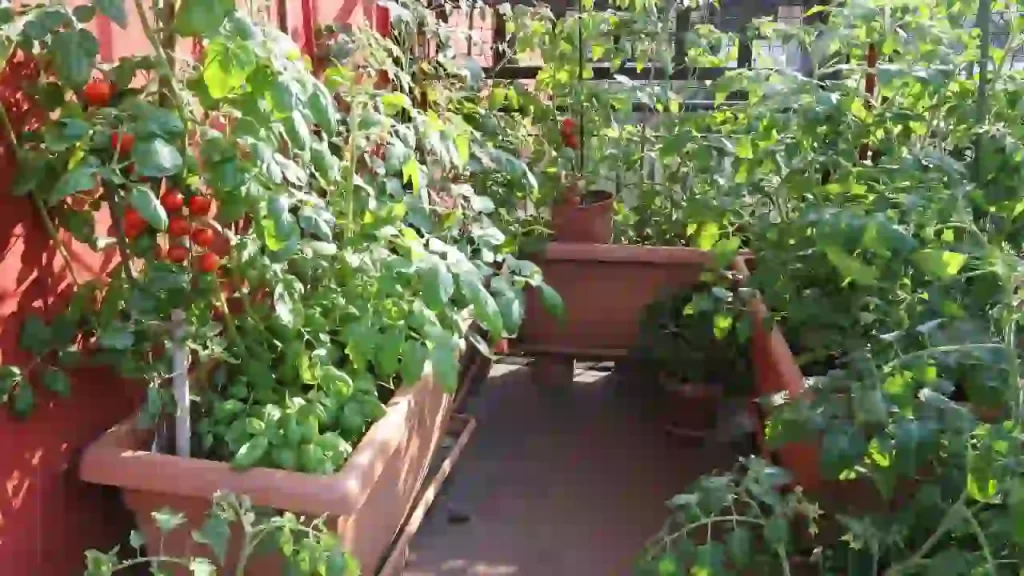
Are you planning to grow your tomatoes on your own? Then it is one of the best choices as tomatoes purchased from stores doesn’t seem to be so delicious and full of flavors. 

Nature has given us a wide variety of tomatoes with different shapes, sizes, colors, and flavors. You can opt to grow beefsteak tomatoes or cherry tomatoes, according to your choice, and enjoy them.

Short answer: It is easy to grow tomatoes for tomato growers if they keep a few points noted before planting tomatoes:

  • Choose a sunny location.
  • Deeply dig the soil while transplanting (it enables your plants to develop a strong root system).
  • Add fertilizers and water in required amounts and support your plant with the help of stakes or cages.

I have briefly explained the ways of planting and growing tomatoes in this article.

How To Plant Tomatoes?

How To Plant Tomatoes

Choose The Right Spot

Tomato plants love to grow at a place where they can get full exposure to sunlight for at least 6-8 hours per day. If you plan to grow them in a pot, container, or garden bed, try to locate them in an area where they can receive direct sunlight.

But you can initiate the germination process of tomato seeds indoors 4-6 weeks before the end of frost. After the danger of frost has passed, you can bring your plant to the outer environment. You need to be extra cautious about spacing. 

For a determinate variety of plants, at least 24 inches of distance is mandatory, whereas 36-48 inches are important for indeterminate plants.

Indeterminate plants continue to grow till frost begins. Rows distance must be at least 36 inches. 
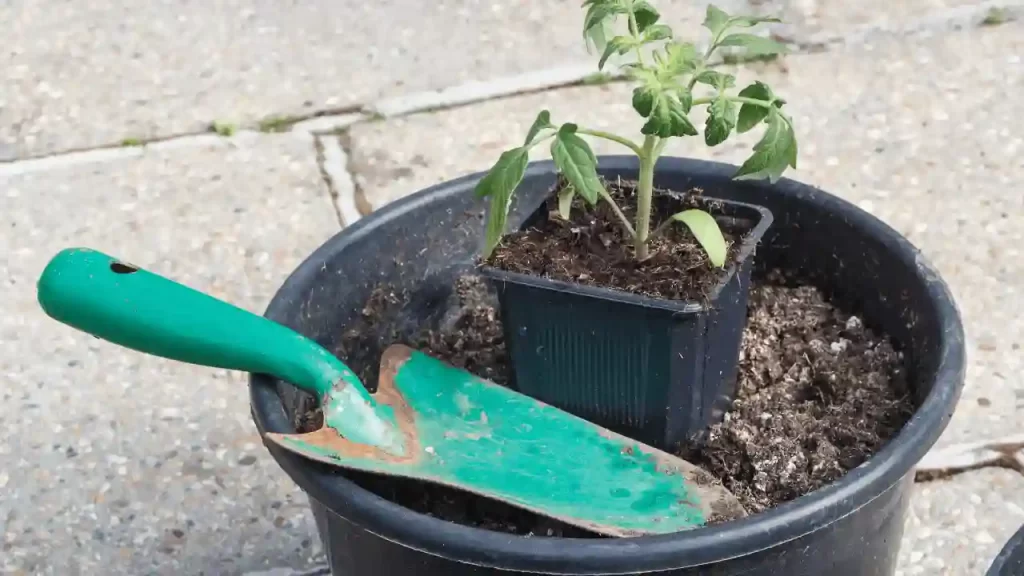
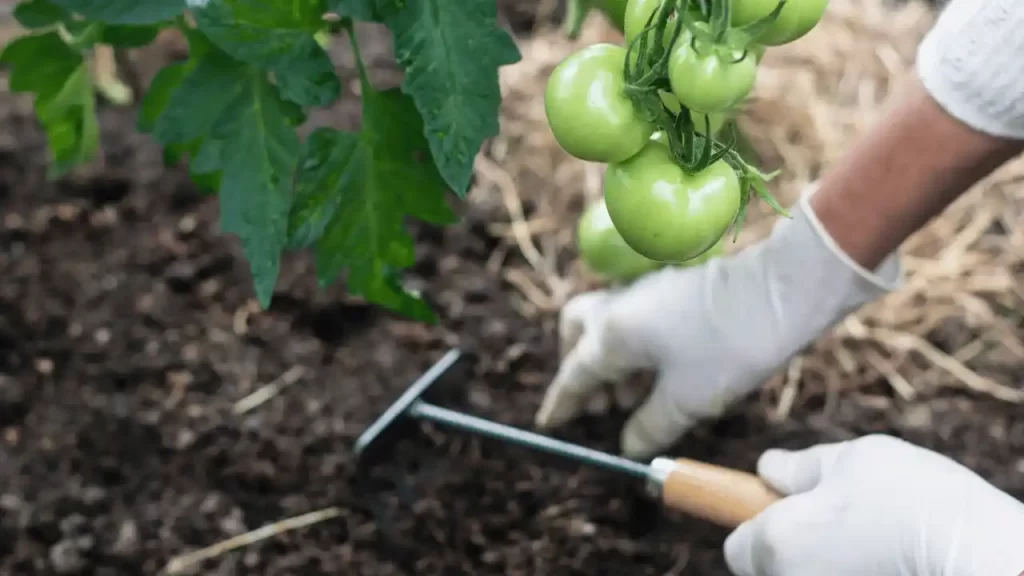
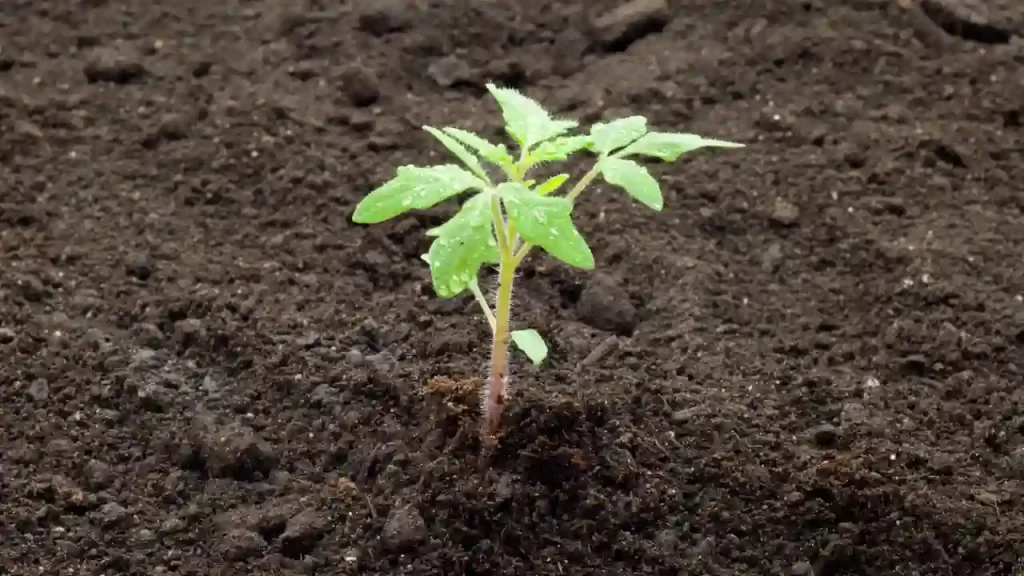
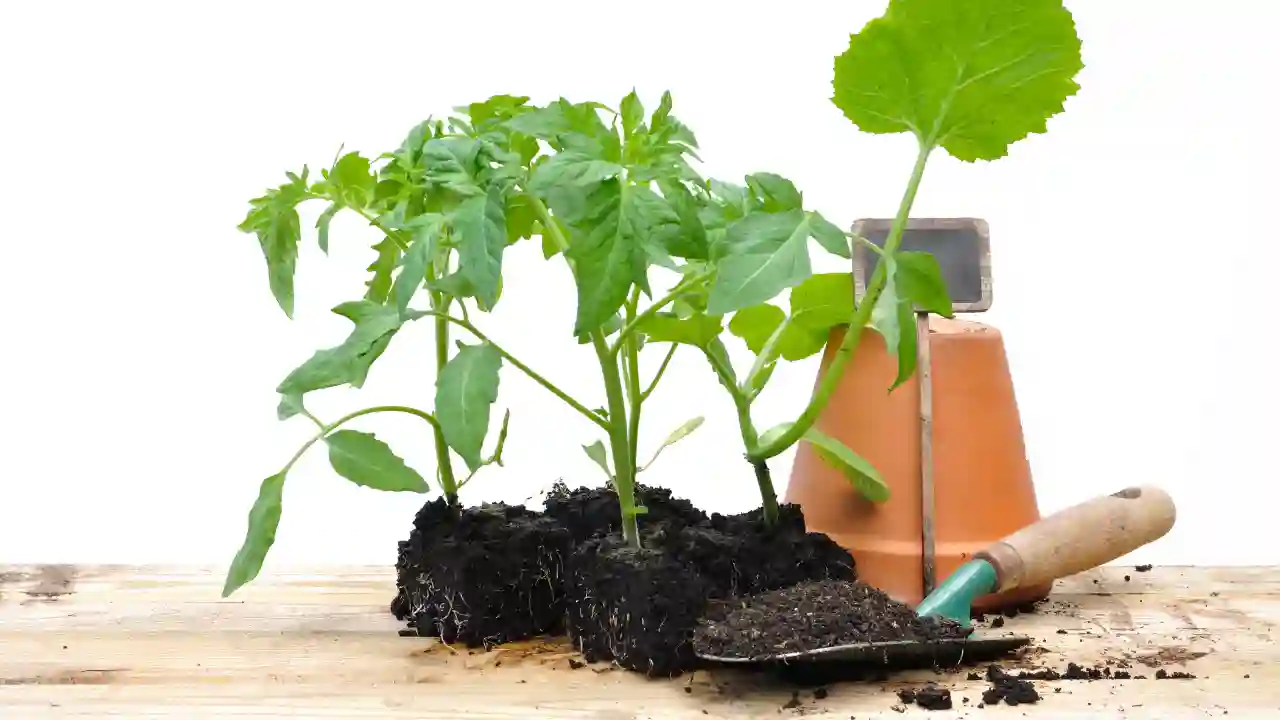
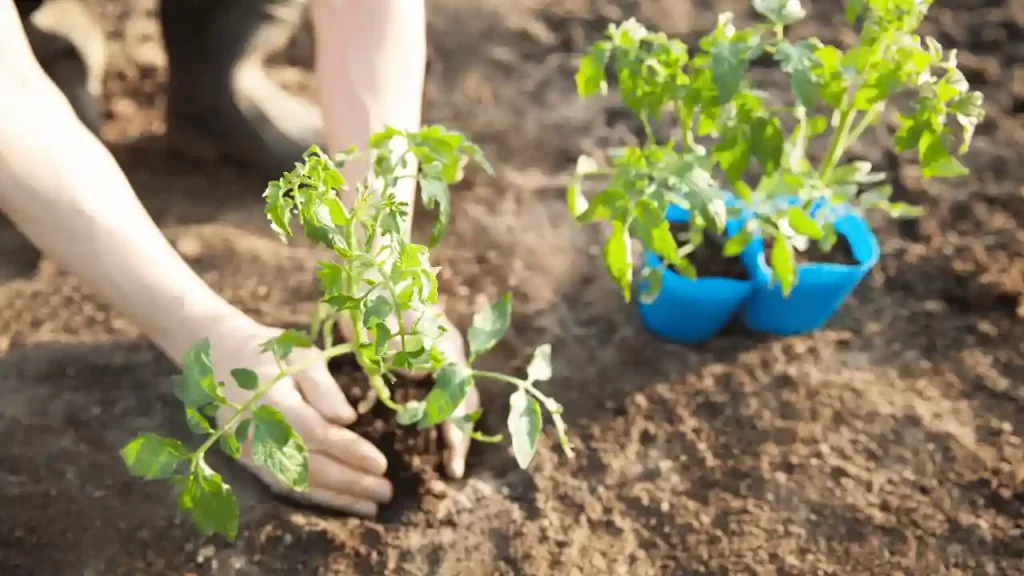
Dig Deep

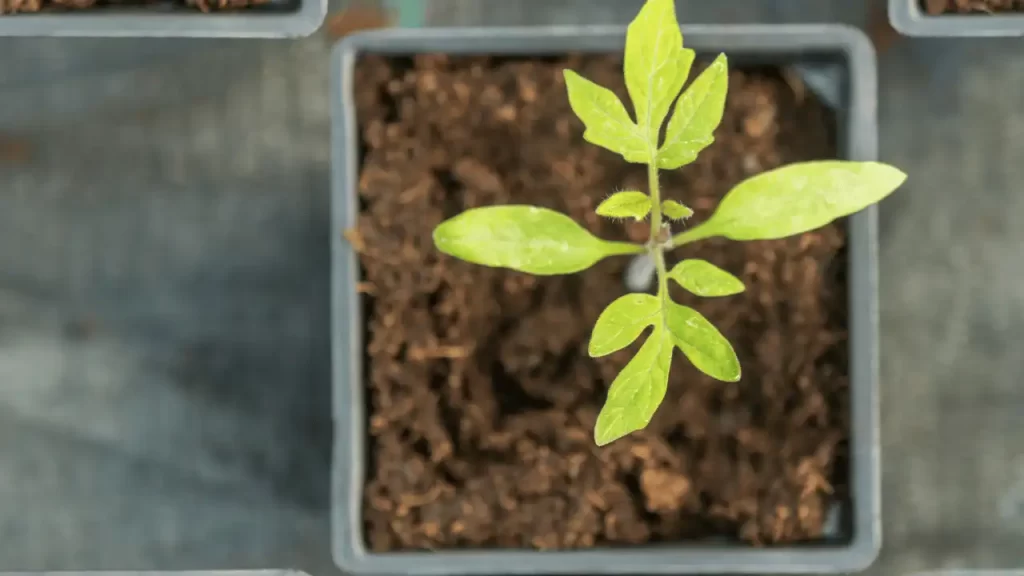
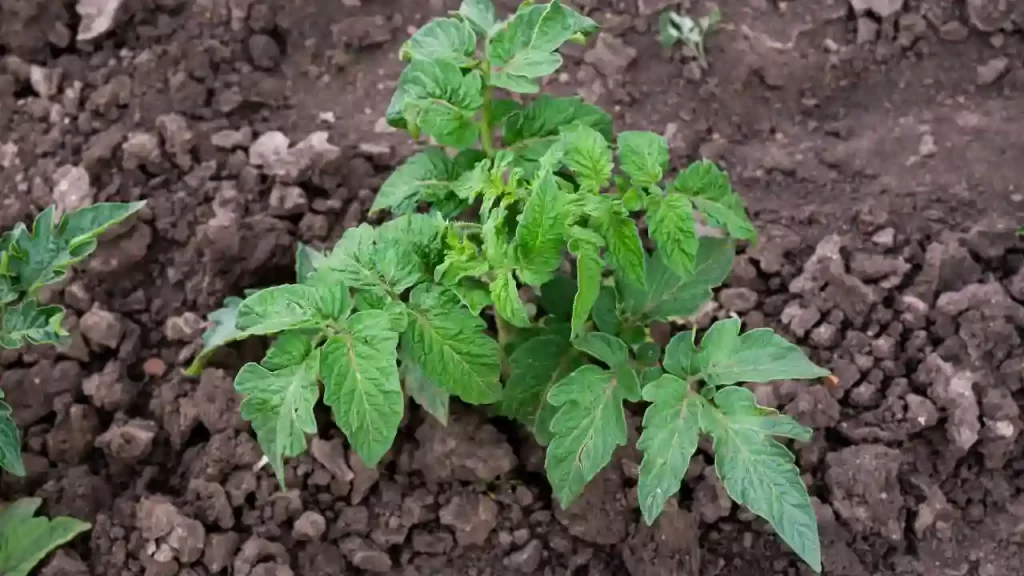
Deep digging of tomato seedlings is quite important to develop a good plant root system.

Remove the lower leaves of the tomato seedlings and place the root balls in the hole so that only the upper leaves of the seedlings remain above the ground.

It helps the plant generate extra roots and prevent them from growing leggy, and the roots become more efficient to uptake water and nutrients. 

Add Fertilizer and Water

It’s best to do soil tests and verify if any fertilizers are deficient; if such deficiency is traced, add some general slow-release fertilizer to the planting holes.

After this process, water them properly. 

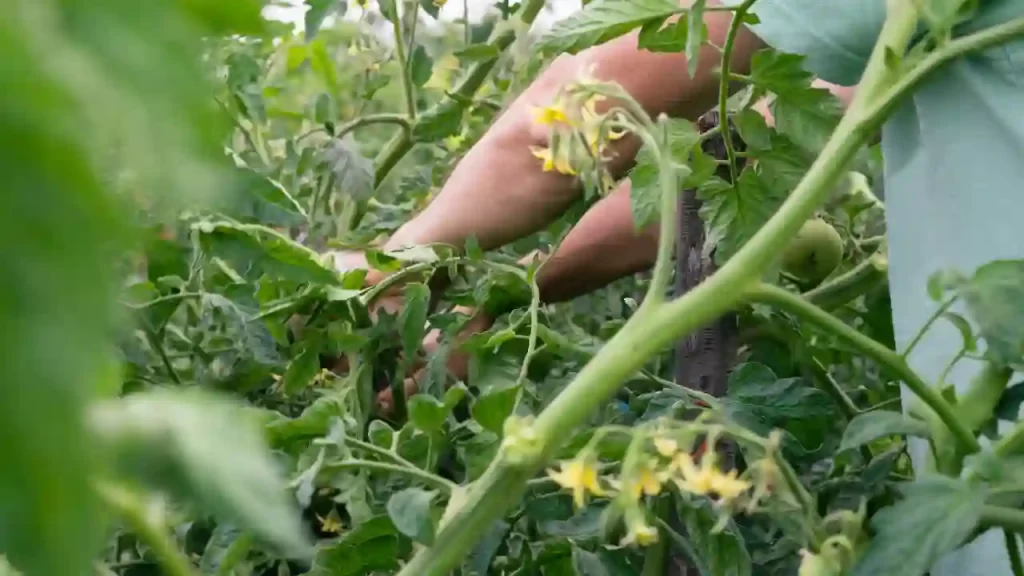
Support Your Tomato Vine Plant

Supporting your tomato plants while the growing stage helps them prevent breakage, maintain good air circulation, and maximize space.

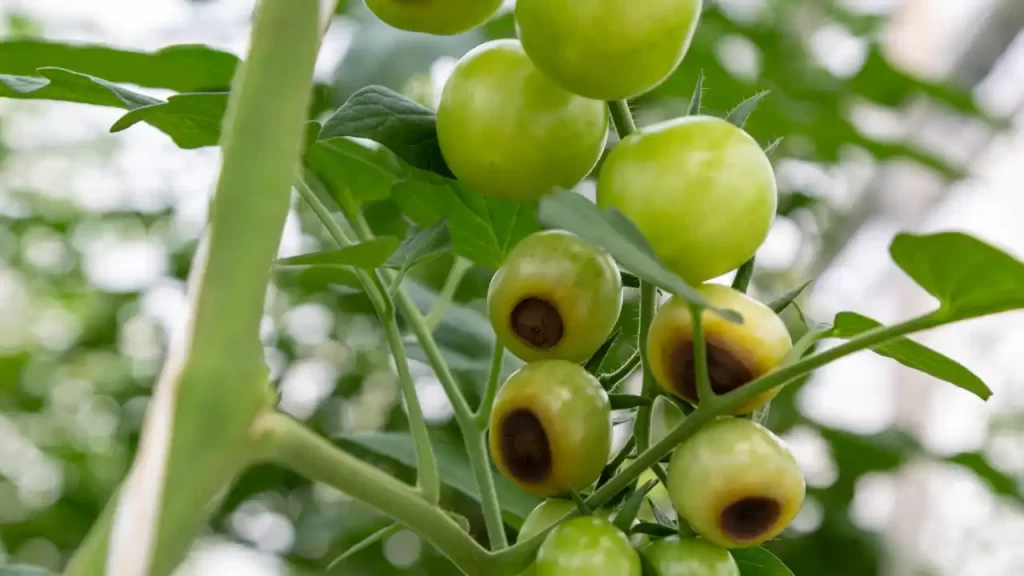
It also prevents the plant’s leaves and fruits from touching the ground, which in turn results in preventing blossom end rot and makes your plant less prone to any diseases.

So you must support your tomato plant, especially the vine variety, just after planting them. You can use a stake, trellis, and cage to support them.

This step is unnecessary while growing a determinate variety of tomato plants as they only grow short.

This is how you should support your young tomato plants:

  1. Choose 5-6 feet tall tomato cages to support your plant. Place the cage around each tomato plant to prevent uprooting during a storm. Or you can also use stakes to support your tomato plants. 
  2. Use a tall stake to support the plant until it is fully grown. 
  3. Place an 8-foot stake into the ground, and keep 12 inches away from the ground and 4 inches away from the growing plant. 
  4. Use a soft cloth or twine to tie the stake to the twin. 
  5. Ensure that the stems are not damaged at all. 
  6. Regularly check your plant to ensure that ties are not too tight and not cutting the stem of the plants.

How To Successfully Grow Tomatoes?

How To Successfully Grow Tomatoes

Most gardeners are well aware of how to grow tomatoes, but growing quality tomatoes with more flavor, tasty and juicy is not a cup of tea. 

I have discussed this process step by step to meet the requirement of growing extraordinary tomatoes.

Choose the Right Variety

Nature has blessed us with various tomatoes, enabling us to get tomatoes in different shapes, sizes, and colors. Some choose the variety according to the climatic conditions in their area.

Some of the varieties are more heat or cold-tolerant. You can seek the varieties suitable in your area from a local gardener or USDA National institute of food and Agriculture. Tomatoes are mainly categorized as Determinate and Indeterminate varieties.

Determinate tomatoes variety are also referred to as bush tomatoes. They grow up to 3-4 inches tall and produce fruit only once during a growing season. They are also compact plants and die after making fruit for once. Thus it would be a great choice for container tomatoes.

Indeterminate tomatoes grow till the beginning of the frost. They can produce more delicious tomatoes and produce fruit till they are alive. Beefsteak, big boy, Brandywine, Sungold, and heirlooms only fall into this category. 

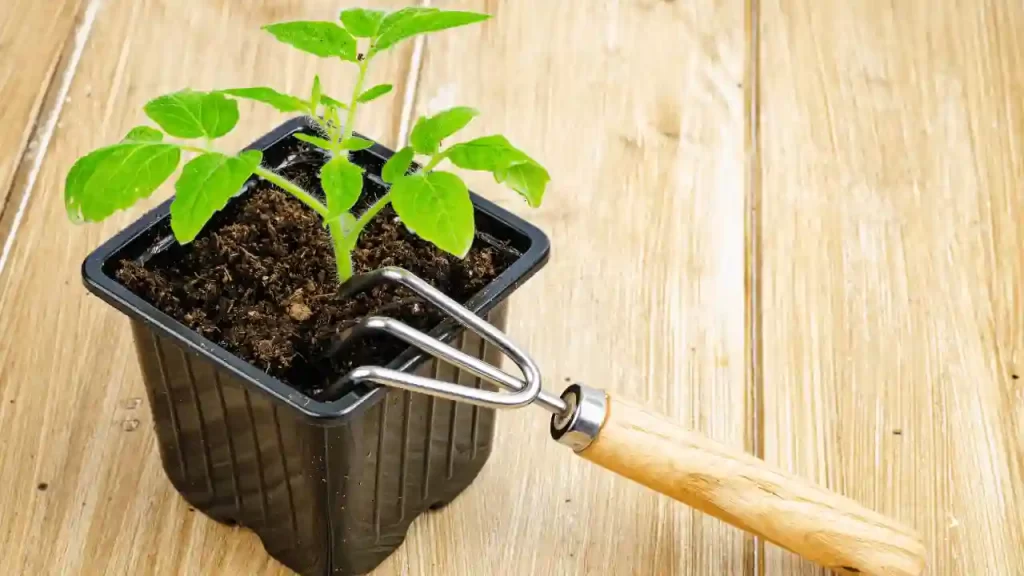
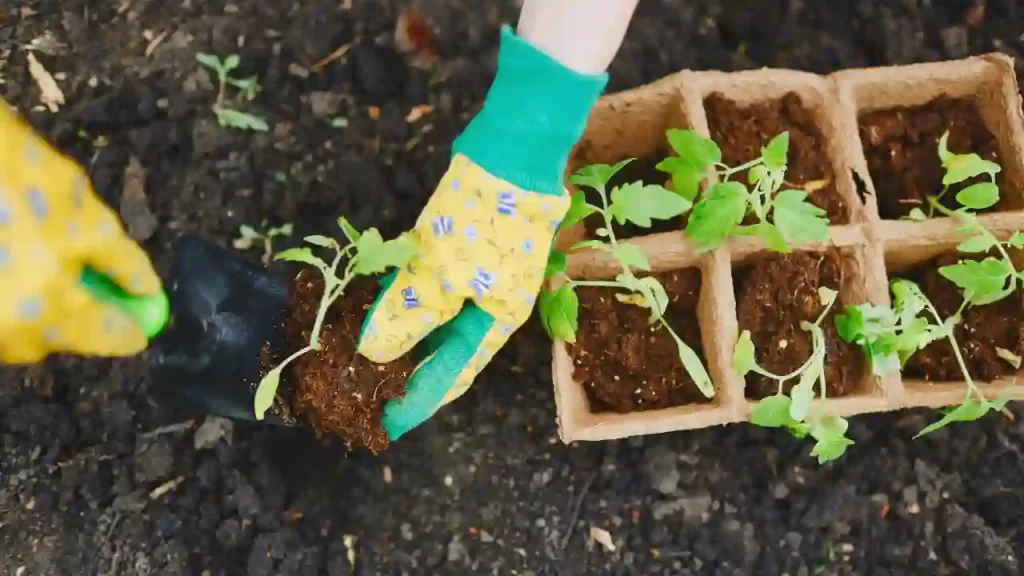
Planting Tomato Plants

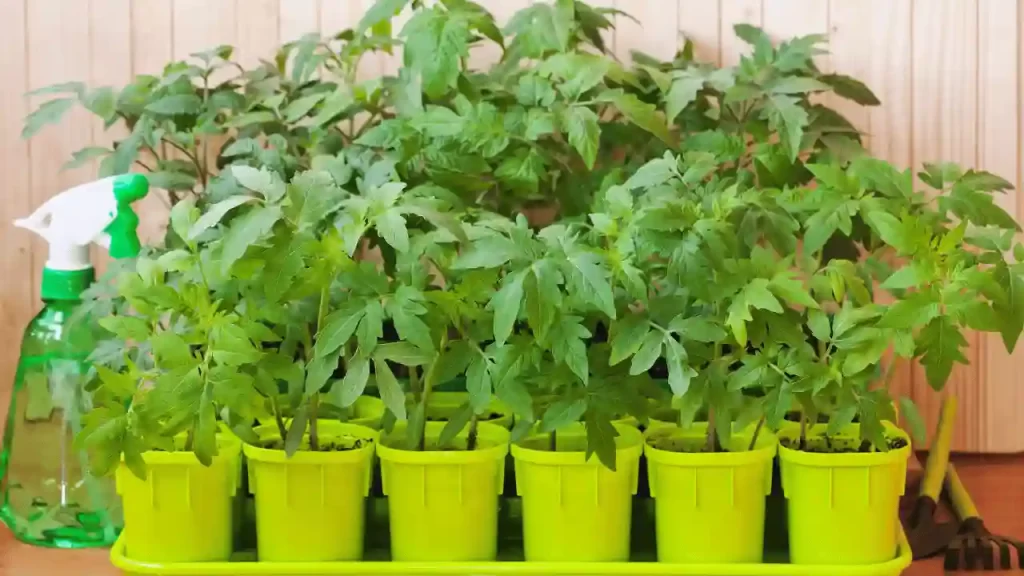
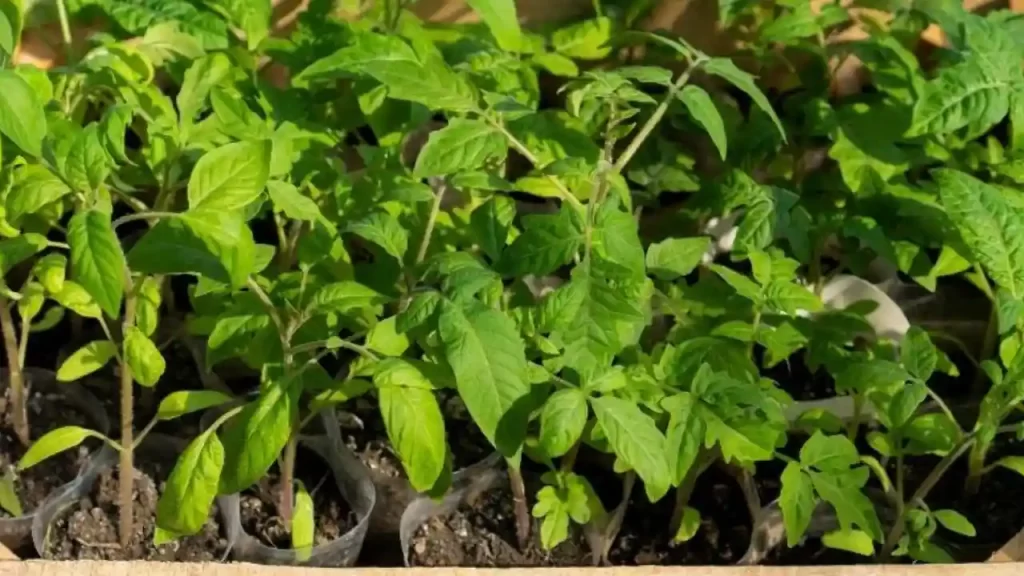
Choose a sunny area and plant your tomato seeds to ¼ inches deep and 1 inch apart in flats.

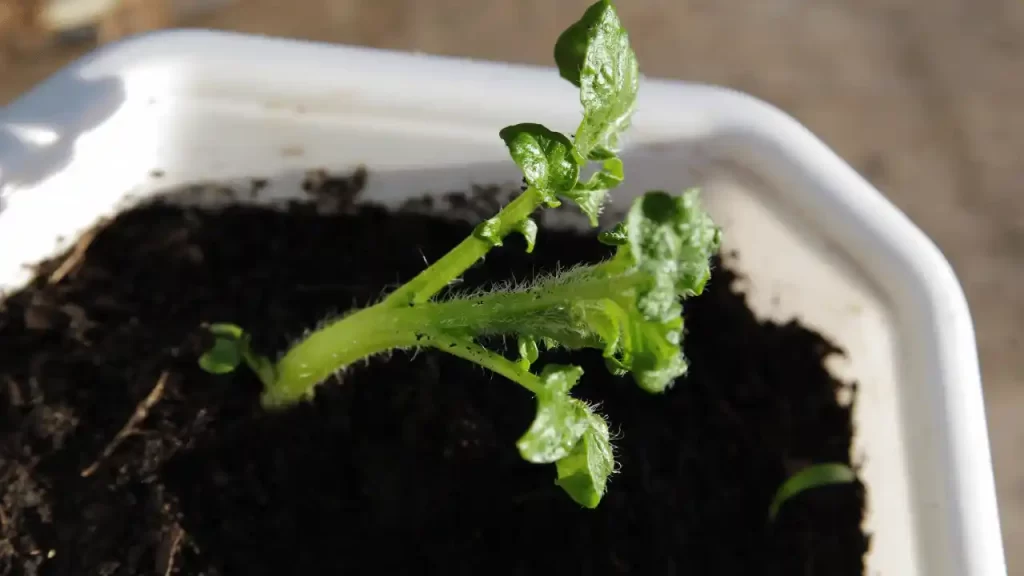
When your seedlings generate their true leaves, take a plastic cup and insert its stems deeper than before.

This helps your tomato plant to develop a strong root system. Ensure to help your transplants purchased from the nursery develop a strong root system. 

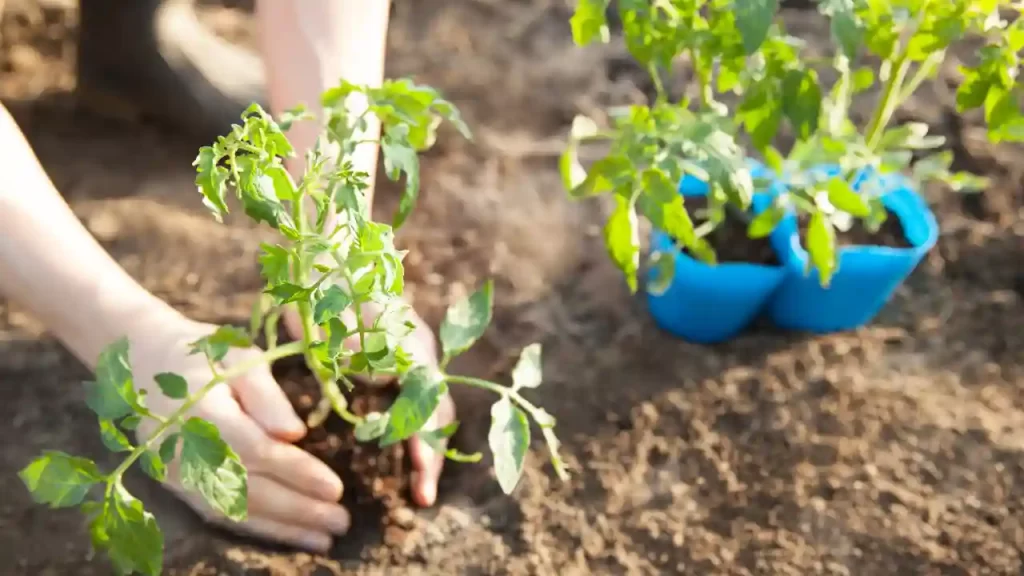
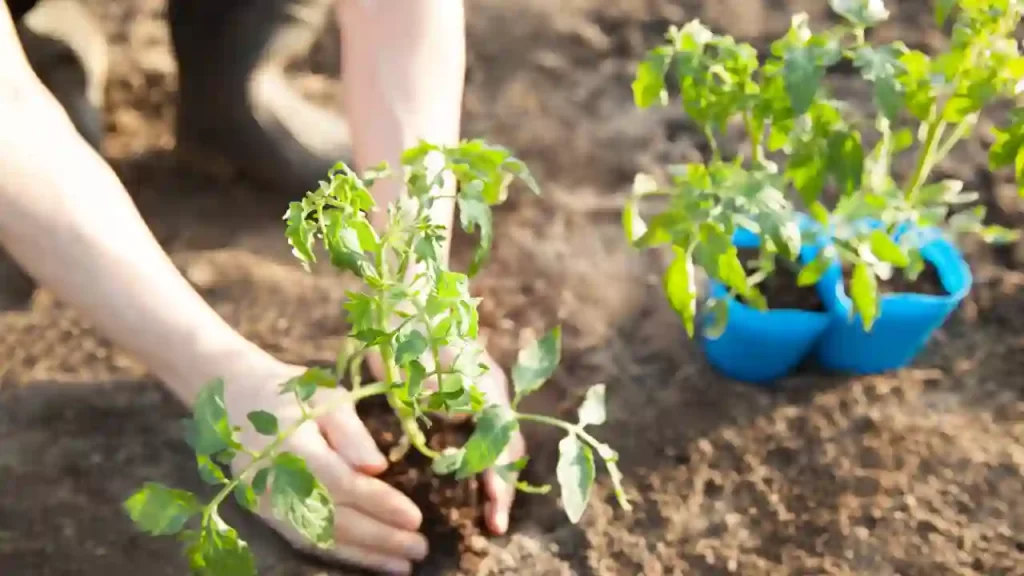
Before you bring your tomato transplant into the outer environment and put them in the ground:

  1. Let the frost completely end, and the temperature becomes stable.
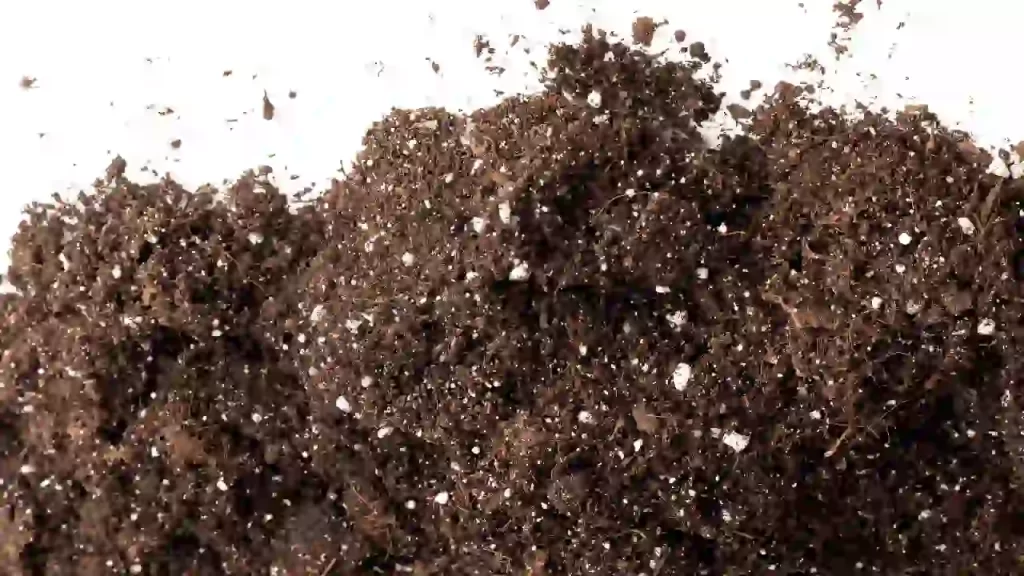
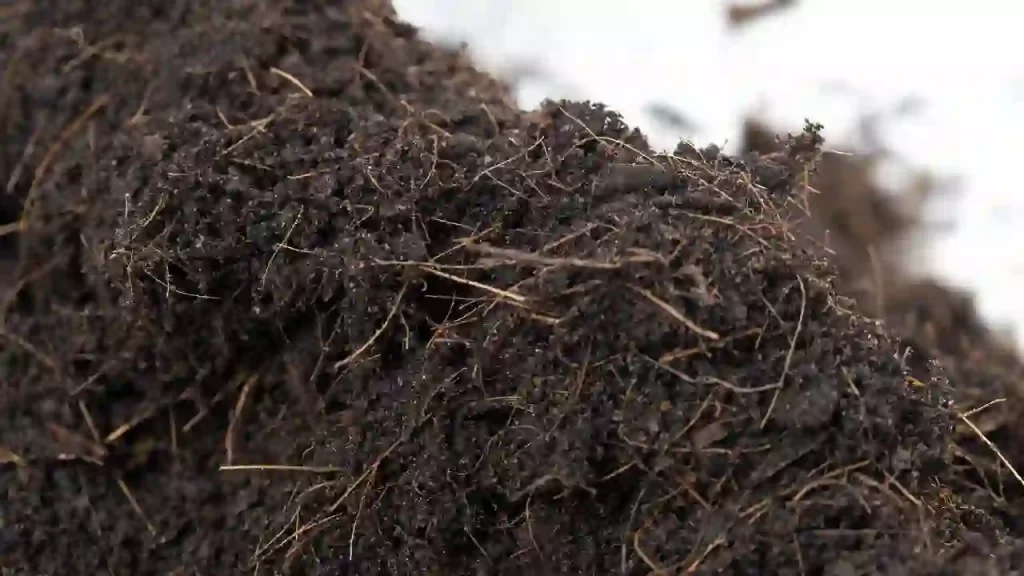
  2. Find an area in your garden where your plant can get full exposure to sunlight. You should plant tomatoes in well-draining garden soil or potting soil.
  3. Dig a planting hole in the soil, which should be enough to cover the bottom part of tomato transplants.
  4. Place the plant in such a manner that only leaves remain above the ground.
  5. Backfill the soil with compost. This generates maximum roots in the stem, making your tomato plants more productive. 

Now water them thoroughly to maintain good moisture in the soil.

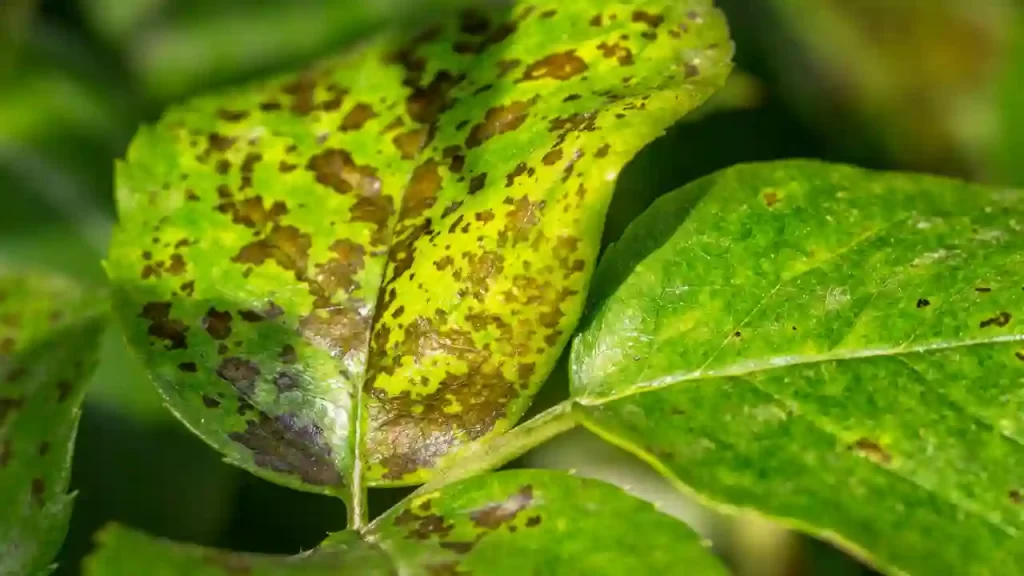
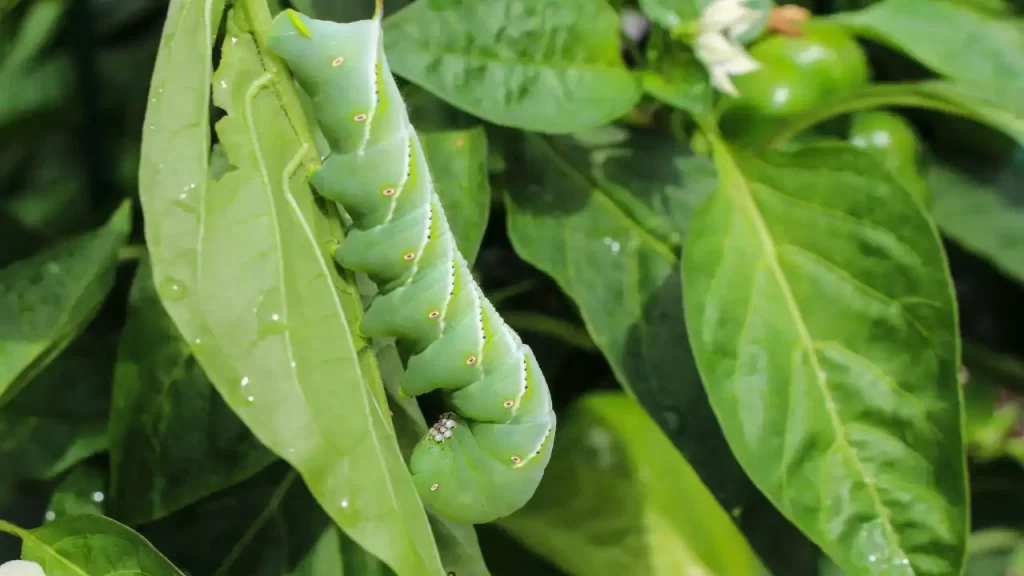
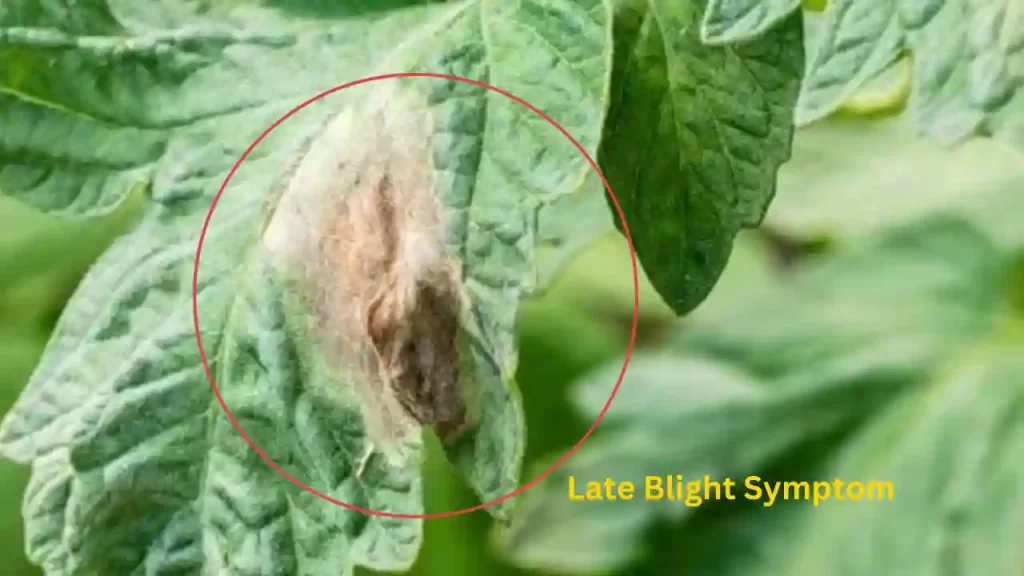
Mulch your plant with straw, wood chips, barks, or leaves. It helps to retain moisture in the soil and also suppresses weeds. Keep an eye on pests and diseases, if any, and take necessary actions accordingly.

Place Mulch Around Tomato Plant

Mulching of tomato plants helps retain soil moisture, weed suppression, regulate soil temperature, improve soil quality, and control pests and diseases. 

Organic mulch your tomato plants with 3-4 inches-thick layers of leaves, grass clippings, straw, or bark chips can improve the plant’s health and growth. 

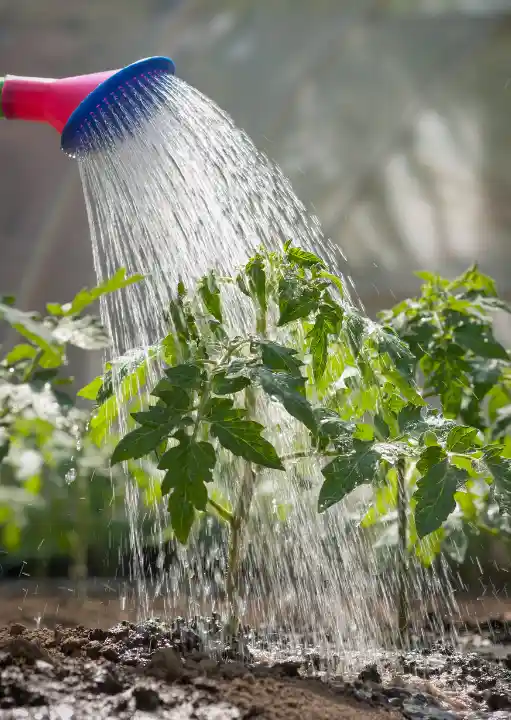
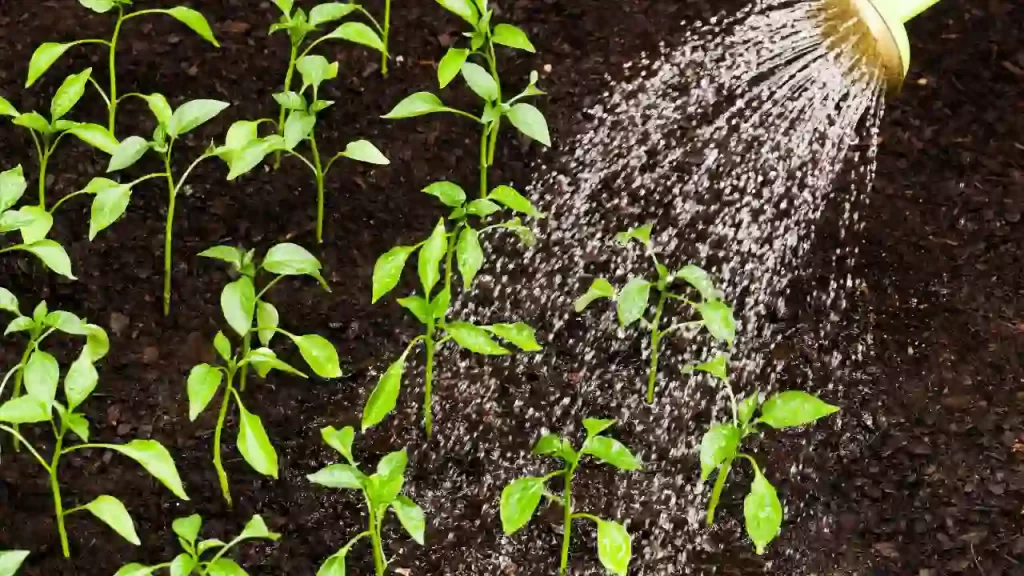
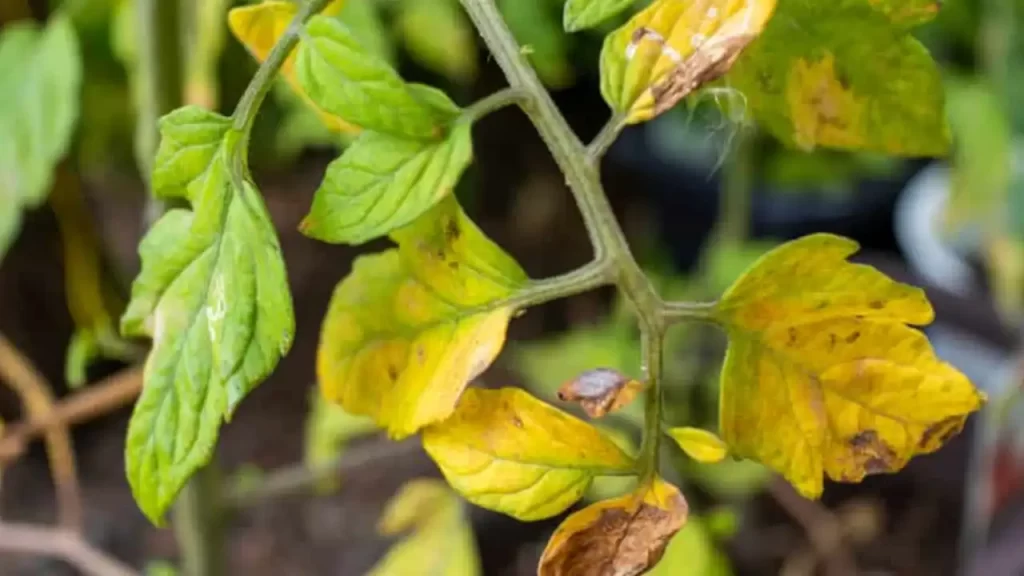
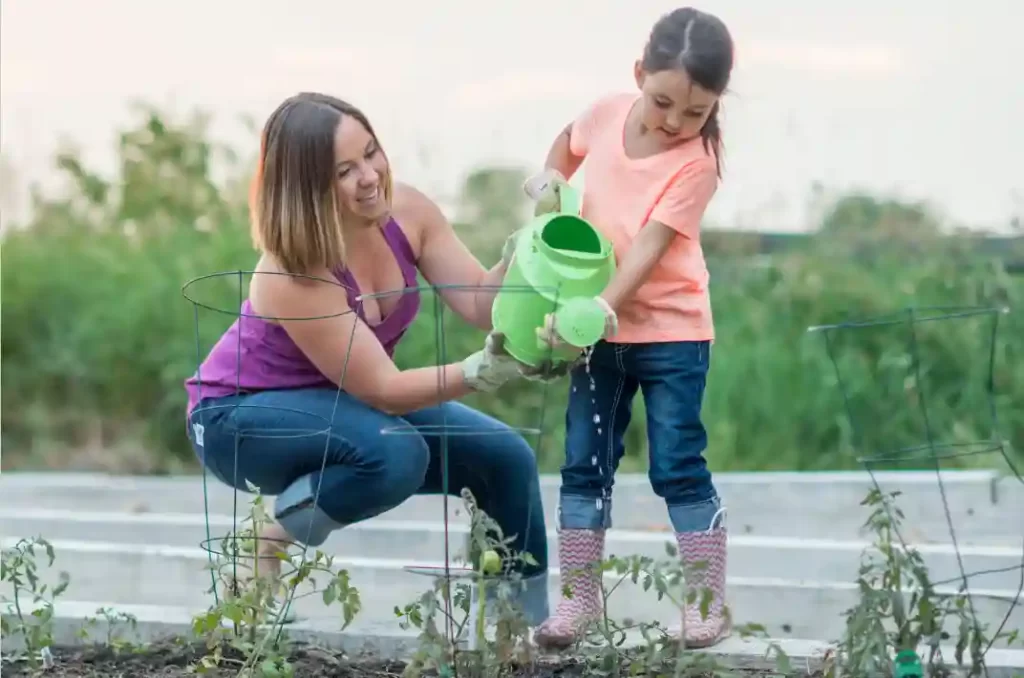
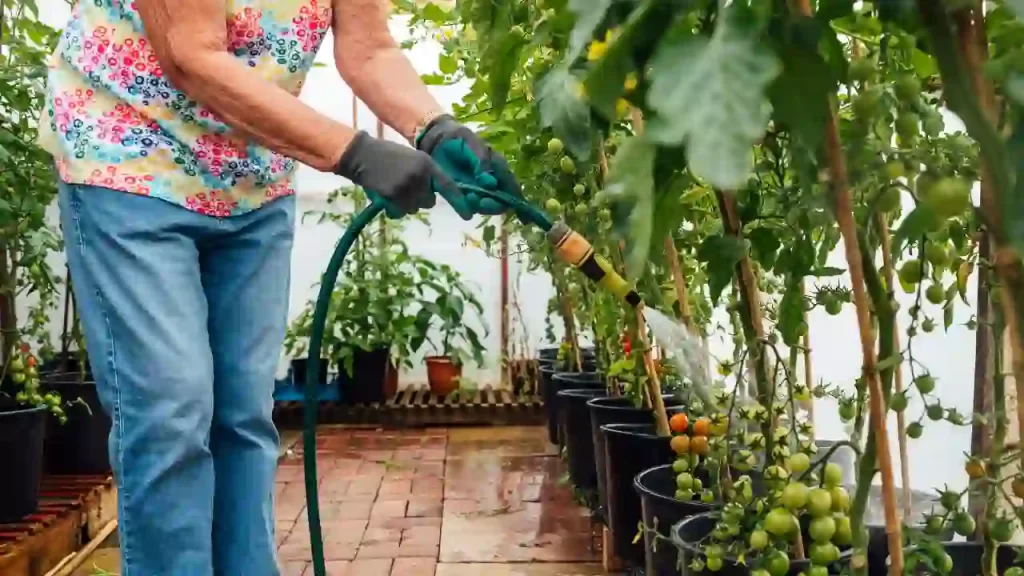
Water The Plants Regularly

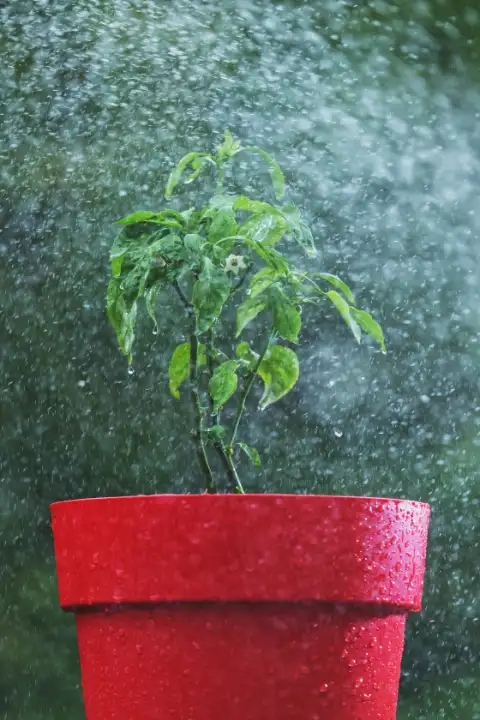
The health and growth of your tomato plant mostly depend on your watering habit. Watering your plant one inch per week makes them healthy.

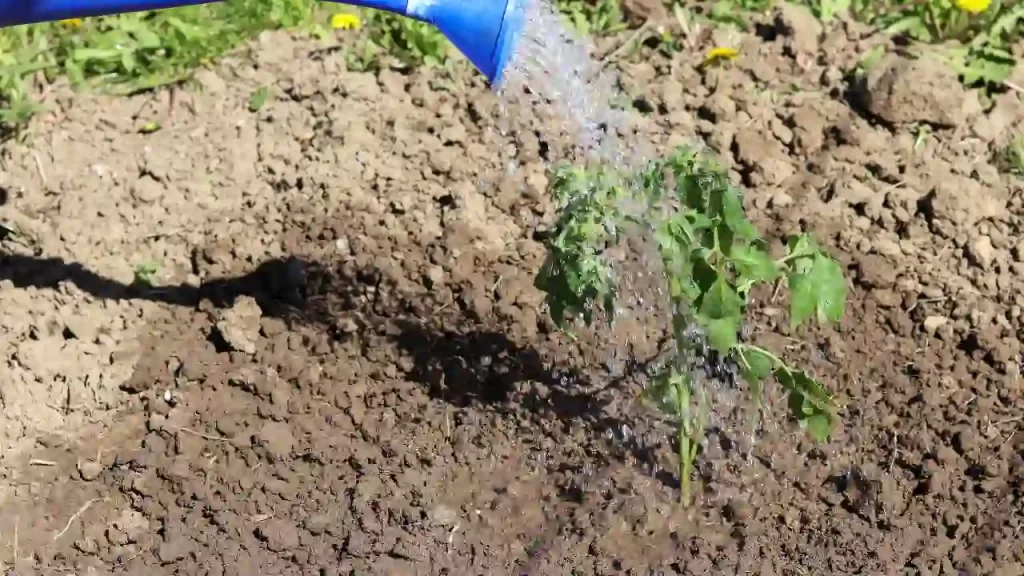
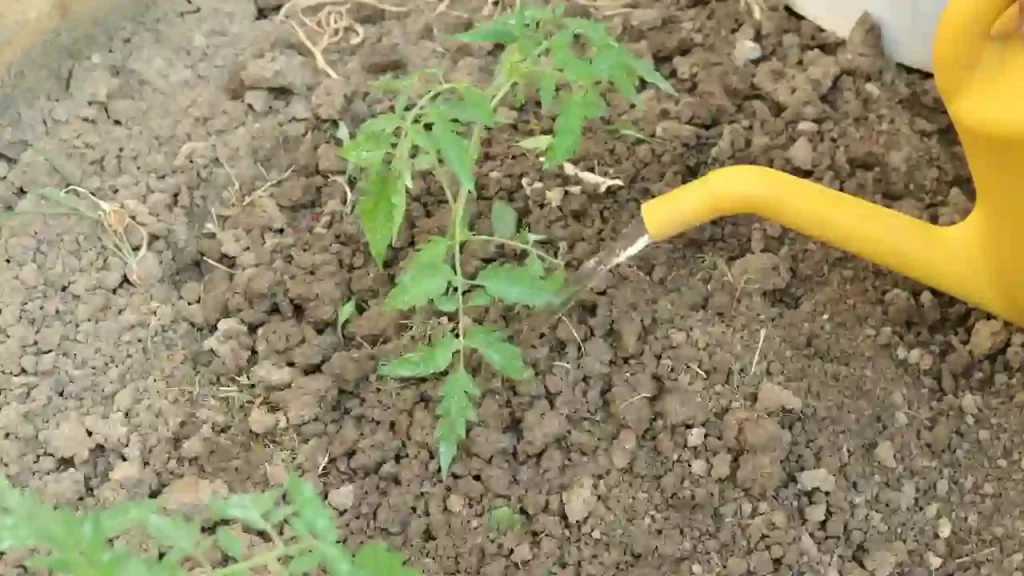
But always avoid overhead irrigation and direct water in the soil and base of the plant. 

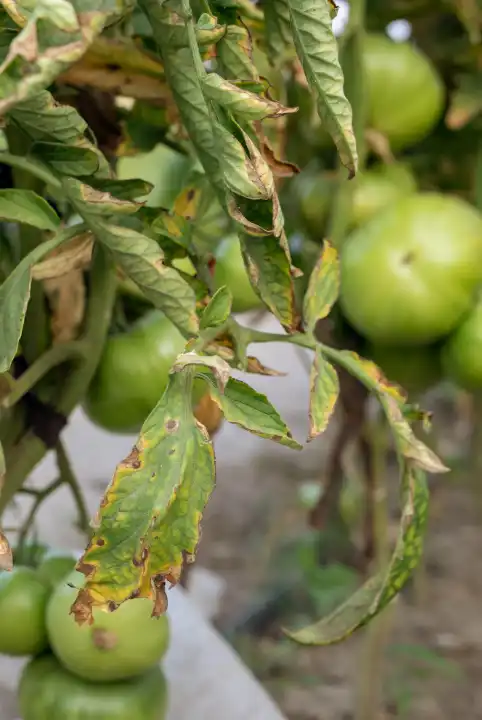
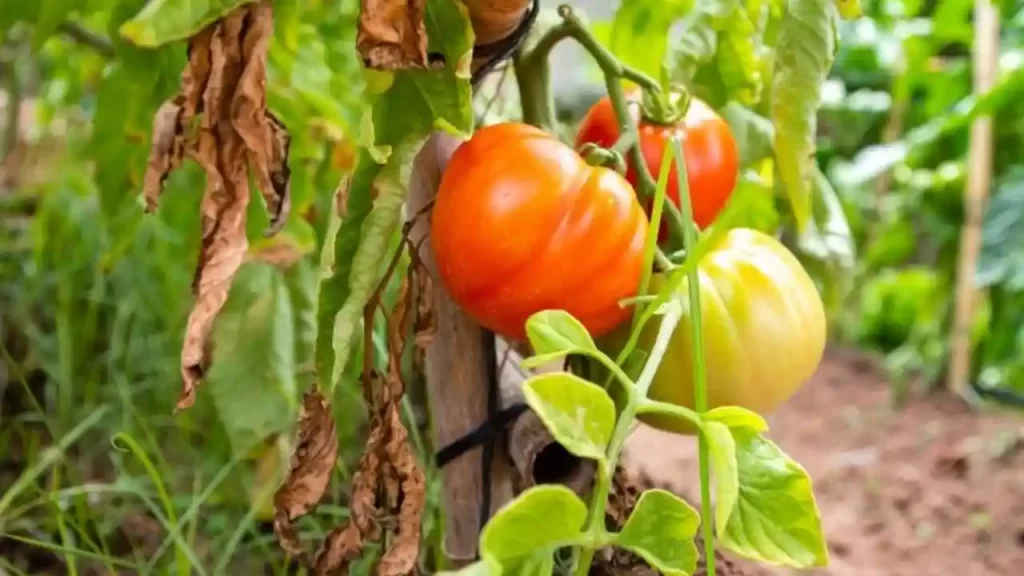
You need to water more often during an excessively hot climate to avoid wilting the plant.

Never let the leaves of your tomato plants wet; otherwise, it attracts insects and many other tomato diseases. You can use soaker hoses and drip irrigation to water your tomato plants. 
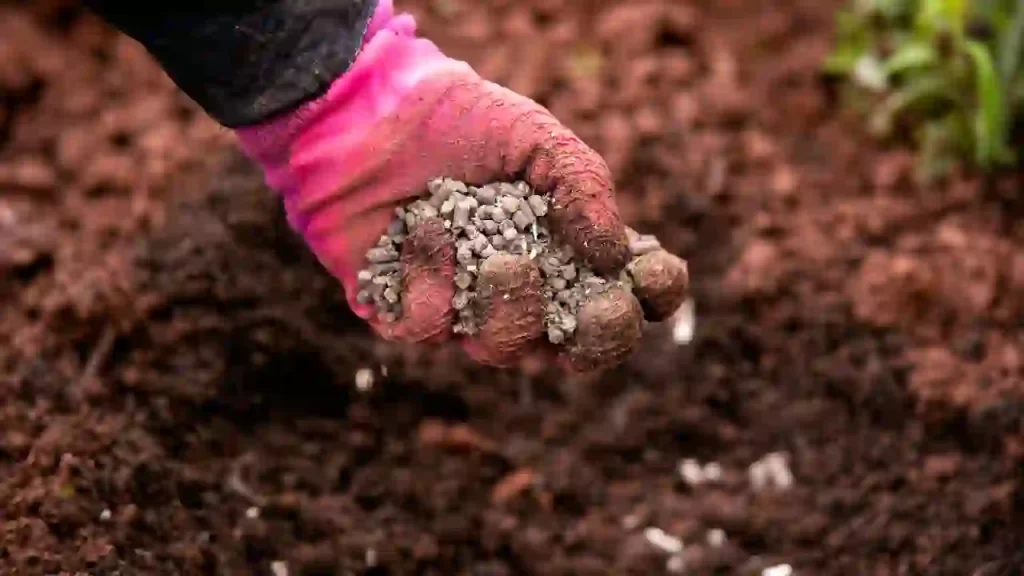
Fertilizing

Fertilizers play a vital role in boosting your tomato plants’ growth and fruit production. After one month of planting, you can apply balanced liquid fertilizers like Nitrogen, potassium, and phosphorus (5:5:5) to your plant.

Then you can apply the 2nd dose of this fertilizer when your plant starts to set flowers and fruits. It encourages the plant to develop more quality fruits.

But always remember not to overuse fertilizers as they can stress your plant.  
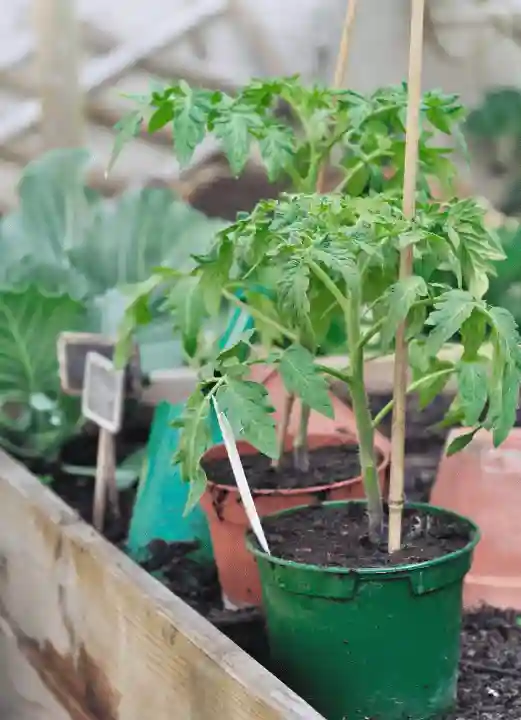
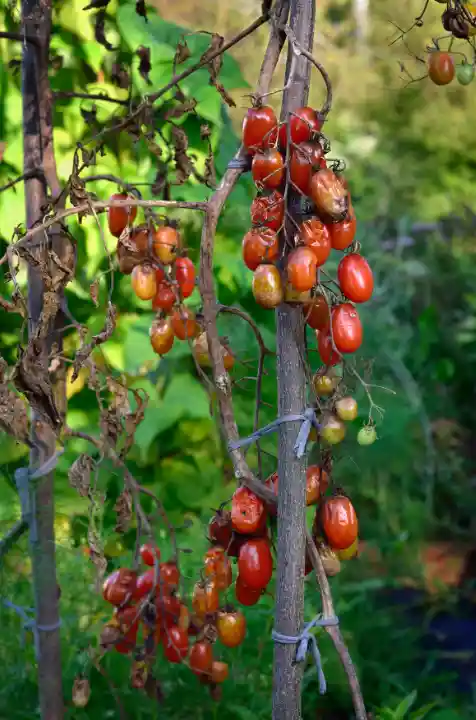
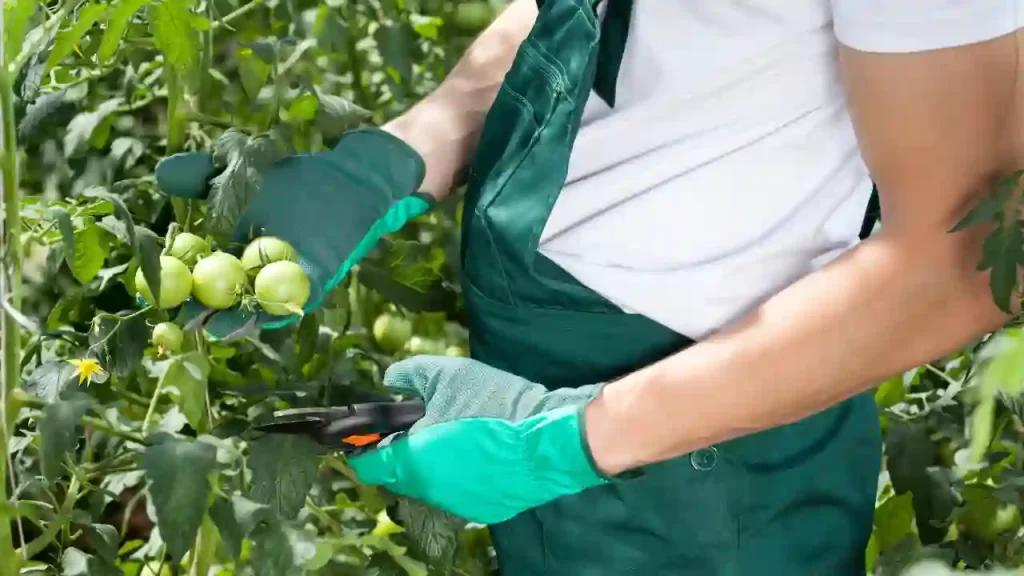
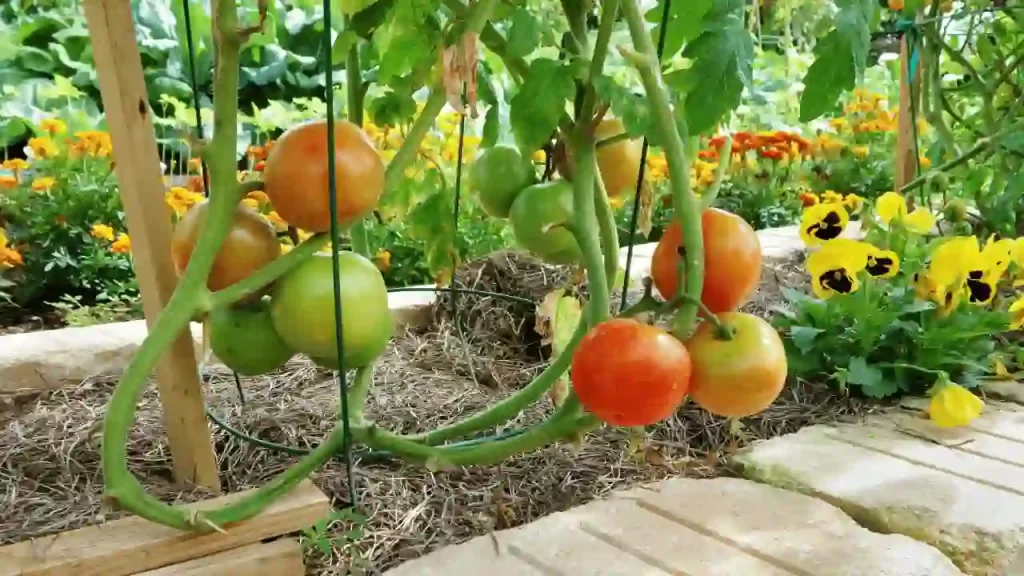
Stake Tomato Plants

You can use stakes or cages to support your tomato plants. Tie the stem of tomato plants with it. This prevents your plant from touching the ground, and the risk of pests and various diseases is also prevented.

Always ensure to check the ties if they are too tight and cut the stem of the plants. 

Take a stake of about 5-7 feet. Dig the soil and insert this stake inside the ground up to 7 inches. You can also make your own cage with welded wires. They are easily available at any hardware store. The square you make should be enough to fit your hands. 
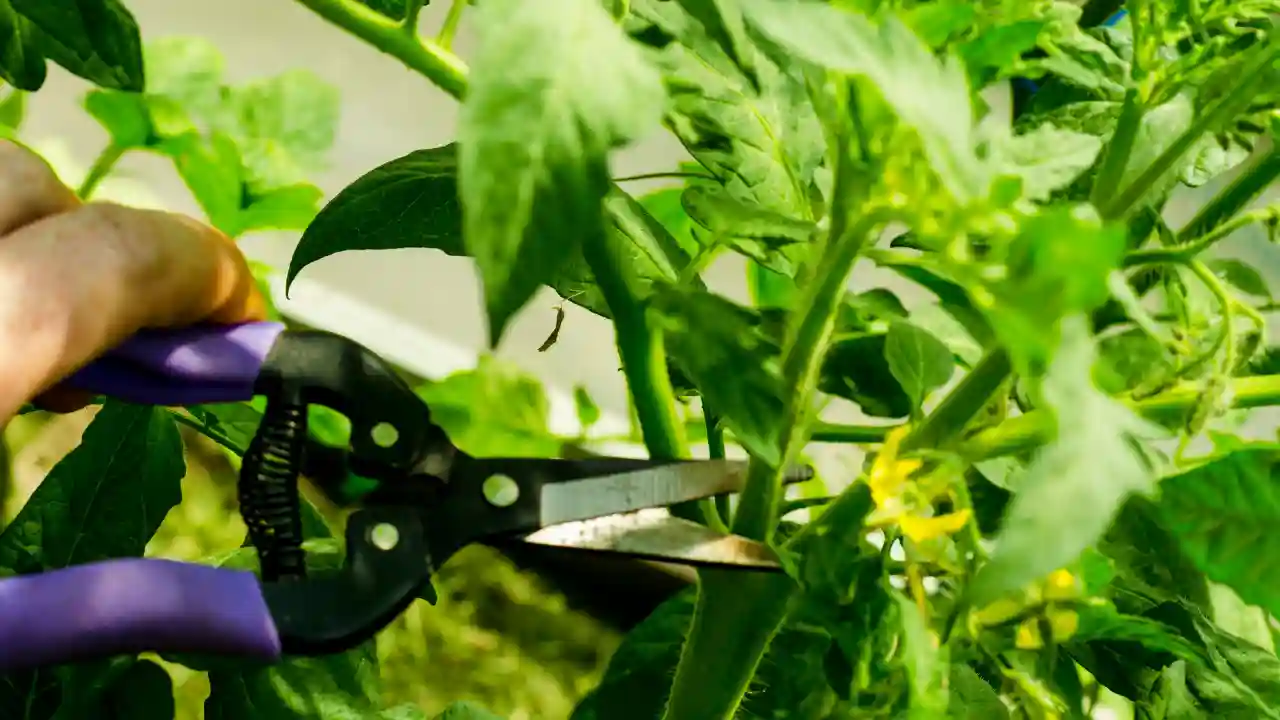
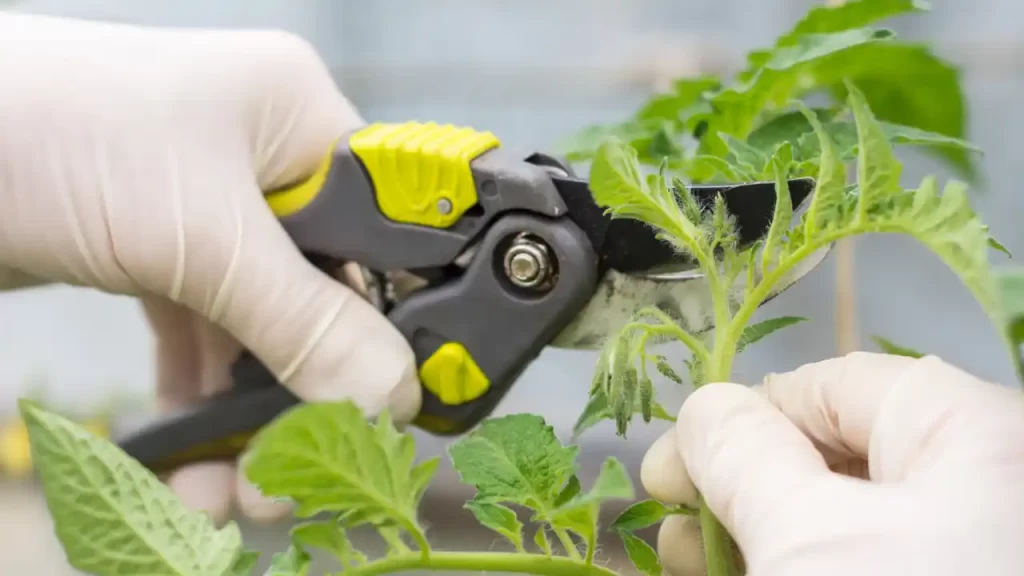
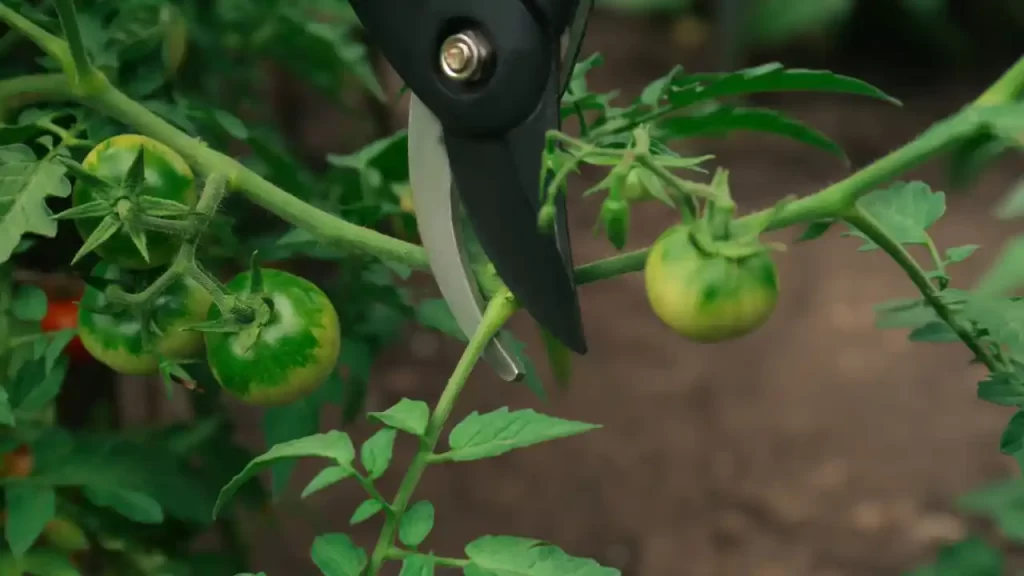
Prune Tomato Plants

Prune Tomato Plants

Pruning is not essential for growing tomato plants, but it encourages plants to use their energy to produce fruits.

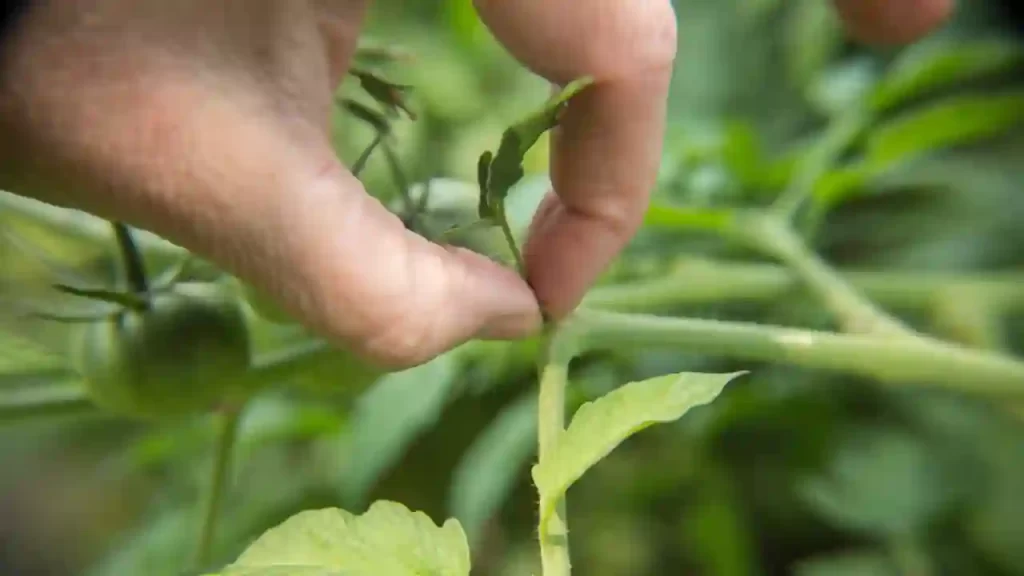
Suckers and shoots growing between the main stem and branch suck the energy of the plants.

So you can remove them to let your plant utilize its energy in the right place. Pruning helps to maintain good airflow in the plants. 

Harvest Your Tomatoes?

Harvest Your Tomatoes

When you harvest your tomatoes at the right time, their flavor and taste are maintained. The tips below can help you properly take care of your harvested tomatoes. 
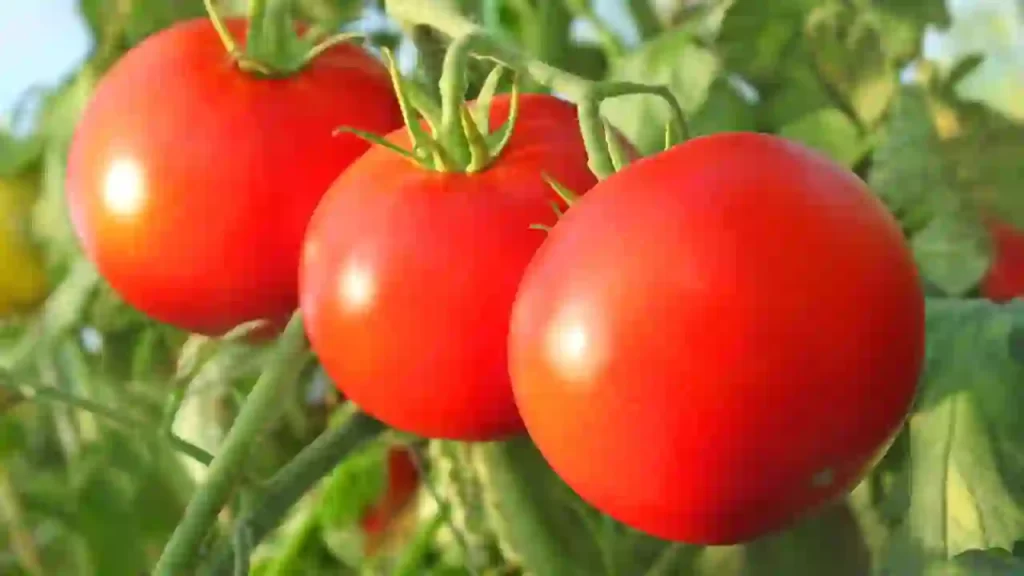
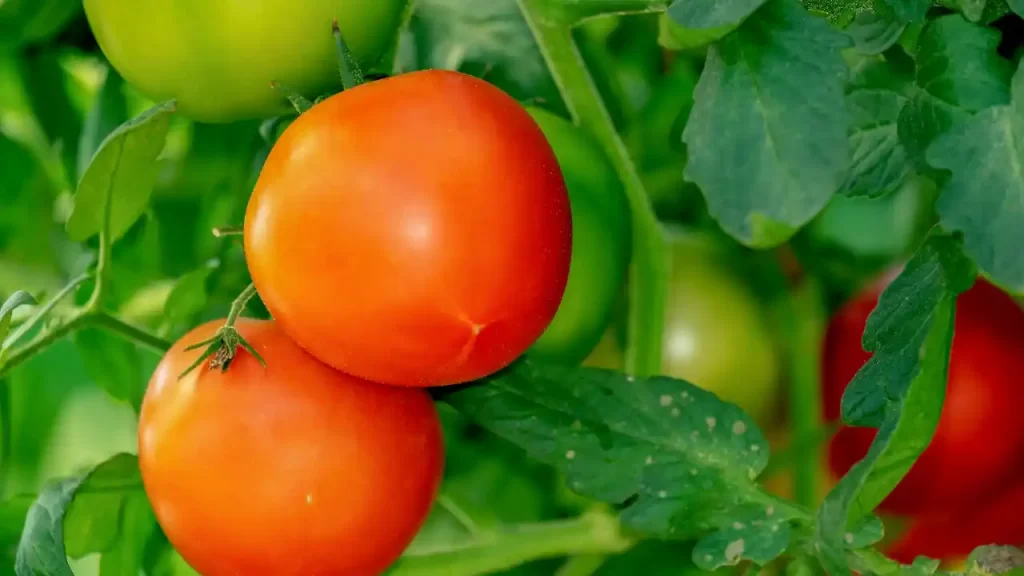
Assess Your Crop

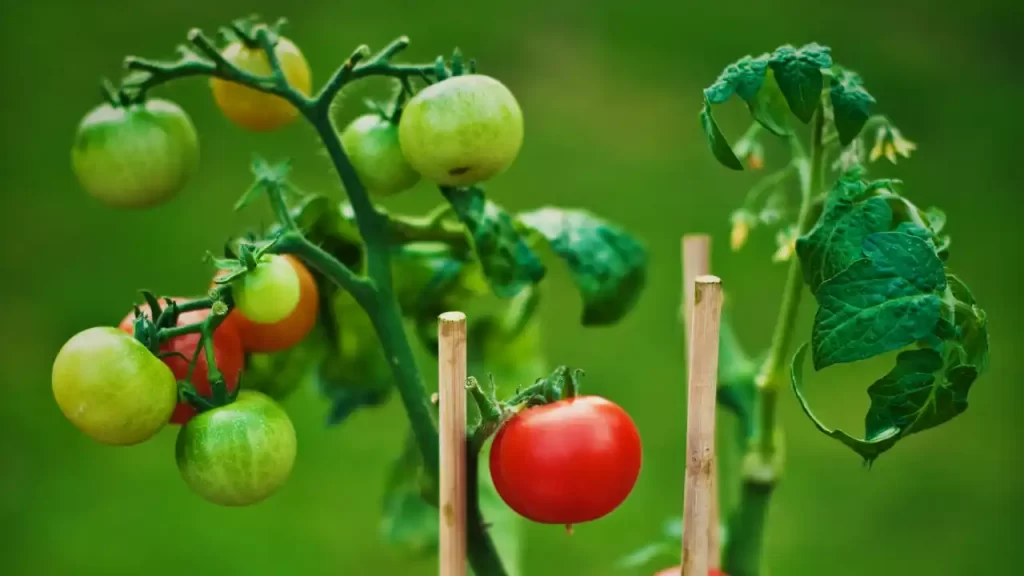
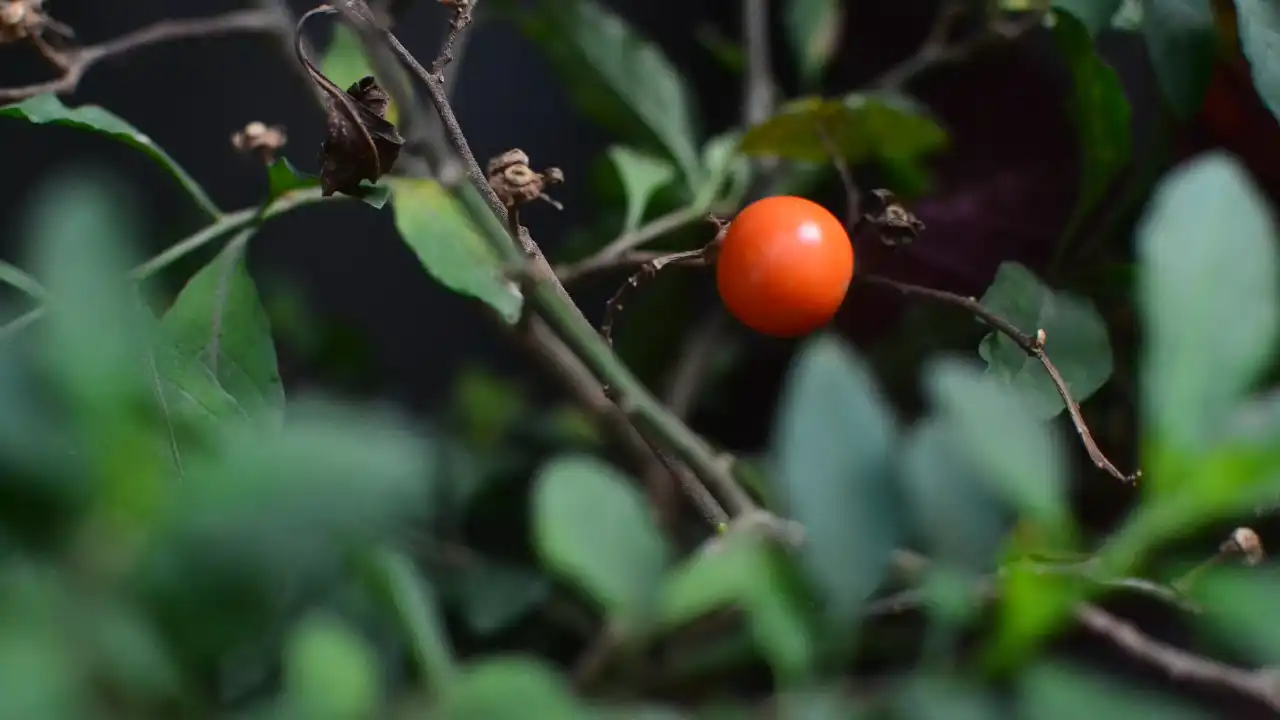
Before harvesting your tomatoes, you should know the right time and stage to harvest them. You can understand this with the texture of tomatoes. 

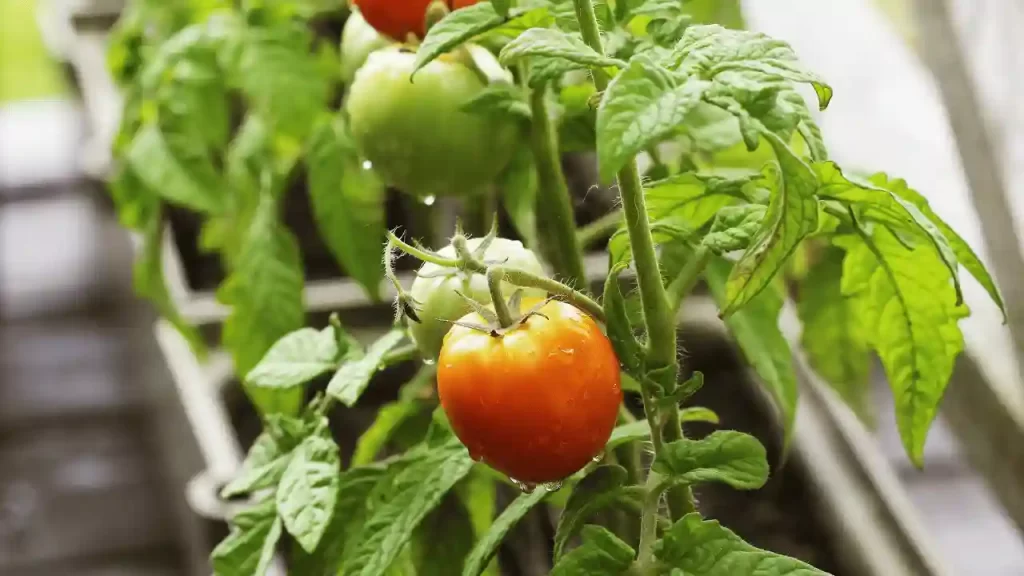
If you find them fully colored and firm, then it is the right time to pluck them. The ideal temperature for ripening tomatoes is 75° Fahrenheit. But any temperature more than 90° Fahrenheit can harm your tomatoes. 

As a result, they form a poor color and become extra soft. 

If you want to pluck green tomatoes for any reason, you can store them and let them ripen indoors.

Protect Your Picks from Frost

Before the start of the imminent frost, try to harvest all your ripe or semi-ripe tomatoes. Keep them in the temperature range of 50-70 degrees Fahrenheit. Any temperature below 50 degrees Fahrenheit can lead to chilling injury to your tomatoes.

To complete the ripening process, you can put your green tomatoes in closed paper bags. You can also use them to make delicious recipes like tomato pickles or fried green tomatoes.

Examine your plucked tomatoes every week to ensure whether they are ripening. If you spot any rotten tomatoes, pick and dispose of them.

Also, you can take off the whole plant and place them somewhere in a warm location. It helps the fruits to ripen rapidly.

You can also keep your tomatoes near apples and bananas to speed up the ripening process as they generate ethylene gas which helps tomatoes ripen fast.

Store Tomatoes Properly

If tomatoes are stored properly, they can maintain their real taste, flavor, texture, and freshness.

You can store them at room temperature of 50-70 degrees Fahrenheit. Ideally, you can store them at room temperature only for a week.

You can also store them in your fridge, but their taste and flavor are definitely compromised. 

Summary

Growing tomatoes might be easy, but growing incredibly tasty, juicy, and flavorful tomatoes requires much effort. If you choose the variety of tomatoes according to your area’s climate, mulch them properly, adopt good watering habits, and fertilize them only when your plants need them. Staking can give you quality and large numbers of tomatoes. 

Limited pruning can also enhance the growth of your tomato plants. 

If you follow all the steps in this article correctly, nothing can beat you to growing your special tomatoes.  

Frequently Asked Questions

What is the best month to plant tomatoes?

The ideal time to plant tomatoes depends on your climate zone and the type of tomato you’re planting.

Generally, tomato plants should be planted outdoors in late spring or early summer when weather conditions are warm and settled.

In cooler climates, April or May may be the best month for planting tomatoes, while in warmer climates, such as the southern U.S., you can plant tomatoes as late as June or July.

Tomatoes are sensitive to cold temperatures, so wait for soil and air temperatures to warm up before planting them.

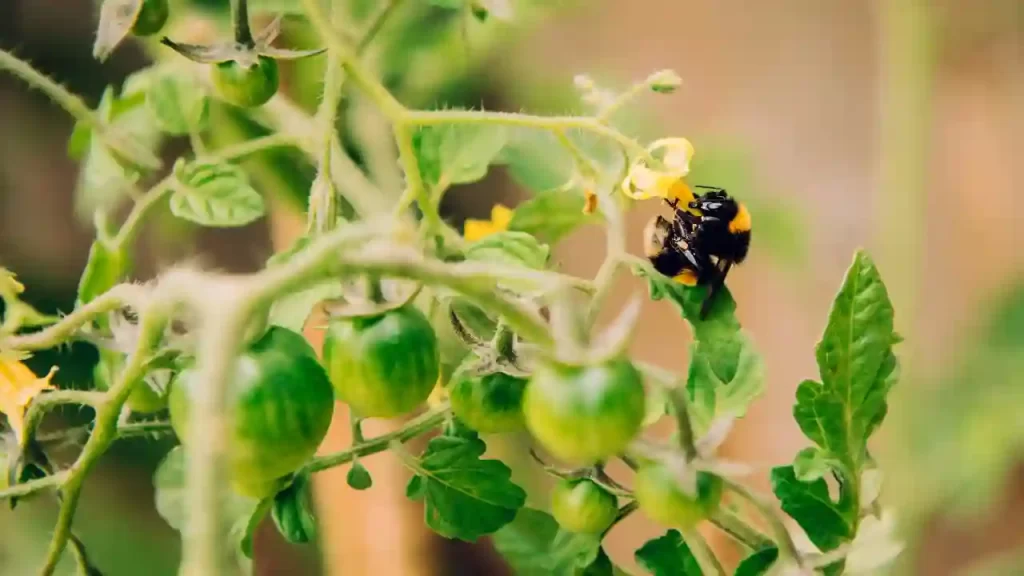
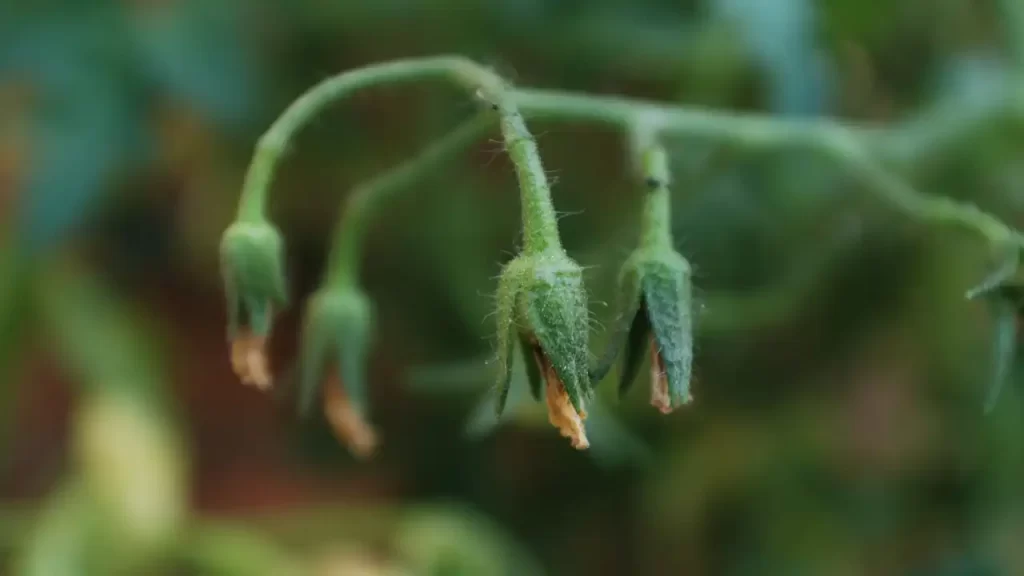
Should I pinch off tomato flowers?

Yes, it is important to pinch off tomato flowers to ensure that the plant has enough energy to produce a healthy crop of tomatoes.

Pinching off the flowers will prevent them from developing into fruit and redirect the plant’s energy toward growing more foliage and branching out. This will also help increase air circulation around the tomato plant and reduce the chances of disease.

Furthermore, pinching off the flowers will prevent overcrowding in the garden since too many tomatoes can lead to reduced quality and size.

Do tomatoes grow better in pots or in the ground?

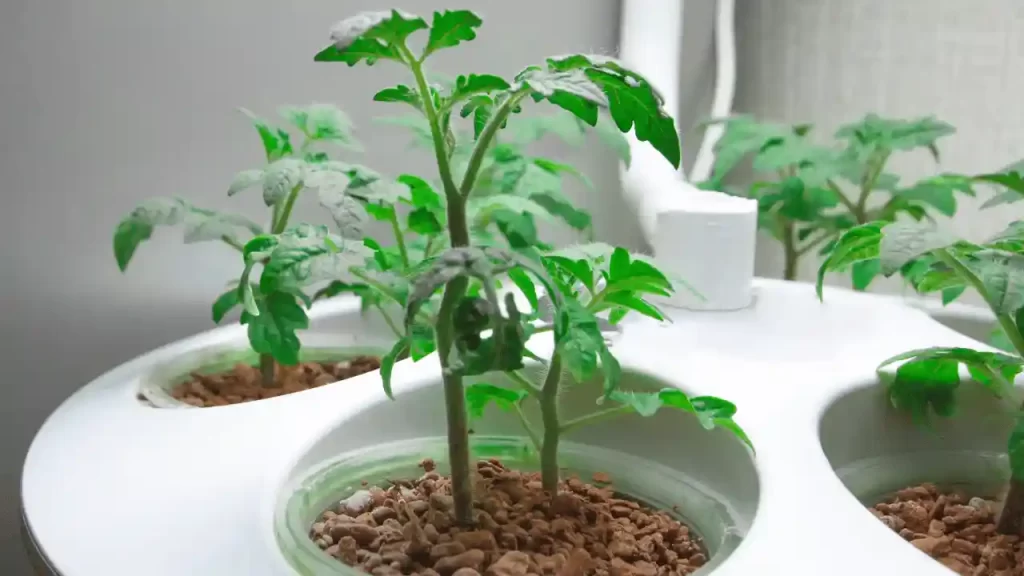
Generally, tomatoes grown in pots have a better chance of being sheltered from extreme weather conditions and being easier to manage and water.

However, when planted directly into the ground, tomatoes have more access to nutrients and can grow larger. As a result, the best choice will depend on your growing conditions and preferences.

Planting tomatoes directly into the ground may be preferable if you have ample space in your garden or yard. This will allow them to spread their roots more and take better advantage of nutrients in the soil.

How To Grow Tomato Plants in Pots?

Don’t own a Garden and want to grow tomatoes? Don’t worry; it is possible to fulfill your dream of growing tomatoes. You can plant tomatoes even in pots, and yet you can have a high yield.

You just need to select a pot-friendly type of tomato plant, a good quality of potting mix, and good quality potting soil.

Benefits of growing tomatoes in pots

growing tomatoes in pots

We have numerous benefits of growing tomato varieties and plants in pots. We can control things according to our ease needed in favor of tomato plants for healthy growth and high yield.

A few of the benefits of growing plants in pots are listed below:

  • Pruning of the plants becomes excessively simple if grown in pots. You don’t need to go far to maintain these necessary needs.
  • Temperature control is also possible. If it’s unfavorable climatic conditions outside, you can bring the pot inside and save your tomato plant from excessive heat, cold, or wind. 
  • Your plant is escaped from outside animals. They won’t be able to eat or destroy your potted plants.
  • It becomes very easy to keep a close look at the tomato plant. It helps to determine if the plant is attracting any pest or developing the disease at the initial stage, and action can be taken instantly.

11 Tips for Growing Tomato Plants in Pots Successfully

When I want to successfully grow tomatoes in potted plants, firstly, I choose a place where my potted tomato plants can get 8-10 hours of direct exposure to sunlight.

Minimum 6 hours of direct sunlight is also good, but it grows more rapidly in maximum exposure to sunlight as tomato is a war-loving plant.

But if you have only shaded places, then you should go for the shade-tolerant varieties of cherry tomatoes, like Black Cherry, Evans Purple Pear, Golden Sweet, Juliet Hybrid (red), etc.

I have discussed a few tips and tricks to grow your potted tomato plants in limited space with a high-quality yield. 

Choose the right type of tomato.

tomato variety for container

Tomato plants are of two types: Determinate and Indeterminate tomato plants. 

Determinate tomato plants are shorter than the indeterminate tomato varieties of plants. Their maximum growth is 3-4 feet.

They are also called bushy, dwarf, and compact tomato plants. It also sets flowers and fruits in one go. Some examples of varieties are Cherry Falls, Italian Roma, Glacier, Rutgers, and celebrity.

But if you can arrange for a minimum of 20 Gallon Buckets and good support, you can also easily plant and grow indeterminate tomatoes or tomato plants.

Indeterminate tomato plants give you an immense harvest if they get an ideal growing environment.

Chocolate cherry, Green Zebra, and Black Krim are some of the indeterminate tomato plants which can be grown in pots or containers.

But it is always better to grow determinate plants only if you have time constraints like you have started late in the season to plant or have a short growing season. 

Start with a strong and healthy transplant.

transplant tomatoes

Minimum obstacles are faced while transplanting a Strong and Healthy tomato plant. After germination, the tomato seedling should be repotted at least once (repotting the seedling three times is the best).

Hardening off your tomato plants before bringing them into the outer environment is essential.

The roots become stronger and larger with the repotting process. It also makes the root zone the plant transplant shock resistant less prone to disease and pests. It helps in the overall development of the tomato plant.

While purchasing transplanted tomato plants from the nursery, thoroughly check the plant. It should not have leggy and thin stems or yellow or curling leaves. It may be a sign of unhealthy tomato plants, which have rarely received any direct sunlight exposure, and there might be any disease in that plant.

The nursery transplanted tomato plant should have thick, strong stems with green and clear foliage.

Be bold about container size, and choose a fabric pot over a plastic pot.

container type

The minimum container size for Determinate plants is 10 Gallons per tomato plant, and for indeterminate plants is 20 Gallons containers.

Tomato plants planted in Smaller sized containers may not be fully developed and can only produce fruit with less yield. Thus plantation of tomato plants should be done in bigger containers only.

Instead of choosing fancy plastic containers container gardening, opt for fabric pots. You can either plant in biodegradable or non-degradable containers. You can use this non-degradable container for your tomato plants.

Benefits of using fabric bags:

  • The roots in fabric pots are exposed to air, and root tips do not grow; rather, new roots are developed.
  • Fabric pots enhance the water drainage system and help the tomato plant’s roots to breathe properly, boosting the plant’s metabolic system. And plants become more efficient in producing a large number of quality fruits. 
  • These fabric pots would naturally air prune the excess roots of the tomato plants. If the tomato plants are grown in plastic containers, the roots of the plant grow round and round in a twisting pattern and later get bounded.

On the other hand, black plastic pots and containers benefit cooler climates by providing warmth to the tomato plant’s roots and protecting them from temperature shocks. If containers are used in hot climates, shade them properly with the help of clothes or towels to protect the roots from excessive heating.

Use high-quality potting soil.

potting soil

People often make mistakes while choosing the garden soil for the potted tomato plants. They bring the topsoil from the garden for their potted tomato plants.

But this soil, when used to grow tomatoes in pots, creates breathing issues for the plants, and the plants become more prone to fungus infection.

You can prepare your own soil mix with fresh compost, manure, and peat moss, or using potting soil can also enhance the growth and productivity of your tomato plant.

Putting potting soil or soil mix up to 3-4 inches in the bottom of the pot can enhance your tomato plant’s overall development and yield.

Feed your tomato plant well.

add nutrients

Tomato plants need plenty of nutrients for their growth and high yield. They are heavy feeders.

So mix some herbal fertilizer (read the label for quantity), bone meal, fish emulsion, and ground eggshell into the soil before planting. And later, put some 2-3 inches of potting soil on the top.

Bury the stem of the tomato plant.

take off leaves from the stems

Now it turns to get the clear stem of the tomato plant. Take off all the bottom leaves from the stem (you should remove around half of the stem leaves).

Now place the stem in the middle of the pot and fill the remaining pot with some extra soil mix till the last leaves in the stem. And settle the soil in the pot; you can put some extra soil in it if needed.

Water thoroughly and consistently.

tomato plant water needs

Consistent watering plays a vital role in planting tomato plants. Water in such a way that it reaches thoroughly till the roots.

Do not add much water in one go. Take a pause and water again, repeat the process until the soil becomes moist. The soil might be drained soon, but the soil still needs extra water to moisten.

Both under or over-watering your tomato plants can be hazardous for the plant and lead to Blossom End Rot or and container tomatoes can also attract pests and diseases when stressed due to excessive heat and humid climate.

Avoid overhead irrigation and use soaker hoses while watering your tomato plants. This reduces the risk of over-watering your plants.

Always check the moisture level of the soil before watering your tomato plant. Dip your dry finger in the soil, if the finger comes out dry up to 3-4 inches, then it is the right time to water your tomato plant.

During summer or hot weather, you need to check the need to water your plant twice weekly.

Potted plants (especially those planted in smaller pots) need to be watered more frequently than bedded tomato plants. They need to be watered once per day. They need to be necessarily watered deeply as 90 percent of the fruit contains water only. 

Protect young transplants from frost with “walls of water.”

protect from frost

The cultivation of tomatoes mostly gets impacted due to frost at night time. So it is best to bring your planted tomato plants outside when the temperature constantly exceeds 50’F.

But where you cannot predict the temperature or when you need to necessarily bring the plant outside, you can use Walls of Water to protect your plant from frost. It works best for me. I use it from spring end to the start of summer. It keeps the plant safe and protects it from frost.

Walls of Water activate your tomato plant up to 6 weeks of frost to get transplanted. They can easily make your tomato plant resistant up to 16 Degrees F. It is also useful for your delicate or baby tomato plants. It protects them from the wind and helps them to survive.

Walls of water is a long tube made up of good-quality plastics. You need to fill the tubes with water and place them so that it becomes a support for your tomato plant. Finally, it looks like a canvas. You can also check below video for better clarification.

They play their role as an affordable greenhouse for your tomato plants. They accumulate the heat from the sun and radiate at night, which helps to maintain a consistent temperature for your plants. You need to monitor the filled water as it may evaporate and refill it when needed.

You can remove the Walls of water when threats of frost are passed and later remove the water from the tubes and re-use them in the next season.

Add your support structure.

add support

When the tomato plants grow longer, they need proper support or else they might be damaged.

Metal conic cage is enough to support your determinate tomato plants, but they are not pretty enough for indeterminate tomato plants as they grow longer than determinate plants. 

You can check this cage and Ladder for your tomato plants. You can easily fold them, keep them when not in use, and use them next season. They look pretty and are strong and easy to use.

While securing your tomato plants with Walls of Water, you can first fasten the plant with a cage or ladder, whichever you prefer. They conveniently support your tomato plants. 

Mulch the soil

mulch soil

Mulching is essential, especially for potted tomato plants, to suck the excessive moisture from the soil.

You can use wooden stakes, grass clippings, bark chips, or dry leaves on the top part of the soil. Do not overload the soil with mulches.

One layer of mulches lasts for one summer and is later shredded bark converted into compost at the season’s end.

Fertilize your tomatoes consistently throughout the season.

add fertilizer

Though you have put enough material into the soil to boost its nutrients, it still needs extra fertilizer to enhance the nutrients in the soil just after six weeks.

High nitrogenous fertilizer would destroy the plant. So be specific about buying fertilizer that contains less nitrogen.  

I recommend using this tomato fertilizer for better results. Read the instructions to use labeled on the packet of the fertilizer. 

Summary

Growing tomato plants, even in pots, is an easy and interesting process. You can follow the above instructions, grow organic juicy and fresh tomatoes even in less space, and enjoy them. A little care for your tomato plant can increase the yield and maintain healthy growth.

Frequently Asked Questions

How deep do containers need to be for tomatoes?

The depth of a tomato container depends on the variety of tomato plants grown. Generally, dwarf and determinate varieties require an 8-10 inch deep container, while indeterminate and vining varieties need at least 12-16 inches of soil depth in their pot.

To make sure your tomatoes have adequate space to stretch their roots, use the largest container size possible for your variety.

Depending on the tomato variety, the pot’s diameter should be about 12-18 inches. Plants growing in containers need more consistent watering and fertilizing than those planted in a garden bed, as they have less soil to draw nutrients from and hold water.

What kind of pots do tomato plants need?

Plastic or terracotta/clay pots are great for tomatoes, as they retain moisture and heat better than metal or ceramic. Make sure the pot is at least 8 inches deep so that there is enough room for the roots to grow. Choose a pot with plenty of drainage holes in the bottom; if necessary, add more drainage holes.

Watering Tomato Plants – How To, How Often & How Much

Watering tomato plants can sound so easy, but what if I say it’s not so easy? Most gardeners make mistakes here only and wonder why their plants could be doing better.

Incorrect watering style leads to many complications and interrupts the plant’s growth, development and yield. Over or under-watering causes blossom end rot and wilting and also attracts diseases.

But the good news is that you can still make watering tomatoes easier by following a few tips.

Water tomato plants early in the morning to ensure that the soil is sufficiently moist and ideal for growth. During the early stages of their growth, you should water them daily. As temperatures rise, it might be best to provide your tomatoes with twice-a-day watering sessions to make sure they are getting an adequate 1-2 inches of hydration per week.

Focus on watering in the base of plants, mulch your plants, and water slowly and deeply. Avoid overhead irrigation; instead, opt for drip irrigation.

Watering also depends on many factors like the size of the plants, planting stage and climatic conditions in your area.

Also, check the moisture content in the soil before watering.

I have briefly discussed these points in this article for better understanding.

Why is Correct Watering Important?

Why is Correct Watering Important

Watering plays a vital role in tomato plants growing and healthy development. It is obvious that any plant’s survival without watering is not at all possible.

But gardeners need to know the correct watering technique to maintain the plants’ long and healthy life. Or else an average gardener must face a bundle of issues associated with their tomato plants.

I have listed some problems that can arise if the watering habit is not up to the mark or the plants are over or under-watered.

  •  Less capable of nutrient uptake.
  • Inefficiency for photosynthesis.
  • Short growth
  • Root decomposition
  • Less production of crops
  • Resistance to disease
  • Blossom End Rot
  • Cracking
  • Yellowing, curling and dropping of leaves

90% of tomato fruit is made up of water. Thus it can be clearly said good watering technique is a must for tomato plants.

The tomato plant requires the right amount of water to produce enough fruit. So the first step for starting tomato gardening is knowing and adopting the correct watering technique.

How To Water Tomato Plants?

the right way to watering tomato plants

You might think watering tomato plants is very simple, but watering is not enough. The method of watering is also important.

Thus, I recommend you understand the correct watering method because the health of tomatoes mostly depends on it.  

Water slowly

A consistent water supply to your tomato plants is very important for their constant growth. Never make the mistake of flooding your plant at one go, and Never rush to water them.

Pouring a lot of water at one go and during a very short interval restricts your plant from absorbing it. And the water does not reach the roots too.

The tomatoes have deep roots, and when it is watered with too much water too quickly, there is a high chance that water won’t reach the roots properly.

When the plants are slowly watered, they have more time to absorb and soak in the soil. As a result, the roots can absorb water and nutrients properly.

You can install a drip irrigation system near your tomato plants, making watering easy. Installing this is worthy and easy.

Water deeply

Tomatoes have a deep root system. It is always beneficial to water them deeply so that the water reaches its maximum. As a result, a very strong root system is developed.

Deep and slow watering encourages the roots to absorb more water. Thus the roots become more efficient in delivering nutrients to the plants and also develop a deep root system to retain moisture. Thus plants become strong enough to exist during dry spells.

Water the soil as deep as 6 inches. You can also use drip irrigation to make your task easier. It supplies water consistently to the plants, and the soil gets easily penetrated into the soil. 

Water Tomatoes at the base

Water Tomatoes at the base

It is important to note that watering the soil is important, not the leaves. Overhead watering leaves the foliage wet, the soil retain moisture resulting in uneven watering in the soil.

The set water on the leaves eventually evaporates, and the purpose of watering is not met. When the water remains on the leaves for a longer period, it attracts many diseases, pests and infections, which can even destroy many plants.

So always water the base of the plants and not the leaves. Thus water can reach the roots and deliver to the required part of the plants.

You should also avoid direct watering on the stem. It can result in stem rot, and it can also wash away soil. So watering in the soil is important. Give a steady and deep supply of water to the tomato plants.

Mulch

tomato mulching

Apart from a deep and steady water and maintaining consistent soil moisture supply in the base of the plants, you should also mulch your plants for better results.

Mulching can benefit your plants organic vegetable garden in many ways, but here the main role is to conserve water and maintain a good soil moisture level.

Create a layer of 2 inches of mulch on all sides of your tomato plants. It keeps the soil cool and reduces evaporation. Thus, water is preserved, and the need for frequent plant watering is also reduced.

You can create an organic mulch using dry leaves, hay, straw and grass clippings. Make a layer of mulch around the plant. Ensure to maintain a few inches of distance from the stems of the plants. 

How Often To Water Tomato Plants?

Generally, people ask this question about how frequently you should plant tomatoes. I would say it cannot be answered very easily.

The schedule of watering the plants depends on various factors. 

Tomato Plants Age and Size

Tomato Plants Age and Size

At the initial stage, the young tomato seedlings require excess water to develop a strong root system. With the growth of plants, roots simultaneously go deep into the soil. And thus, the roots become less capable of handling more water if the soil is deeply soaked.

The plants which are bigger and have large root systems require water frequently as compared to the smaller plants. They absorb and deliver water to the plant very quickly.

Planting Time

At the stage of transplantation, the plant is transferred from the pots to the ground. In such a situation, potted tomato plants require plenty of water to grow stronger. 

Outside Temperature

When the temperature is high, water your tomato plants more often as the water evaporates very quickly.

During summer or hot climate, always keep an eye on and inspect the soil regularly, once or twice per day, if they are dried out.

Fruit Stage

At the fruit-developing stage, tomato plants require more frequent watering. But you should reduce the water supply to the plant after the fruit is completely developed; otherwise, it can cause the skin of the fruits to split.

The flavor of the fruit is also enhanced if watered within the limit after the fruits are developed. 

Rainfall

tomato plants in pot during rainfall

After your plant experiences heavy rain, stop watering as the soil already has enough water due to the rain.

If the rain continues for a longer period, the soil can become soggy and causes root rot. To maintain a consistent supply of water, work for the rain.

Containers

Container grown tomato plants need more frequent watering than bed plants because the soil in the containers dries out faster during hot weather. 

You should keep the habit of checking the moisture level in the soil for watering. Do not establish any schedule to water the garden tomatoes containerized plants.

Deep your finger in the soil; if the 1-2 inches of the finger comes out dry, then you can water your plants. It reduces the risk of over or under-watering, and you can water your plants when they need it.

Morning time is considered the best time to water your plants. Watering your plants in the afternoon evaporates the water, and rarely any water reaches the roots of the plants.

And watering in the evening leads to fungal infections as the water on the leaves and stems does not get time to dry out. 

How Much Water Do Tomato Plants Need?

How Much Water Do Tomato Plants Need

No one can recommend exactly how much water do your tomato plants need. Generally, about an inch of water per square foot per week is good.

But the proper watering of your tomato plants depends on many factors. Some factors are climate, soil type, size of the plant, stage of fruits and rainfall. I have also discussed it above.

Due to all the factors, the amount of water varies. So setting any fixed amount of water for all the plants is not at all a good idea.

It is better to check the moisture content in the soil before watering and setting any fixed amount of water for your plants.

Keep watering your plant deeply and slowly and ensure not to leave the soil soggy to avoid any disease or fungal infection in your plants. The look of the soil also indicates when and how much water it needs. 

Initially, you may face problems while watering your tomato plants, but at times you can develop the ability to understand when and how much water your plant requires. 

What Problems Do Improper Watering of Tomato Plants Cause?

Improper watering of your tomato plants can result in many complications. I have listed the main problems below:

  • Dwarf growth and slow development
  • Blossom End Rot
  • Low yield
  • More prone to diseases, pests and infections
  • Weak root system
  • Bad fruit quality

Tomato Watering Tips

tomato watering tips

I have listed a few simple tips with the help of which watering your tomato plants can become a piece of cake for you.

  • Water in the base of the plant rather than watering the leaves, or your plants can become more prone to diseases. 
  • Slowly and deeply watering helps to penetrate the water in the soil properly.
  • Morning is the best time to water the plants. It can keep the soil moist and helps the plants avoid various diseases and fungal infections.
  • Potted or contained plants should be checked frequently as the soil dries out quickly compared to bedded plants. 
  • Give consistent water supply to the plants. Inconsistent watering can result in Blossom End Rot and cracking of tomatoes.
  • 1-2 inches of watering per week is recommended, but it can vary depending on the climate in your area. 
  • Apply some organic liquid fertilizers occasionally for flavourful, juicy and delicious tomatoes.

Summary

Watering tomato plants is like an art. You need to understand your plant, the climate, stage of fruits and develop a habit of watering them. Always check the moisture in the soil before watering your tomato plants. If the soil is soggy, avoid watering.

Do not water on the leaves and stem; rather, focus on watering the base of the plant. If you keep all these small silly things noted and followed, your tomato plants can do better, and your plants will reward you with juicy, plumpy and flavorful tomatoes.

Frequently Asked Questions

What are the signs of over-watering tomato plants?

Signs of overwatering tomato plants include wilting, yellowing, and dropping of leaves; stunted growth; brown spots on the leaves, stems, and fruit; root rot; and distorted or cracked tomatoes.

Additionally, if the soil feels wet when touched, it may be a sign that your tomato plants are being overwatered.

Can tomato plants be overwatered?

No, You can’t overwater tomato plants. When a tomato plant is overwatered, it can cause the leaves to turn yellow, wilt, and eventually die.

Overwatering also causes root rot, preventing the plant from absorbing water and nutrients.

If overwatering continues for an extended period of time, it can lead to fungal diseases and even plant death.

Therefore, it is important to be aware of the water needs of your tomato plants and provide them with just enough water without overdoing it.

Should you water your tomato plants every night?

Tomato plants should be watered deeply and infrequently—about once a week for most climates. If the temperature is very hot or dry for a while, you may need to water it more frequently.

During scorching and dry weather, you may need to water your tomatoes every other day or even daily.

Monitor the soil moisture levels around the roots of your plants, and if it starts getting dry, give them a good soaking.

Avoid watering every night, as this can lead to root rot. Instead, give your tomato plants a deep soak when they need it.

Tomato Leaves Turning Yellow: How To Fix

In short, it is a common problem associated with tomato plants and can mostly be treated and taken care of using nitrogen-content fertilizer, nutritious soil, giving the right amount of water to the plants, protecting them from diseases, and fixing climatic stress protects the tomato leaves from discoloration.

Tomatoes plants are very delicate, and even a small mistake can make them struggle. Sometimes you might notice discoloration in their leaves.

It may involve several reasons like diseases, nutritionless soil, use of excessive fertilizers, too low nitrogen content in your soil, or unfavorable climatic conditions.

Why are the Leaves on My Tomatoes Turning Yellow?

why are my tomato leaves turning yellow

Yellowing of tomato leaves indicates various problems occurring in your plant. But it is a very common problem and needs to be handled patiently. Firstly we need to identify whether the problem is really big. At some points, the yellowing of tomato leaves is common.

  • If you are planting new tomato plants directly from the pot in the garden, you can find yellow tomato leaves in their lower stem. This happens because in nurseries, they are grown in lesser space, and sometimes they are also grown in less nutrient soil.

They face a lack of sunlight due to high inch growth and are shaded by their neighboring plants. This also results in bad airflow facility; their lower leaves turn yellow and may be shaded afterward. 

When you bring them and plant in a better environment with adequate space, nutrient soil, sunlight, and airflow, they grow normal leaves and come out as healthy plants. 

But sometimes yellow tomato leaves may be due to some serious issues. They might have caught diseases from some other plants and may be contagious to your other plants. 

So be sure to purchase only healthy, spotless, and green leafy plants from your nearby nursery.

  • Sometimes transplant shock also leads to the yellowing of tomato plants. Do not rush to bring the baby plants into the outer environment. Wait at least two weeks after they reach the height of 2-3 inches. Proper hardening off the plant should be done to escape this problem. 

Both points mentioned above are common and not so dangerous problems. You can resolve the problem after bringing the plants into an ideal environment.

The concerning reasons for yellowing tomato plants are inconsistent watering, less nutritious soil, too low nitrogen in the soil, and diseases.

8 Reasons For Yellow Tomato Leaves and How To Fix This!

Your tomato plant leaves may turn yellow for various reasons. I have listed the common 8 reasons why your Tomato Leaves are Turning Yellow and their solution. 

#1 The Seed Leaves Are Turning Yellow

Seedling leaves tends to turn yellow during growth stages

It is natural to get yellow leaves of the seeds; it is a plant development. Cotyledon leaves are first grown on the plant after germination, and their job is to provide nutrition to the plant. So they are not needed after this process is done.

At this stage, their color turns yellow, and the plants later shade them. At the same time, the tomato plants generate new leaves to provide the necessary nutrients to the plants.

How To Fix

As this is a natural process and part of the life cycle of the tomato plant, you cannot fix it. With the growth of tomato plants, seed leaves are shaded, and new leaves grow.

#2 Over or Under Watering

Over or Under Watering

Water consistency is very important for tomato plants. Even after providing nutrient soil, leaf yellowing is noticed in the plans because the plant’s root can only deliver nutrients to the plant when watered in adequate amounts.

Ideally, 1 inch of water per week is needed in the plantation stage, and 2 inches of water per week is needed while the plant produce fruit.

Similarly, if the plant is flooded with water, it can cause root rot. The roots are soaked in the water and die soon if not drained on time. And the proper nutrients are not delivered to the plant, which causes yellow leaves on tomato plants. 

How To Fix

I have listed some tips to handle the situation:

  • During the plantation stage, you should water only when the surface is dry. A spray bottle for watering is best recommended as a limited amount of water is spread, and the risk of overwatering is also reduced.
  • Consistent watering habits should be encouraged while transplanting tomato plants. 
  • Water plenty when the weather is too hot. Don’t let the soil lose its moisture. 
  • Avoid overhead water irrigation as the sun may damage the plants, and they become more prone to disease, rather, use a soaker hose to water your tomato plants. 
  • Be extra cautious while watering your potted tomato plant. They require twice as much watering per day.
  • A deep irrigation system is proven to be more efficient than a sprinkler system. It also reduces the risk of diseases. If you cannot afford this, be extra cautious of the changing weather. Avoid watering during heavy rain and increase watering during hot weather. 

#3 Transplant Shock

Transplant Shock

When newly transplanted tomato leaves turn yellow, it must be because of transplantation shock. They are very critical and delicate and get damaged easily when brought into a new environment.

Never break up the roots; even a small root break can result in leaf curling, yellowing leaves, and wilting.

Little transplant shock is normal and natural, and it gets recovered with correct watering techniques, soil nutrients, and regular plant care. 

How To Fix

  1. Tomato roots are very delicate, so gently transplant them into the soil. Put the entire root ball and lower stem into the soil without touching the roots. Then put some soil in and water them properly.
  2. Do not stress if your baby plant is already undergoing transplant shock. Let it recover on its own.

#4 Poor Soil Aeration

Poor Soil Aeration

Poor soil Aeration is associated with a lack of oxygen in the soil. Due to this, the roots of tomato plants are suffocated and become inefficient in delivering the plant’s needs like water, oxygen, and nutrients to the entire plant.

As a result of which, the leaves start turning yellow. As the plants won’t get their food, it gets damaged and dies after a certain period.

The problem arises when the soil is too tight and never loosened. This creates uneasiness for the young roots. Walking around the near area of your plant can also raise this problem.

How To Fix

  1. Transplant your tomatoes in nutrient soil. While transplanting, dig 2-3 times to keep your soil aerated. Later, put some nutrient-enriched soil.
  2. A good garden naturally has aerating agents like worms. They keep the soil naturally aerated. 
  3. If you are going through compaction, you can use aeration spikes. But mind this may cause harm to the root of the plants and may damage them. So be extra careful while doing the process. You can also opt to plant your tomatoes in a container. This will never raise the problem of soil compaction. 

#5 Disease

Once your tomato plant catches a disease, you can’t cure it easily. So it is always best said that prevention is better than cure.

Not maintaining a good soil drainage system is the main reason for the spread of disease in tomato plants

A few tomato diseases are briefly discussed below: 

Early Blight

Early Blight

Blight is tiny in size, very hard to identify on the plants, and are also called plant lice, and they are generally found on older leaves.

They form a ring, round pattern spots, and create holes in the leaves. The near spot area of leaves turns yellowish. They damage more foliages in hot and humid weather.

They also damage the fruits, and infected fruits drop from the plants.

Prevention: The blight issue can be resolved to a certain extent by following the points below.

  1. Plantation should be done where direct sunlight exposure is available, especially in the morning sunlight. This would help the foliage to be dry. 
  2. Avoid overhead watering, and do not water your plant in the afternoon time.
  3. Good quality and disease-free seeds should be used while the cultivation of tomatoes.
  4. Do not plant potatoes with tomatoes in the same garden. 
  5. Discard the diseased plants and do not use them as compost.

Septoria Leaf Spot

Septoria Leaf Spot

The Fungus Septoria Lycopersici causes septoria leaf Spots. The leaves, stems, and petioles of the plant are affected due to the disease, but the fruit is not affected. 

The disease starts showing spots in the lower leaves when the fruits are set on the plant. 

Older leaves are mostly attacked. 

Small round spots with dark brown borders can be seen on the affected leaves. The affected leaves turn yellow and die after some time. The plants are more prone to get infected with this disease when the temperature is between 68-77 degrees F, and the plant remains wet due to rainfall or overhead irrigation. The ultimate goal of the disease is to reduce the quality of fruits, and a large number of fruit production weakens the plant and leads to sunscald. 

Treatment: 

Maintain at least three years of crop rotation. Avoid overhead irrigation of your tomato plant. The use of chlorothalonil or copper fungicides prevents this disease. 

Fusarium Wilt

Fusarium Wilt affects the roots of tomatoes

Fusarium oxysporum is responsible for the occurrence of Fusarium Wilt. They are more active in warm weather.

Their impact on small plants can be seen as the shedding and wilting of leaves, the green color of the plant starts to fade, and in the end, the plant may not survive and dies.

Generally, only one side of the affected leaves turns yellow. The stems are internally affected, and discoloration in the stem can only be seen when the stems are cut. This fungus is only born in the soil and transferred to the plants from its roots. 

Treatment: 

  1. Plantation should be done in soil free from pathogens. 
  2. Maintain the pH level of the soil from 6.5 to 7.00.
  3. Use nitrate nitrogen like calcium nitrogen, and avoid using ammoniacal nitrogen. This helps in the prevention of the disease.

Verticillium Wilt (not found)

It is a soil-borne fungus caused by Verticillium Alboatrum. They are more prone to spread in the garden’s cooler northeast side.

Mainly the lower leaves are attacked and form yellow patches, then develop into brown spots and finally, they curl up and die. 

Treatment:

The affected leaves cannot be cured. So you need to pull and discard the plant as soon as possible. It is a highly contagious disease and can be easily spread to other plants too. So never use the infected plant as compost. 

#6 Nutrient Deficiency in Tomato Plants

sign of nutrient deficiency in tomato fruits

Yellow leaves in developed plants are a sign of nutrient deficiency. As tomatoes require a high amount of nutrients for their proper growth, they are known as heavy feeders.

Nitrogen, phosphorus, potassium, calcium, sulfur, magnesium, zinc, copper, and iron are needed for the complete and healthy growth of tomato plants. 

Nitrogen deficiency is mainly responsible for the yellow leaves of tomato plants. But before providing a high dose of nitrogen, it is very important to identify which tomato plant is going through the deficiency of exactly which nutrient. Excess of any nutrient can harm your plant. 

To identify the exact nutrient deficiency, check which part of the leaves is turning yellow, and it is also best to do soil tests to identify your plant is deficient in nutrients. 

How To Fix

First, it is important to identify which part of the leaves is discoloring so you can understand the exact nutrition deficiency. 

Yellow older leaves indicate a nutrient deficiency in nitrogen, potassium, and magnesium. Old lower leaves of the plant turn yellow.

Nitrogen deficiency is the main reason for the yellowing tomato leaves, and the whole leaf becomes yellow. Still, high nitrogen can only develop more leaves, and the plant has to compromise its production of flowers and fruits. So enrich your soil with the right amount of nitrogen to eliminate the problem.

When the leaf’s outer edge turns yellow, it is a symptom of potassium deficiency. Later the leaves turn brown. The use of potassium-rich fertilizers helps to better the leaves’ situation, and in turn life of the plant is also ensured.

Yellow leaves with green vines are signs of magnesium deficiency. Solution of Epsom Salt with water application would turn the yellow leaves into green almost within a week.

If new and younger leaves turn yellow, it is a sign of calcium and iron deficiency. 

Calcium deficiency can also cause Blossom End Rot and discoloration of leaves in tomato plants. You can mix crushed Eggshell and shell meal in the soil to fulfill the calcium deficiency.

Iron deficiency can cause yellow leaves along with green veins. Apply 2 ounces of iron Sulfate with 3 to 5 ounces of water to eliminate iron deficiency in tomato plants. 

Before doing any remedy, it is best and important to do a soil test. It would help to identify the nutrient deficiency and pH level of the soil. Fertilizers responsible for curing yellow color leaf should be only used. 

#7 Pests

tomato pests

Tomato plants are more prone to attract pests, and some can cause the leaves to turn yellow. If you have identified any fungal disease or pests, You should take measures to control and resolve the issue. 

How To Fix

  1. Go through your state extension program website regularly to check if any tomato health issues are general in your region.
  2. Healthy soil and crop soil rotation can help to reduce pests ultimately.
  3. Planting companion plants like pepper, garlic, and basil can also reduce the problem.
  4. Using neem oil in the evening once a week can also help solve the problem.
  5. The organic spray also helps to control pests.

#8 It’s the End of the Tomato Season

end of tomato season causing yellow leaves

At the end of the season, it is quite natural for your tomato plants to turn yellow and fall from the plant.

When the leaves of tomato plants turn yellow or brown at the end of summer, it is part of the plant life cycle. Leaves help the plant to get their food.

Leaves responsibility is done when the plant sets fruit on it. 

When you notice such a situation, it is better to prune the yellow leaves. It helps plants to utilize their energy in the development and ripening of fruits. 

How To Fix

No remedy can be done as it is a natural process of the plants and part of their life cycle. Instead, you should be happy that your plant has successfully completed its task.

Final Thoughts

Yellow leaves on your plants may occur due to numerous reasons. So handle the situation patiently and try to identify its main reason, as discussed above in this article. Take measures to solve the issue, as you can resolve most of it. 

Keep a closer look at your tomato plants to identify the pests or spread of fungal diseases when you observe tomato plants turning yellow.

13 Best Blue Hydrangea Varieties For Home Gardens

Are you also a lover of Blue Hydrangeas and want to make your garden beautiful? This universe has gifted us with a wide variety of Hydrangea. So in this article, I have discussed the 13 best blue hydrangea varieties you can plant in a home garden.

Blue is one of the best colors, enhancing the garden’s overall look. So planting a blue hydrangea in your garden is the best thought. You can easily pair blue with any other color; it feels relaxing and soothing too.

If you are looking for annual blue flowers, then blue Hydrangea is the best choice.

I have briefly discussed varieties of blue hydrangea flowers, but please note that some varieties can be good only in full exposure to sunlight, and some perform well in half shade. 

Blue Hydrangea Varieties

varieties of blue hydrangeas

Most of the blue hydrangeas are bigleaf, but there are some Hydrangea serrata, you shouldn’t miss.

The bigleaf hydrangeas are mostly medium size and fit well as a border of the garden. Their large, rounded leaves are mesmerizing when combined with larger flowers. It produces flowers that are mophead and lace cap in shape. 

Hydrangea serrata is a perennial shrub. It seems smaller than bigleaf hydrangeas. Commonly it is known as mountain hydrangea and tea of heaven. It produces flowers with lace-cap shapes which are very delicate.

Due to its attractive look, foliage, and size, it is added to perennial gardens. 

Hydrangea Macrophylla Species

Hydrangea Macrophylla is commonly known as bigleaf Hydrangea. Their foliages are longer than any other hydrangea varieties and are native to Japan and Korea. 

They are also captivating due to their large and glossy leaves. 

Many gardeners choose it because of its beautiful flowers, leaves, and easy maintenance. It loves to grow in partial shade and well-drained soil. 

Big Daddy

blooming big daddy hydrangea

It is one of the species of hydrangea macrophylla, which is referred to as mophead hydrangeas. It blooms sky blue and reaches up to 14 inches.

It prefers to grow in partial sunlight and moist, well-drained soil and blooms from mid-summer to early fall. Its green and glossy leaves look more attractive after a frost.

It grows up to a maximum height of 6 feet. It is a cold and hot-tolerant plant. Thus it becomes the first choice of gardeners. It can also easily bloom in old and new woods. 

Endless Summer Hydrangeas

fully bloomed Endless Summer Hydrangea

It is one of the most beautiful varieties of Hydrangea and is commonly known for producing endless blooms during the summers and is called true reblooming Hydrangea.

Endless summer also blooms in old and new woods like “big daddy.” It prefers to grow in partial sun, especially in the afternoon and requires moist and well-drained soil.

The plant is covered with blue mophead blooms, and it gets more decorated because of its glossy green foliage.

This unique plant grows up to a height of 3 -5 feet (0.9 – 1.5 meters). It is an economical shrub that can be grown in containers and or in a grouping, adding colors and beauty to your garden. 

Endless Summer Twist and Shout

Endless Summer Twist and Shout hydrangeas
Image Credit: Michele Walfred via Flickr 

It produces flowers in lace cap shapes and blooms in periwinkle to dark pink, depending on the pH level of your soil. 

It has a red shade stem which adds extra glory to your garden. It is hardy in zones 4-9 and grows to 3-5 feet tall. The plant prefers to grow in partial sun, especially in the afternoon, and needs well-drained, moist soil.

Générale Vicomtesse De Vibraye

french hydrangea variety

Générale Vicomtesse De Vibraye is a French stunner and a large hydrangea with a maximum height of 6 feet and a width of 8 feet.

It blooms in the shade of pale blue with huge flower heads. It has a wavy edge which makes the plant more attractive.

It loves to grow in the morning sunlight and afternoon shade and can be grown in different types of soils.

If blue flowers are dried, they turn their shade to blue-green, giving them a unique feature. Its blooming time is early summer to mid-fall. It is hardy in the zones from 6-9. 

Let’s Dance Rhythmic Blue

Rhythmic blue hydrangea

Rhythmic Blue is straightforward to grow, and even pruning is not needed for this plant. It produces deep blue flowers in mophead style, making it unique in features.

One of its special features is that it can maintain its dark blue shade even in high-pH soil, which is non-acidic and thus preferred by gardens with neutral or high-pH soil.

It blooms in mid-summer to early fall. It prefers to grow in the partial sun of the afternoon and requires well-drained, moist soil. 

It is also a reblooming hydrangea-like endless summer that blooms on new and old woods. It grows to a maximum height of 4 feet and can be added to your perennial garden. This shrub is cold-resistant and hardy from zone 5-9. 

Mathilda Gutges

Mathilda Gutges hydrangea
Image Credit: Michele Walfred via Flickr

Mathilda Gutges is an amazing variety of Hydrangea which produces flowers in a rich blue shade with light blue shade in the center of the flowers, due to which the flowers look really amazing and enough to mesmerize you and decorate your garden.

It blooms in early summer to the middle of the fall.

It has an average height of 3-6 feet and prefers to grow in partial sun. The right time for pruning the plant is just after the end of the blooming season as it blooms on wood. It’s hardy from zones 5-9. 

Nantucket Blue

blooming Nantucket Blue hydrangea

Nantucket Blue is classic and very popular on the east coast of the United States.

It is a reblooming hydrangea and blooms from early summer till the beginning of the frost. Its maximum height is 6 feet, and preferred as a border plant.

It is hardy in the zones from 5-9. You can plant it in both full and partial sunlight. The ideal sun timing for its smooth growth is 6 hours of daily sunlight. 

Pruning is not required as it grows at a medium pace. 

Nikko Blue

Nikko Blue hydrangea

It is a deciduous shrub that blooms with blue flowers and grows to a height of 4-6 feet. It prefers to grow in partial sunlight and needs moist, well-drained soil.

It blooms in the early summers and mostly preferred to be planted on the garden’s border along a wall or fence. Be very cautious about pruning as it blooms on old wood. 

Generally, the plants which bloom on old wood do not require pruning. But if you want to prune it to give it a good shape and size, then the ideal time to prune is just after the end of its blooming season, i.e., in August and September. Do not prune later than this, as the plants will not be able to bloom in the next season. 

PennyMac

pennymac hydrangea variety

Most gardeners prefer to grow PennyMac as its maintenance requires much less effort. It grows 6 feet high, spreads up to 4-6 feet, and grows rapidly. It blooms giant blue mophead flowers in the summer. It looks gorgeous also because of its glossy green leaves, which turn red or burgundy in the fall.

Avoid pruning this plant. If the plant has some winter damage, you should prune it, and that too very minimum. It can also tolerate full exposure to the sun if the soil is moist enough.

Most gardeners opt to grow it as it is weather tolerant, needs low maintenance, and produces showy flowers. It is planted as borders, hedges, and as a specimen plant.

Early Blue

the early blue variety of hydrangea

If you are searching for container hydrangea plants then Early Blue is the right option as it grows smaller. This plant is very easy to manage and breed and comparatively blooms for a longer period of time.

The shade of its bloom is blue and pink, and it blooms in the early summer. It is preferred to be planted as the border of the garden. And it is hardy from zones 5-9.

Hydrangea Serrata

It is a flowering shrub species native to Japan, Korea, and china. It grows very short and only up to 2 feet.

Thus it is a great option for those who want to grow small hydrangeas. It is resistant to cold climates. It blooms blue and gives your garden a very different and beautiful garden. 

Blue Billow

blue billow hydrangea variety

It produces sky-blue flowers in lace-cap shapes, which are very delicate. The plants look so amazing, especially after blooming. It blooms only from the beginning to late summer. It has dark green, glossy, pointy, and narrow leaves.

The shade of foliage turns burgundy during the fall. It grows 4 feet high and 10 feet wide. It prefers to grow in partial sunlight and needs well-drained, moist soil.

It is a cold-resistant plant and hardy in zones from 5-9. But it blooms more consistently in warmer climates. 

Bluebird

bluebird hydrangea

Bluebird is a unique hydrangea, and light blue florets surround its fertile flowers in rich blue shades and give it an immense look with its double shades. Its maximum height and width are 4 feet.

The flowers pair well with their dark green leaves, and their color changes to red in the fall. It blooms during summer and is used as a border and accent plant. It loves to grow in partial sunlight and is hardy in zones 6-9.

LA Dreamin Hydrangea

La Dreamin Hydrangea species

La Dreamin Hydrangea loves to grow in full exposure to sunlight. Thay have pink blooms to bright blue shades in the same bush. But if you want blue blooms, you need to maintain soil acidity. Soil with low pH is suitable for blue blooms. 

It is a favorite of many gardeners because it is cold and heat tolerant. It grows up to 5 feet high and 6 feet wide. It can bloom in both old and new woods. Thus pruning can be done to control its height. 

Color Changing

the hydrangea changing color

Bigleaf hydrangeas or Hydrangea Serrata bloom into many shades, which are influenced by the soil’s pH and aluminum levels. For blue-shade flowers, more acidic soil is needed, and a low pH level of soil ranging between 5.2 – 5.5 is favorable, and in such conditions, more aluminum is absorbed.

Instead of blue flowers, if your plant is blooming pink, add aluminum sulfate to the soil to get blue blooms. But it should be within the limit to avoid any complications in the future.

Prepare a mixture by adding one tablespoon of aluminum sulfate to one gallon of water and only apply the solution to the plant but water the plant before this application if the plant is already dry.

The process should be done twice a year, once in the month of April and again in the month of May.

How To Care for Blue Hydrangeas?

How To Care for Blue Hydrangeas

You can change the shade of Hydrangea to many colors, and it can be pink, purple, or sky blue. For the change of shades, the soil’s pH level or its acidity level plays an important role.

You can turn the shade from pink flowers to blue or vice versa by controlling the pH.

Use a soil test kit to measure the pH level and acidity of the soil to get your favorite blue color blooms in your garden. You can follow the below tips to get your specific and favorite shade.

Choose the Right Kind of Hydrangea

The Bigleaf Hydrangea can change the color of its bloom. You can also go for “Anabelle,” which blooms in white or cream color and is enough to beautify your garden.

If you are very specific about blue Hydrangea, choose the variety that blooms blue. 

Choose Blue Varieties

Choose the varieties like Nikko Blue, Endless Summer Hydrangea, penny mac, Blauer Prinz, and Endless Summer Twist -n- Shout.

You can identify the blue color hydrangea with the tag on the plant if the plants have not bloomed in the nursery. 

Measure the Soil pH

Measure the Soil pH

Not to worry, measuring the soil pH is not a complex process. The acidity or alkalinity of the soil can be known by the level of pH in the soil, and the range of pH of the soil is from 0-14, and 7 is neutral.

Less than 7 pH level specifies the soil’s acidity, and more than 7 specifies its alkalinity. You should use the Soil test Kit to measure the soil’s pH level for accurate results. 

Pick the Flower Hue You Want

The ideal pH level of soil for blue Hydrangea is from 5.2 to 5.5. Neutral to alkaline soil with a pH level of 6.5 and more is good for planting pink flowers.

To enjoy purple flowers or a mixture of blue and pink flowers, you need to maintain the soil pH from 5.5 to 6.5. Now do a soil test to ensure your next step. 

Adjust the Soil pH

Most of the garners have neutral soil, and if they want to grow blue Hydrangea, they need to maintain the ideal pH level of the soil and acidify the soil to get blue hydrangeas.

You can do it by adding sulfur, aluminum sulfate, and other acidic soil to lower the pH of your soil. You can lower the pH of the soil by using Organic Fertilizers.

You can also get the soil that can best fit for the cultivation of hydrangeas.

Using soil sulfur and garden lime can bring the soil pH level, and you can get your favorite color to bloom in your garden. The use of a pelleted mixture is highly recommended while planting the Hydrangea. 

Continue to Acidify the pH for Blue Blooms

The color of the blooms also depends on the pH of the soil. You need to plant the Hydrangea in acidic soil and maintain its pH from 5.2 to 5.5 blue Hydrangea.

The top layer of the soil should be acidified around the root area, and this process should be performed, especially in early spring. 

If you have already planted in neutral or alkaline soil, it won’t support the plant to bloom blue flowers, and if it has already bloomed pink, then you would be able to get blue ones in the next season only. 

What is the dark blue Hydrangea called?

Dark Blue Hydrangea is often called “Nikko Blue Hydrangea” and are known as the bluest hydrangea. It is a popularly cultivated species of hydrangea macrophylla and continuously blooms for two months from the beginning of summer. It has glossy, medium green, and large leaves, giving it a gorgeous look. 

It grows to a height of 4-6 feet and prefers to grow in partial sun in well-drained, moist soil. It blooms blue in acidic soil and pink in alkaline soil. 

Final Thoughts

You can choose any of the varieties discussed in this article according to your ease and decorate your garden like never before. Choose the varieties according to your local climatic conditions and understand the need for varieties planted and cared for it, and the plant will reward you with many blue blooms. 

Frequently Asked Questions

What do blue hydrangea flowers mean?

Sometimes it becomes really difficult to apologize in the right way when you make a mistake. In such cases, blue hydrangeas help a lot. You can present blue hydrangeas and seek forgiveness. It is the symbol of regret, guilt, and remorse.

Can You use vinegar to turn your hydrangeas blue?

Using vinegar in the soil may turn the shade of bloom into blue, but it could be for a very short span of time. And it also takes longer than usual to turn the shade into the blue.

Vinegar also works as an insect repellant. So there are high chances of repelling the beneficial insects too. Thus, I would never recommend using vinegar to change the shade of hydrangeas in your garden. 

Will blue hydrangeas come back after the winter?

All hydrangeas like Blue, White, or Pink are resistant to winter if they are properly cared for. But potted hydrangeas, which are replanted, may not survive in the winters.

You need to choose the variety which is suitable for your local climate. The hydrangeas need extra care and protection in winter and can bloom gorgeously. 

Caring For Geraniums: How To Plant and Grow Pelargoniums

Geraniums, an aromatic and colorful flower plant, are commonly planted and are one of the most favorite flowers for any gardener. They are very easy to grow in garden beds and even in hanging baskets and containers. The best time to plant Geraniums is in autumn; they develop their roots in the fall. 

So, if you are looking for an answer on how to plant your Geraniums:

Short Answer:

  • Take a fine healthy cutting of the Geranium stem.
  • Make drainage holes.
  • Place it where you want to grow, like garden beds, containers, or pots. It would be economical as compared to replacing them. 

You can care for your plant by following good watering techniques, maintaining a good soil drainage facility, and saving your plant from frost and cold. Keep the plant in sunlight for 4-6 hours per day for proper blooming and good growth.

(Please be informed that here I am not discussing Hardy Geraniums, i.e., cranesbill, and only discussing annual geraniums, i.e., pelargoniums. These geraniums are sensitive to cold and need to be brought indoors during winter).

Geranium or Pelargonium?

Geranium or Pelargonium

The plant that we call “Geranium” was brought to Europe by Dutch traders. In the early 18th century, Dutch brought the plant from South Africa. 

Since the same-looking plant, “Wild Hardy Geraniums,” were already grown in Europe, botanists mistakenly categorized them into the same genus. 

Later, in 1753, a botanist named Carl Linnaeus categorized the plant under Geranium. It was after that they noticed that new Geraniums were different from European Geraniums; their petal shape, stamens number, and many other factors were different, so they classified them as Pelargoniums. It means Stork’s bill refers to large, thin, and sharp-pointed seed pods. 

The original name of the plant is Stuck, and yet Pelargoniums are commonly said to be geraniums only.

Botanical NamePelargonium spp
Plant TypeHouseplant
Sun ExposureFull Sun
Bloom TimeSpring, Summer
Flower ColorPink, Purple, Red, White, Multicolor
Hardiness Zone10, 11

Popular Types of Geraniums

geraniums planted in hanging containers

Geraniums are the ultimate adaptable plants, offering over 300 species in their family. Whether it be color, type of bloom and foliage, or scent – geraniums have something for everyone.

They come in a wide range of sizes, from petite six-inch versions to mightier options that can reach several feet tall with an array of blooms! 

Let’s explore four of the most sought-after varieties:

  1. Ivy Geraniums – Ivy geraniums are often grown as houseplants or in hanging baskets due to their trailing habit and delicate five-petal pink, white, red, or violet flowers. The foliage of ivy geraniums is a vibrant green shade with a glossy texture that makes them stand out among other plants on the market.
  2. Scented-Leaf Geraniums – The foliage of these scented geraniums is a scented delight! They emit an aroma from the oil-producing glands on their leaves when touched or brushed against, making them a delightful addition to any outdoor space. These plants are available in vibrant colors such as white, pink, and purple.
  3. Zonal Geraniums – They are a garden favorite due to their various colors, shapes, and sizes. Their name comes from the distinct dark circular ‘zone’ in their center, which is common among all varieties of this species. They usually grow to about 18 inches tall with a mounding habit.
  4. Martha Washington Geraniums (Also known as Regal Geraniums) – Most geraniums of these kind are known for their show-stopping features, offering large 4-inch blooms in vibrant shades of purple, pink, and white. They also have a compact bush-like growth habit that makes them great for container gardening or flower beds. Their foliage is attractive too, with a dark and glossy texture that ensures they stand out in any garden.

Regardless of the type you choose, geraniums make an excellent addition to any landscape or indoor space.

Their hardiness, versatility, and vibrant blooms make them an ideal plant for novice and experienced gardeners alike.

With over 300 species available, there’s sure to be a geranium for everyone!

Planting Geraniums?

how to plant geraniums
  • You can grow Geraniums in pots or containers or as annual flowers. It is quite beneficial to keep them outside in warm weather in sunlight. If you have planted geraniums as houseplants, do not forget to bring the plants indoors in cold weather conditions or during later summer or early fall when the temperature at night goes below 13 degrees celsius or 55 degrees Fahrenheit. 
  • Closely monitor the size and color of the geranium plants while purchasing. Evenly green-colored leaves with strong stems indicate a sign of a healthy plant. Do not choose a plant with a straggly or uneven shape stem. Ensure not to bring any plant which shows signs of pests also. Generally, mealybugs, whiteflies, and spider mites are very common pests in indoor plants.
  • Ensure a good drainage facility by making a hole in the pots. It would reduce the risk of root rot. 
  • Geraniums prefer to grow in well-drained soil and not in excessively wet, soggy, or compacted soil. Thus, use a properly drained soil mix for planting geraniums in containers. Avoid using heavy or clayey soil. 
  • I would recommend to keep the plants in at least 4-6 hours of sunlight for a maximum blooming of geranium flowers. (check this post “Geraniums Not Blooming: Reasons And Solutions“if you are having problems with geraniums bloom)

Growing Geraniums?

How To Care For Geraniums?

caring your planted geranium
  • Check the moisture level of the soil before watering. If the soil’s top inch is dry, you can water the plant.
  • Avoid frequent watering during winter months but do not let the roots completely dry out. Geraniums perform great when allowed some dormancy during winter months. During winters, they require less water and grow slowly and steadily. I have discussed this below in detail. 
  • Remove faded or dead flowers from the plant to encourage blooming.
  • To discourage leggy stems and encourage bushiness, prune back the stem.
  • Use good fertilizer once every two weeks during the growing season. Using a water-soluble fertilizer is best recommended. Avoid fertilizers during winter when your plant is dormant. 
  • You can re-pot the geranium plants in spring to have new growth or when they need to be refreshed. 

Overwintering Geraniums

Overwintering Geraniums
  • If you have kept geraniums indoors during summer, you can still keep them indoors if they get adequate sunlight. There may be a lack of adequate sunlight in northern climates during late winter to set buds on some of the geranium plant varieties. 
  • Before the start of the first fall frost, using a clean, sharp knife, cut the plant’s stem sharply up to 6-8 inches. Here they don’t need to utilize their energy to grow leaves in low sunlight areas where they are about to be placed. 
  • “Mother Plant” should be transplanted in the smallest pot, which can just fit its roots. You can use normal potting soil for this. 
  • Place your geranium plant in the shade for one week. Later find a sunny spot and keep your plant there. Ensure they get the adequate amount of required sunlight and keep the plant cool. 
  • The best-fitted night temperature in winter for the plant’s growth is 50 to 60 degrees Fahrenheit, i.e., 10 to 16 degrees Celsius. They will only survive if they are kept relatively dry at 32 to 80 degrees Fahrenheit, i.e., 0 to 27 degrees Celsius. 
  • Prune the old leaves when new leaves grow. 

It is tough to maintain a plant’s growth rather than getting a new one. I have listed some tips to maintain the continuous growth of your geraniums:

  • It is better to water your plant only when its leaves show signs of falling. In this situation also, provide only a small amount of water. Do not feed your plant in any way, and stop giving fertilizers. Your Geranium should get proper rest to grow uninterruptedly. 
  • If you wish to see your overwintered geraniums blooming during summer, prune them in February. As and when the frost ends and the risk of cold is gone, bring your plant outdoors in sunlight, and you can transplant them in pots, containers, or garden beds. 

Harvesting Geraniums

Geraniums can form roots simply from stem cuttings in soil, water, perlite, or other material needed for root material. 

  1. Use a clean, sharp knife and make an angle to mark a tilted cut on the stem of the Geranium, just above the nodes from where the leaves come out. Remove the buds, if any, and leave only two to three leaves on the stem.
  2. Take the cut and rap in a newspaper. Preserve in the shade for 24 hours at least to dry out the cut ends. It prevents the stem from rotting. 
  3. Now keep that stem in a damp pot and place it in a shady and warm place for two continuous days. Now, put the pruned plant to the indirect sun and moisten the medium when required. 

Wit And Wisdom

  • Geranium leaves work best if you have a minor cut. You can crush some of its leaves and apply them to the cut area. It reduces bleeding.
  • Pelargonium Geraniums mean silliness in the language of flowers.
  • Japanese beetles hate geraniums. So, you can easily prevent these annoying pests with geraniums. 
  • You must keep Pests and children away from geraniums as they can cause vomiting and indigestion in young children and pets. 

Geraniums Pests and Diseases

Geraniums can become prone to various pests and diseases due to the following reasons:

  • Not keeping the plant for at least 4-6 hours in sunlight per day.
  • Over or under-watering of the plant.
  • Improper soil drainage facilities.

In such conditions, your geranium plant’s leaves would turn yellow, and even your plant would wilt. 

So keep them in proper sunlight and water them adequately. Also, maintain a good soil drainage facility. 

Geraniums Varieties We Recommend

  • If you are planning to grow your geraniums in a container, go for Common or Zonal Geraniums (Pelargonium x hortorum). It thrives well in containers and outdoors too. 
  • Ivy-Leaf Geraniums (Pelargonium peltatum) is beneficial to grow in hanging baskets, window boxes, and containers

Summary

Annual Geraniums are lovely and aromatic flowers loved by most gardeners. Geranium cuttings are placed in containers, pots, or beds to grow into a plant. It is challenging to plant them in such a manner, but if you follow the above-discussed tips and tricks, it will be fun and exciting to plant them. 

Ensure to water them properly, expose them to the sunlight, protect them from frost and cold, and maintain a good soil drainage facility. It would help your plant to be away from any pests and diseases. And you can enjoy lovely colorful, scented geranium flowers almost every season. 

Frequently Asked Questions

Do geraniums come back every year?

Yes, Geraniums can come back year after year. A geranium’s exact lifespan will depend on your variety and how it is cared for. Most varieties will live for several years if given proper care. It is possible to grow geraniums from seed, but it is often easier to purchase already established plants.

When planted in well-drained soil, kept moist, and provided with adequate sunlight, geraniums can thrive and flower all summer long.

For a lovely springtime bloom, potted geraniums just need to be brought indoors during winter. In order for them to thrive, expose the plants to 55 degrees F while shielding them from chilly nights and frosts.

Are geraniums annuals or perennials?

Geraniums are classified as both annuals and perennials. Annual geraniums (Pelargonium x hortorm) bloom from spring until frost, while perennial geraniums (or true geraniums, or cranesbills, as they’re sometimes called – botanical name: Geranium spp.) are evergreen, with blooms appearing intermittently throughout the year. 

As a general rule of thumb, annual geraniums are planted directly in the ground and will die back at the end of each growing season. 

Perennial geraniums can be grown in containers or planted directly into the soil, and they’re hardy enough to survive the winter in most climates.

Can you grow geraniums from seed?

Yes, you can grow geraniums from seeds! This is a relatively easy process that requires only minimal supplies. You’ll need geranium seeds, potting soil or seed starting mix, and small pots or trays.

Tomato Plant Not Setting Fruit: 7 Reasons Why?

It is heartbreaking for any gardener to see their tomato plants unable to produce fruits. 

If your tomato plant is not setting fruit, try to identify the root cause behind it. Sometimes the plant produces flowers, but unfortunately, they are not pollinated, resulting in dropping them. The reasons behind blossom drop are unfavorable climatic conditions, too much nitrogen, over or under water, less nutrient soil, diseases and pests, and insufficient light. 

In this article, I have discussed seven reasons why tomato don’t set fruit and how to fix this.

Why Tomatoes Won’t Set Fruit?

Tomato Plant Not Setting Fruit 1

Unfavorable weather conditions and lack of pollination are the main reasons for not setting tomato fruits on the plants. 

High temperatures and drought make tomato plants struggle to set fruits. 

As per the College of Agriculture, Forestry and Life Sciences, “Tomato plants have complete flowers, meaning they contain both male and female parts within the same flower. The tomato flowers hang down in a cluster and are pollinated when shaken by movement such as wind.” 

When the flowers cannot pollinate properly, they fall from the plant and die. Pollination is mainly affected due to high temperatures and drought. 

The ideal temperature for a tomato plant’s growth is 70-85F. Temperature beyond or below leads to blossom fall. The best you can do during higher temperatures is properly irrigate your plant. 

The tomato plant starts pollinating only when the temperature becomes moderate.

7 Reasons Your Tomatoes Aren’t Setting Fruit and How To Fix Them

Like any other plants, tomato plants require certain conditions to produce juicy and plumpy fruits. But if the plant won’t get a favorable environment, neither flower nor fruit is produced.

Below are the briefly listed problems with their solutions.

Lack of Pollination

Lack of Pollination

Bees, butterflies, and insects play an important role in the pollination of flowers. If you can see flies and insects in your garden, it signifies a healthy garden. Like other plants, tomato plants also require these flies and insects to complete the pollination process.

If you notice that tomato flowers are still yellow and are not transformed into fruits, it needs more food to attract pollinators; hence, the pollination process still needs to be completed. 

Also, excessively hot (above 90 degrees F) or cold ( below 40 degrees F) climates can also negatively impact pollinators’ ability to complete the pollination process. 

Sheltered or greenhouse tomato plants struggle for good airflow, which is needed for pollination. Keep your indoor tomato plants in such an area where there is good airflow, 

How To Fix

There are numerous ways to fix the pollination issue:

Hand Pollination: Hand pollination is quite an effective technique used to stimulate the pollination process of tomatoes. You can perform this on warm sunny days. 

All you need to do is shake the flowers with your hand or pencil. Using a powered toothbrush is a better option to pollinate them. Its vibration acts similarly to create the buzz of bees.

Tomato blossoms have both male and female parts to be self-stimulated. You should repeat the process daily for 2-3 days, and it will resolve the pollination problem. 

You can watch the below video of hand pollination for better clarification.

Importing pollinators:

If you lack pollinators in your garden, you can easily import pollinators such as bumble or mason bees from garden stores and release them in your garden. 

But you need to plant flowers in the garden to stick the insects and bees in your garden.

I prefer planting Bee Balm, Goldenrod, Basil, and marigold to attract pollinating insects in my garden. In this way, you can maintain the food sources for pollinators, and raising native honey bees is also the best option. 

Lack of Fertility

Lack of Fertility

Nutrition is the main food of tomato plants. Thus lack of fertile soil affects the tomato fruit production of the plants. Potassium and phosphorus are mainly responsible for tomato production. 

Potassium helps form flowers, and phosphorus is needed for tomatoes’ high yield and ripening. Using fertilizers rich in potassium and phosphorus can increase the production of fruits in plants. 

You can complete the potassium deficiency using quality compost, rotten manure, hardwood rock powder, etc., and you can fulfill phosphorus deficiency with manure-based compost—fish bone meal, rock dust, etc.

How To Fix

At the flowering stage of tomato plants, avoid using nitrogenous fertilizers; instead, potassium and phosphorus fertilizers are used to enhance the fruiting ability of the plant. I prefer using organic kelp fertilizers biweekly to enhance the nutrition level in the soil. 

If you use organic fertilizers and compost at the beginning stage of the plantation, you won’t face nutrient problems.

Too Much Nitrogen

Too Much Nitrogen

If you identify your tomato plants as healthy and lush but struggle to produce fruit on them, there might be some fertility issues. If large leaves are there on the plant, but fruiting is not taking place, then it has too much nitrogen. 

Though nitrogen is very important for tomato plants, too much nitrogen can create fruiting issues. 

Excessive leaves are developed due to high nitrogen content in the soil, and the maximum energy of the plant is wasted in producing leaves only, and the plant ignores the setting of the fruit or leads to poor fruit development.

How To Fix

Nitrogen is necessary to plant tomatoes, but a high dose of nitrogen impacts the fruiting of tomatoes. Always use a small amount of nitrogen while on a plantation. If organic fertilizers are used at the plantation stage, they will deliver a very low and feasible amount of nitrogen to the plants and can take care of the danger of nitrogen overdose.

If your plant is already nitrogen overdosed, give your tomato plant ample water to get rid of the excessive nitrogen issue. The use of Carbon Rich Mulch helps suck excess nitrogen from the soil. 

Drought or Overwatering

Drought or Overwatering tomato plants

Tomatoes’ main ingredient is water, as they contain almost 90 percent of water. 

They need plenty of water to complete the process of fruiting from flowering. 

However, drought can create water stress in the plant, resulting in blossom dropping, and the plants affected by drought may look wilt or yellow

On the other hand, overwatering also creates some serious issues like root decomposition, attracting various diseases and pests, which is enough to damage your precious tomato plants. 

Due to overwatering, the roots are soaked into water and incapable of delivering the required nutrients and water to the plant, impacting fruit production. 

The leaves of the plant would look yellow or brown.

How To Fix

The thumb rule for watering your tomato plant is deep your dry finger in the soil (1.5 to 2 inches) and check if the soil is dry.

And if your finger is moist, you must wait to water them. Your tomato plants need 1 inch of water weekly. 

You need to be extra cautious about watering them when there is a rain shortfall. 

Blossom End Rot happens mainly because of inconsistent watering. 

Always use straw or leave mulch to maintain good moisture in the soil.

Tomato Diseases

late blight tomato plant disease

Plants impacted by diseases and pests would obviously be unable to produce fruits. The plant become too stressed to produce fruit on it. 

The fungus and bacterial disease worsen the situation and even become the vital reason for even death of plants. 

The common and dangerous tomato plant diseases are late blight, powdery mildew, and white mold. These diseases result in tomato plants’ death if action is not taken at the early stage.

How To Fix

It is very difficult to treat infected tomato plants. So “Prevention is Better than Cure” suits best here. Always care for your plant in such a way, so they never get caught by any diseases. 

Use the below steps.

  • Always choose nutrient-rich soil at the stage of the plantation to growing tomatoes.
  • Direct exposure to sunlight at least 8-10 hours per day keeps the plant healthy and disease free.
  • Avoid overwatering and use the correct watering technique for your tomato plant.
  • Proper spacing between the plants and good airflow leads to healthy tomato plants. Drip irrigation and soaker hoses are best to use for watering the plant.

Insufficient Light

tomato plants not getting enough sunlight

The tomato plants love to get direct exposure to sunlight for 8-10 hours daily, sufficient to produce fruits and flowers. Their fruit production capacity might be affected if they won’t get enough exposure to sunlight. 

Due to insufficient sunlight, plants are not able to photosynthesize properly. 

Less exposure to sunlight can cause leggy tomato plant growth. As the plant cannot complete the photosynthesis process, its leaves become pale yellow, and the stem becomes long, which might produce some flowers, but the chances of their transformation into fruit are very rare. 

How To Fix

Choose the area where sunlight reaches a maximum for indoor or potted tomato plants. 

If your garden has too many shrubs or bushes, and they are shading your tomato plants and blocking direct sunlight, pruning the excess shrubs and bushes is the best way to get rid of this issue. 

Choose a brighter area to plant your tomato plants from next time. 

Extreme Weather

warm extreme sunlight affect

Tomatoes love warm climates, but extreme temperatures can make the plants stressed, and they cannot set fruits on it. 

Tomatoes can easily set fruits in the temperature range of 60 degrees to 80 degrees F. They struggle to make fruits if the temperature ranges extremely high or low. 

Due to extreme heat, plants begin to shed the flowers, and sometimes it becomes inefficient to produce flowers. This mainly happens when the plant is going through the stress of drought. 

When the weather is extremely hot or cold, you should plant cherry tomatoes which provide an ideal solution for your vegetable garden. They are known to produce fruit over a broad range of temperature variations – something that other large-fruiting tomato varieties cannot boast!

How To Fix

In extremely hot areas, you should always plant heat-tolerant tomato plants like Black Cherry tomatoes, Bella rosa, Celebrity, and Eva Purple Ball. 

These tomato varieties can produce tomatoes even in hot climates. 

Use frost fabric or low tunnel in a cold climate to help your tomato plants set fruits. 

Final Thoughts

Tomatoes are naturally very simple plants; sometimes, they cannot set fruits if their basic care is not ensured. 

If you manage to take care of the below points your tomato plant will never face problems producing fruits and encourage fruit set.

  • Ensure direct exposure to sunlight for 8-10 hours daily.
  • Use the right watering technique, and do not overwater your plant.
  • Use organic fertilizers and compost while planting them to protect them from the problem of excess nitrogen.
  • Maintain good airflow.
  • Keep pruning your plant when needed.
  • Always plant companion plants to attract pollinators and keep your plant disease free.
  • Protect your tomato plant from scorching weather.

Why Do Tomatoes Split And How To Prevent This?

Tomatoes split due to a sudden change in the water supply to the plant. Unfortunately, there is no treatment to cure tomato splitting. But obviously, you can take preventive measures to avoid the situation and prevent tomatoes from splitting.

In short, Rapid fluctuations in soil moisture levels can cause fruits, such as tomatoes, to expand faster than the skin can grow, resulting in split tomato fruit. These cracks can take one of two forms: radial cracking, which appears as vertical splits along the sides of the fruit, and is the more severe of the two types of damage.

Water consistently, maintain adequate soil moisture by mulching around the plant area, and choose a variety of tomatoes resistant to split to avoid this.

I have seen the splitting of tomato fruits mainly after heavy rain. 

Why Do Tomato Split?

split tomato on vine

Inconsistent water supply to the tomato plant results in split or cracked tomatoes. Heavy rainfall followed by dry weather is the main reason behind the splitting and cracking in tomatoes. 

When tomatoes speed up their growth, the flesh inside them grows more rapidly than the skin, resulting in tomatoes cracking. The tomato pulp comes outside and sometimes may result in rotting also. 

We cannot ignore the uneven irrigation, high nitrogen content soil, and lack of calcium, as they are also the reasons for split tomatoes. But pests are certainly not the reason for splitting tomatoes. 

So there’s no danger of spreading the issue to other plants. Both red and green tomatoes can get affected, but ripened tomatoes are more prone to split.

Cracking happens in Radial Cracking and concentric cracking patterns. Radial Cracking, i.e., vertical Cracking, is more dangerous as it attracts many diseases. 

So the best option is to pluck and use them instantly and dispose of all the smelly and already rotten tomatoes. 

Concentric cracking looks like a spot or ring, and the flesh of the tomato is not exposed. So it is less contagious to diseases. You can let these tomatoes ripen on the vines until the flesh of the tomato is exposed.

Points to remember:

  • Water inconsistency is the main reason for splitting tomatoes.
  • Both green and ripened tomatoes can split or crack, but ripened tomatoes are more prone to this.
  • If the flesh of split tomatoes is exposed, it should be harvested as soon as possible to reduce the risk of disease and should be used if it is not already rotten and smells pungy and sour. 
  • You can trim the affected areas of tomatoes and use them as sauces, salsas, or other items.
  • Tomatoes cracked in concentric patterns can ripen on the vines as the flesh is not exposed. Keep an eye on it; as and when it starts exposing the flesh, harvest them.

Types of Cracking in Tomatoes

cracking in tomatoes

Tomatoes split into two patterns: vertical and concentric cracking patterns. 

Vertical Cracking

Vertical Cracking is visible from the top to the bottom of the fruit and is also called radial cracking. When tomatoes split in this pattern, the chances of rotting, getting infected, and attracting insects are more as the flesh of the fruit is more exposed.

Therefore, it is always best to harvest these types of tomatoes and utilize them as soon as possible. Inspect if any tomatoes smell sour or rotten; if so, discard them off.

Concentric Cracking

Concentric Cracking appears like a ring and forms a circle on the top stem of the tomatoes. Generally, they do not result in exposing the fruit’s flesh; hence, it is less prone to disease. So you can let them ripen on the vines. 

But always keep an eye on these types of tomatoes while they grow; if they attract insects or rot, harvest them instantly. 

But the harsh truth is that they last only a short time and start rotting very quickly, and the taste of these tomatoes is not as good as regular tomatoes. So inspect for any insects in the fruit before using them.

7 Reasons For Cracking and Splitting Of Tomatoes on the Vine and How To Prevent

How To Prevent tomato cracking

Splitting and Cracking of tomatoes occur due to various reasons like improper moisture in the soil, inconsistent watering, less fertile soil, and many more. 

If you do not choose the split-resistant variety of tomatoes or harvest them too late, it might also be the reason for fruit cracking and splitting.

Water Fluctuations

Inconsistent watering is one of the main reasons for tomatoes splitting or cracking . Heavy rain is followed by dry weather resulting in a split or cracked tomatoes. 

Ninety-five percent of tomato fruit is water, and due to the sudden heavy supply of water, they crack. As a result, the flesh of the tomatoes grows more rapidly than its skin, and the skin bursts. 

To prevent this issue, I always do mulching to maintain the soil’s limited moisture and good soil drainage facilities. Sometimes I use an irrigation timer to keep consistent watering and maintain water fluctuation.

Overwatering Before Harvest

overwatering tomato plants

Overwatering before harvesting tomatoes also creates premature splitting issues in almost-ripe fruit. In addition, overwatering your tomato plants also invites various diseases and root rot. Therefore, it is very important to check the soil moisture before watering. 

Flooding your tomato plant with excess water results in swelling and cracking. Overwatered tomatoes produce fewer fruits. These tomatoes are generally flavorless and taste watery.

Deep your finger in the soil; if the soil is dry up to 1 inch, it is the right time to water your plant. Avoid watering your plant on the day of harvesting.

The best time to harvest is either in the morning or evening. The air during this time is humid and sugar concentrated.

Calcium Deficiency

Lack of calcium in tomato plants leads to Blossom End Rot, which causes black water and wounds in tomatoes. Calcium is the main reason behind ripening and uptaking water up taking. 

Calcium solution should be sprayed 2-3 times weekly on the foliage to reduce the splitting issues in the tomatoes.

To completely eliminate the problem, organic calcium fertilizers like eggshell or oyster shell should be used in the soil 4-6″ deep while planting tomatoes to make the soil calcium rich. 

Poorly Drained Soil

Waterlogging in the tomato plant’s soil can damage the plant and, in the future, split tomatoes. Tomatoes can be grown healthy only if the soil is well drained. In addition, tomatoes can breathe properly only in adequately drained soil.

When the roots are socked in poorly drained soil, they need to be more efficient in delivering proper water and nutrients to the plants, which attracts various diseases. 

You can use good quality compost to overcome the situation. Also, prepare rich soil mix with rotted manure, peat moss, or shaded leaf mulch and avoid overwatering your plant to prevent this issue in the future. 

Tillage can create more water logging issues, so you must avoid it as much as possible.

Over-Ripening

tomatoes getting overriped

Vine Ripened Tomatoes are more tasty and delicious than green-picked and indoor-ripened tomatoes. However, if you won’t pluck your tomatoes on time, it is more likely to be split and cracked. 

Due to the concentrated sugar, the flesh of tomatoes is more swollen inside, and when there is heavy rain or prolonged irrigation, they split very fast if not picked up on time. 

It is an open invitation to pests, insects, and various diseases, which can even cause the rotting of the fruit.

So it is best to pluck the little under-ripe tomatoes to escape from cracked tomatoes. Using this process before rain can save your tomatoes from splitting. 

Ethylene is responsible for the ripening of tomatoes. So the best way to promote ethylene is to keep a bunch of bananas while ripening tomatoes indoors. 

Tomato Plant Variety Selection

If you face tomato splitting problems in every season, you must check the variety you have planted. Always choose split-resistant varieties of tomatoes. 

Avoid Beefsteak and Cherokee Purple tomatoes, as they are more prone to splitting and cracking. In addition, they split easily when they come in contact with hot weather with so much water in the soil.

Jetstar, Roma, and Prudence Purple are some examples of split-resistant medium-sized tomatoes. In addition, some small cherry tomatoes like Black Cherry, Gold Nugget, and Sun gold are also split-resistant.

Exposed Fruit

Tomatoes are designed in such a way that they would grow healthy only if they are shaded with the leaves of the plant. So over pruning of tomato leaves also causes significant issues like splitting and even sun scalding. 

When tomatoes are overly exposed to sunlight, spotting and uneven ripening occur, leading to the splitting of tomatoes. 

To overcome the situation, create artificial shade with clothes, avoid over-pruning leaves, and prevent tomatoes from overexposure to sunlight. In the worst scenario, you can also pluck the tomatoes early to save them. 

What to Do if Your Tomatoes Split?

Split tomatoes attract insects which in turn spread various diseases. As soon as you see the split or cracked tomatoes, pluck them at the earliest. 

You can trim the lousy part of split tomatoes and use them to make sauces and salsas and cook your favorite fresh recipe.

However, only store these tomatoes for a short time as they attract insects easily. Before using these tomatoes, please inspect if they are rotten or have pungent or sour smell.   

Final Thoughts

Always ensure the preventive measures discussed above, and you will never face this issue. Consistently Watering one inch in the base of the plant every week would give you the best result. It is best to create mulching with straw around the plant to maintain adequate moisture in the soil.

You can also arrange for good drainage soil and Cultivate split-tolerant varieties of tomatoes.

Even after putting in so much effort, if still, your tomatoes are splitting, harvest them before time and let them ripen indoors. 

Frequently Asked Questions

Can You Eat Split Tomatoes?

Split or cracked tomatoes are not good to see, but freshly picked split tomatoes are safe to eat unless they have already attracted insects. However, check thoroughly before eating them, as the exposed flesh is prone to pests and insects and should also not smell sour.

Tomatoes with white, brown, or black spots are also safe to eat. You need to trim the affected part and finish the split tomatoes as soon as possible, as they begin to rot early. 

Does over-watering cause tomatoes to split?

There are better options than over-watering tomato plants, as this is one of the main reasons for splitting tomatoes.

Always check the moisture level of your soil before irrigation, or else you will end up flooding your tomato plants which they don’t even require.

This also results in the rotting of tomatoes, making them more prone to disease and premature splitting, even in ripe tomatoes. 

Prune Tomato Plants: Why, When And How To Do This ?

It is always a matter of contention whether pruning prompts healthy growth and maximizes fruit production of tomato plants or negatively impacts them. But the reality is that it won’t harm you if you don’t prune the plant. 

At the same time, if you prune it in the wrong way and at the wrong time, it is definitely going to impact your tomato plant. 

Pruning is not necessary for the survival of your tomato plants, but it helps to enhance the quality and quantity of the tomatoes. 

So the question is, when should pruning be done? When you notice the lower leaves of your tomato plant have turned yellow, you should pinch and prune those leaves to keep your plant healthy. 

You can locate and remove the sucker. This would help your plant to utilize its energy more on fruit production. At the same time, if any long branches are found touching the ground, either support them or remove them. 

Always avoid over-pruning your tomato plants, as it would damage the plant. 

Go through this article to understand why you should prune tomato plants and what are the best ways to do it without impacting your plant health.

Why Should You Prune Tomato Plants?

Why Should You Prune Tomato Plants

When tomato plants produce unwanted leaves and branches, the plant’s energy is wasted in the growth of those leaves and branches. 

We do pruning to utilize the tomato plant’s energy correctly. And after pruning excess leaves and branches, the plant focuses on using its energy to produce fruits. 

Pruning the suckers and yellow leaves of the tomato plants enhances the quality of tomatoes and keeps your plant away from many possible diseases. 

If the foliage remained unpruned, they would grow new branches and set new fruits on the plant. These fruits can attract many pests and diseases.

But, if you prune tomato plants, large tomatoes can be grown on the plants, and the risk of pests and diseases are also reduced.

Good Air circulation is much needed to prevent Fungal infection, and already if fungal issues exist in your garden, then pruning can enhance the air circulation in your garden. 

If air circulates around plants and fruits, it can reduce the spread of fungal infections. 

However, if you have never found white spots on leaves or fungal issues in your garden, your garden already has a good air circulation facility.

Have you noticed branches of your tomato plants touching the surface of the ground? If yes, it can be a matter of concern as direct contact with soil can develop fungal diseases. 

When bushy plants are grown on the ground, direct exposure of the tomato plants to sunlight is compromised, and hence plants become less efficient in producing sugar. Pruning helps to get rid of this problem. 

In case you have potted or containerized tomato plants, it is very important to control the size of the plants, and pruning helps to prevent the overgrowth of the tomato plants. 

Otherwise, the plants will grow outside of the pots. 

Planting determinate tomato plants in pots and containers is a good idea. 

Due to pruning, plants can perform the photosynthesis process correctly, as each plant part gets direct sunlight exposure, preventing the plants from various diseases and increasing quality fruit production. 

When pruning Indeterminate tomato plants, it is best to prune them once they reach a height of four feet. To begin with, locate the main stems, remove all side shoots growing from them, and then remove any suckers growing from leaf axils along the stem.

Be sure only to remove one sucker per stem so as not to weaken the plant. Finally, remove any branches that are not growing in a productive manner. This includes stems that are spindly, weak, or crossing over each other.

Doing this will allow air and light to reach the plant’s fruit better, improving its overall health and productivity.

If any of the branches get too long, it is also possible to pinch them back with your fingers to keep them from getting too wild.

With proper tomato pruning and care, your Indeterminate tomatoes will produce an abundant harvest of delicious fruits!

When To Prune The Top of the Plant?

When To Prune The Top of the Plant

Tomatoes have limited time to ripen on the vines at the season’s end. Nothing can be better if plants utilize their most energy in fruit ripening. 

To maximize the ripening period, gardeners apply the “topping the plant” technique and prune the top of the plant’s terminal shoot one month before the beginning of the frost. (Always use high-quality gardening clippers.)

With the application of this technique, the fruits absorb a good amount of nutrients, enhancing the quality of the fruits. 

Even at the end of the season, with the help of pruning, you can harvest the best qualities of red, juicy and fleshy tomatoes.

Reasons To Prune Tomatoes

reasons to prune

Pruning the tomato plants is not necessary for their survival, but it can promote the plant’s long and healthy life. It can also promote the quality production of fruits. 

We, the gardeners, prune the tomato plants because of the below-mentioned reasons:

Improved airflow and less disease

Pruning the leaves of tomato plants improves the air circulation in the plants, reducing the risk of fungal infection. 

It makes the plant less dense, and it becomes easier for us to spot the pests and insects in the plants quickly. 

The leaves dry rapidly after rain, which invites various pests and diseases, and clipping leaves reduces disease susceptibility. 

Bigger fruit

healthy and bigger tomato fruits

Pruning of leaves in tomato plants results in fewer fruits. But if leaves are pruned at the right time, the plant utilizes its energy to produce bigger fruits. 

The fruits would be able to absorb more nutrients, and hence the quality of tomatoes is also enhanced. 

The pruned plants have limited growth so more plants can be grown on the ground and easily make up the tomato harvest. 

You can grow bigger and quality fruits just by pruning the leaves of tomato plants. 

Earlier ripening

Due to pruning, the tomato plants could set very few tomatoes. Thus it becomes easier for the plant to complete the ripening process rapidly. 

Due to frost, it is always challenging to ripen the tomatoes at the end of the season. Thus pruning helps the tomato plants in the early ripening of the tomatoes. 

How To Prune Tomato Plants?

How To Prune Tomato Plants

Pruning tomato plants has various advantages, but if not pruned correctly, it can destroy your tomato plant. 

To avoid excessive pruning and know the correct technique for clipping your tomato plants, follow the below-discussed techniques. 

Simple Pruning

When new “V” shaped branches, also known as suckers, grow between the main stem and the branches, you should prune them along with the fruits grown on them to save the plant’s energy. 

It also prevents the plant from various possible diseases and the crowding of plants. 

You should pinch the suckers as and when you spot them (up to 2 inches), and if they become bigger, pruning becomes necessary. 

Missouri Pruning

Suckers grow very fast, and if they have grown bigger, pruning them can result in shock to your tomato plants. 

To avoid this shock, the tip of the suckers are pinched and some of the leaves are left which protects the developing tomatoes from sunburn. This process is called Missouri Pruning, and this method is useful when things are out of control, i.e., the suckers are overgrown, especially in hot climates. 

But the main disadvantage of this pruning is the remaining part of the suckers will grow new suckers, which requires regular pruning.

What is “root pruning” and when should you do it?

Some gardeners believe that “Pruning the roots” strengthens their tomato plants. Root cutting results in a decline in the plant’s growth, and plants mature more than they would have been before.

You can prune the roots of your tomato plants when the few batches of tomatoes start to ripen. 

You can use a kitchen knife, hoe or pitchfork to prune the roots. Insert any equipment inside the soil and penetrate up to 8-10 inches from the plant base. Make your cut just half away around the plant.

Pruning Cautions

Pruning tomatoes is a very risky process and therefore you need to be extra cautious while performing this process for your plants. 

I have listed a few points below, which I keep in mind while pruning my tomato plants.

Don’t over-prune in hot climates.

Pruning the tomato plants in hot climates can damage them. If you grow your tomato plants in hot regions, pruning won’t be healthy for your plant. Excessive sunlight can develop sunscald due to the pruning process. 

Go easy on pruning determinate varieties

If you have determinate varieties of tomatoes, please remember that they can grow tomatoes in bulk at once. Very few tomatoes are produced at the end of the season. 

It is better not to prune determinate varieties, or else you need to compromise your yield. 

Instead, you can pinch the suckers from determinate tomatoes to get quality and tasty tomatoes as they continuously grow and produce fruit till the beginning of the frost. 

Is pruning absolutely necessary?

Pruning is not at all necessary for the survival of tomato plants. You can choose not to prune your tomato plants and still get quality and large numbers of tomatoes. 

Your tomato plants need good sunlight exposure, proper watering, and nutrient-rich soil to survive and set fruits. Proper Pruning can enhance the quality, size and number of fruits on your tomato plants. 

Why Do Tomato Plants Grow Side Stems and Suckers?

When tomatoes get enough sunlight, they are totally filled with energy. They use their energy in the beginning week to produce maximum leaves before blooming. They also develop new branches, and new leaves emerge on those branches. 

New branches are developed between the main stem and branches in a V shape called suckers, whereas side stems can be seen growing directly from the main stem. 

With the growth of tomato plants, more energy is produced by tomato leaves, which is the main reason for the growth of suckers and side stems. 

If the plant is developing suckers between the middle to end of the season, they are damn weak and produce bad quality fruits. 

Bottom suckers are comparatively stronger than the top ones as the sugar concentration is decreased at the top part of the plant.

What Parts of Tomato Plants Should be Pruned?

What Parts of Tomato Plants Should be Pruned

You should prune tomato plants to encourage healthier plants growth and improve yields. Generally, you should prune the terminal ends or tops of the plant away. This will promote lateral branch development, which produces more fruit-bearing branches and a bushier shape for the tomato plant. 

If you find any dead or diseased branches, you must prune them, so the disease does not spread to the rest of the plant. 

Pruning off leaves and stems in the center of the plant can help prevent fungal diseases, such as blight and powdery mildew, by allowing for better air circulation. 

Also, the suckers (the shoots that grow in between two leaf nodes) should be pruned away to focus the plant’s energy on producing fruit. 

As tomatoes grow, you should remove new suckers regularly. Pruned tomato plant ensure a healthy and productive harvest season.

Which leaves to remove from tomato plants?

When pruning tomato plants, it is important to remove the sucker growth. The suckers take away essential nutrients and water from the main plant.

You should also remove any dead or diseased leaves, as they can spread infection and reduce the plant’s overall health. 

Finally, if you see any yellow or wilted leaves, you should remove them to prevent the spreading of disease and pests that can feed on them.

Summary

Though pruning is not necessary for your tomato plants, it can reward you with high-yield and quality tomatoes. It can also reduce the risk of diseases and result in stronger plants. But it is important to be cautious while pruning your plant as it is a very delicate process, and over-pruning can even destroy your tomato plants. 

Also, figure out the weather condition and variety of the planted tomatoes before pruning your tomato plants. 

Avoid pruning in hot climates; only suckers should be pinched if planted with determinate varieties of tomato. Thus if pruning is done diligently, it will definitely reward you with better yield. 

Can You Plant Two Tomato Plants Together?

If you plan to plant two tomato plants together, it can create a spacing issue, which can invite various diseases. Both plants would struggle for the nutrients available in the soil as their roots would tangle with each other due to less space. There would be a high risk of an outbreak of diseases like blight fungus.

I will recommended to plant only one tomato in each container, and if grown in the ground, you must ensure proper space between the two plants.

Do You Have to Plant Two Tomato Plants Together?

Planting tomato plants

Generally, two plants are necessarily planted together because of pollination. But tomato plants have both female and male parts in one plant. So they can self-pollinate. Thus you can easily grow a single plant and can produce fresh tomatoes. 

The plant’s fruit production gets hampered if two tomato plants are planted close to each other as they compete for nutrients from the neighbor planted closely.

In this way, some plants grow stronger, and others are forced to compromise for their growth and strength.

It causes a high risk of growing fungus and white spots on leaves, attracting hazardous insects, and your plants may remain underdeveloped also. 

Spacing is one of the major constraints while planting tomatoes. As roots need proper nutrients and moisture to grow, also roots can be entangled while planting two tomato plants.

Tomato plants need a lot of water but having more plants in a place can lead to watering issues.

Underwatering can increase problems such as limp steam, discoloration, and more. Due to multiple problems, planting one tomato plant in a pot or keeping a distance of 12-15 diameter is advisable.

How Far Apart Should Tomatoes Be Planted?

How Far Apart Should Tomatoes Be Planted

Spacing while growing tomato plants depends on the plant type and place of cultivation. One pot or container is enough to grow one tomato plant.

But when it comes to growing in raised beds, it needs a proper distance of 12 -24 inches, depending on the plant type.

Not maintaining an ideal distance between the plants can invite numerous diseases and lead to your plant’s underdevelopment. 

Tomato Spacing by Plant Type

Ideally, you should plant each tomato plant at a distance of 18-24 inches. But it totally depends on the type of tomato plant you are growing.

You can identify the tomato plant type on the label of the seed packet also. Tomatoes have two varieties, Determinant and Indeterminate tomatoes. 

Determinate Tomatoes: The ideal distance for this tomato variety is 18-24 inches as they are bush plants. They can grow up to a height of 3-4 feet and stop growing beyond this. The compact or dwarf tomatoes can be grown at a distance of 12 inches without risk of underdevelopment. 

Indeterminate Tomatoes: These are vining tomatoes and continue to grow or are either pruned or killed by the frost.

It grows taller than determinate tomato plants and grows more upward than outward. Ideally, you should maintain a minimum 18 inches distance between the two plants to maintain their healthy growth.

How Far Apart Should Tomato Plants Be in Your Garden?

How Far Apart Should Tomato Plants Be in Your Garden

If you are planting your tomato plants in a garden, there won’t be any shortage of space. So maintain proper spacing between the plants depending on their types. 

As discussed above, there are Determinate plants and indeterminate plants. 

  • Determinate tomato plants are bush plants that need more spacing and should be planted at a distance of 18-24 inches (45-60 CM). They grow both outward and upward. They might compete for sunlight and moisture if the proper spacing is not maintained.
  • Indeterminate plants are vine plants, grow vertically, hence need less spacing and should be planted minimum at 18 inches (45 CM) distance. 

Always maintain some extra distance for safety between the plants for their healthy development. 

How Far Apart Should Tomato Plants Be in a Container?

If you are planting your tomatoes in a container, they need the same spacing of 18-24 inches, but it is always a safe and better option to grow one tomato plant in one container at a time.

But if you own a very big container, you can plant more than one, maintaining an ideal distance between the plants.

But never make the mistake of sharing the same hole for more than one tomato plant. This would reduce the risk of root tangles and competition between neighboring plants for nutrition, moisture, and sunlight.

How Many Tomato Plants Can You Plant in a 5-Gallon Bucket?

tomato plant in gallon container

5 Gallon Bucket is really a large container. But planting more than one tomato plant in such a container is not a good idea. 5 Gallons of soil is still best for one tomato plant.

Almost 2 Dwarf or compact varieties of tomato plants can be planted in a 5-gallon Bucket, as one dwarf variety of tomato plants needs only 2.5 Gallons of potting soil for its ideal growth. But again, there is a risk of cramps. 

To get a good harvest and healthy plant, keep the 1st container away from the 2nd tomato plant as they would compete for their necessary food with each other. 

Can You Plant More than One Tomato Plant in a Container?

Only plant the two tomato plants in a single container once, and if you really have a very big container.

Tomatoes are heavy feeder plants competing for nutrients and water during cramps attracting fungal infection. 

For heavy and quality harvest: 

  • Maintain 24 inches distance for determinate tomatoes and 18 inches for indeterminate tomatoes.
  • Dwarf or compact varieties of tomatoes can be planted at a distance of 12 inches also and need 2.5 gallons of soil.
  • Maintaining as much possible distance between the plants rewards with a good harvest.
  • Never plant tomatoes too close to each other.
  • Five gallons of soil can make one healthy tomato plant. 

Is It Possible To Grow Multiple Tomato Plants In One Pot?

Planting several tomato plants in the same pot is never a good idea. The plants would struggle for nutrients with their neighboring plants and starve each other. It would also hamper the airflow facility for the plants.

The roots of multiple plants would tangle with each other, becoming more prone to catching fungal infections and attracting pests. 

While competing for nutrients, some plants become stronger while some remain weak. Planting one tomato plant in one pot can give you a quality harvest.

Tomatoes thrive well if planted together, but you need an exceptionally big container. 

Summary

Spacing is a factor that can never be ignored while planting tomatoes. Good spacing between the plants can prevent them from suffocating, reduce the risk of underdevelopment, and be less prone to attracting fungal diseases. 

If you follow the above tips and tricks, you will definitely be rewarded with healthy, disease-free plants and juicy and tasty tomatoes.