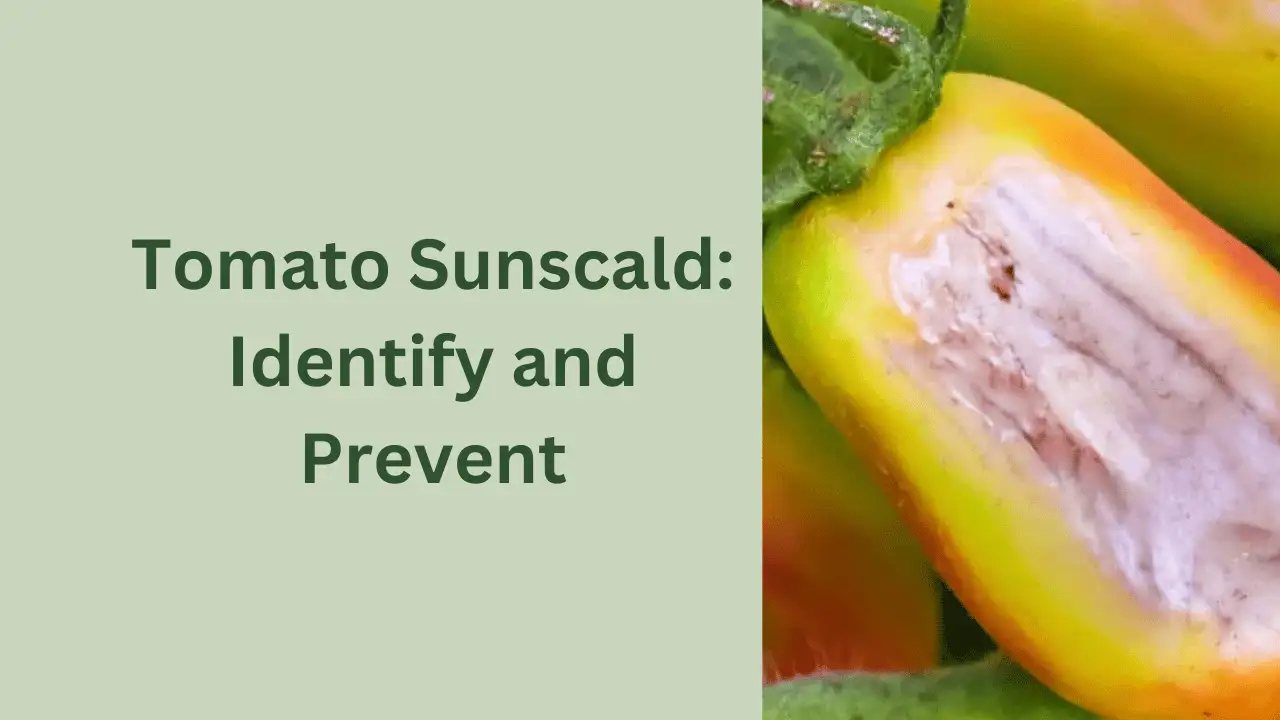
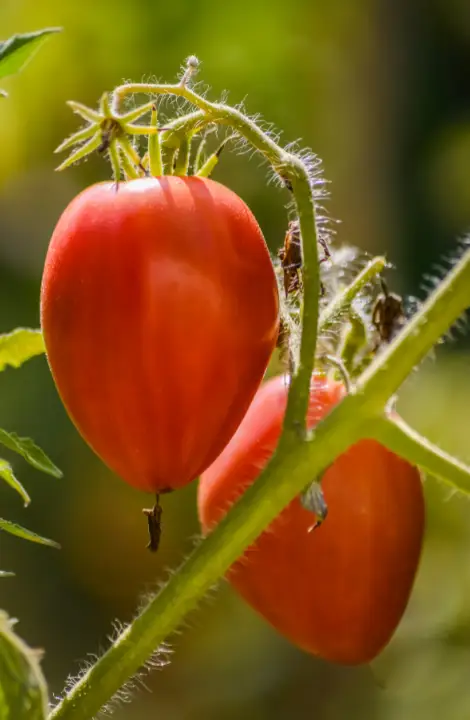
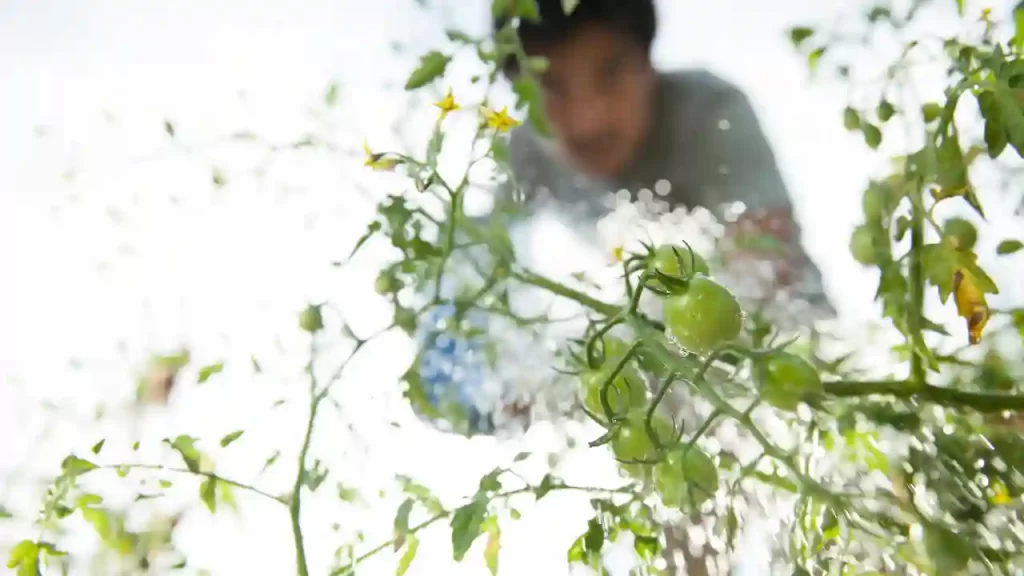
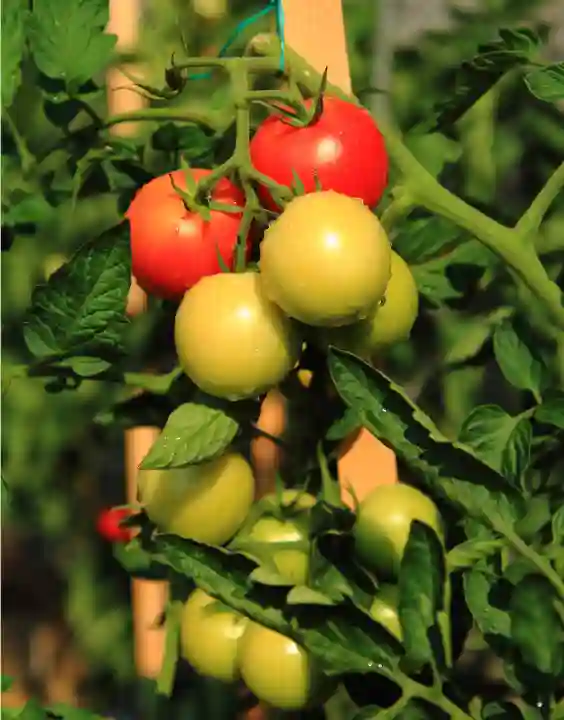
If you notice a dry crack or burn on your tomatoes, your tomatoes might be going through sunscald. Fortunately, it is not a plant disease. So it would be easy to prevent your tomatoes from getting sunscald.
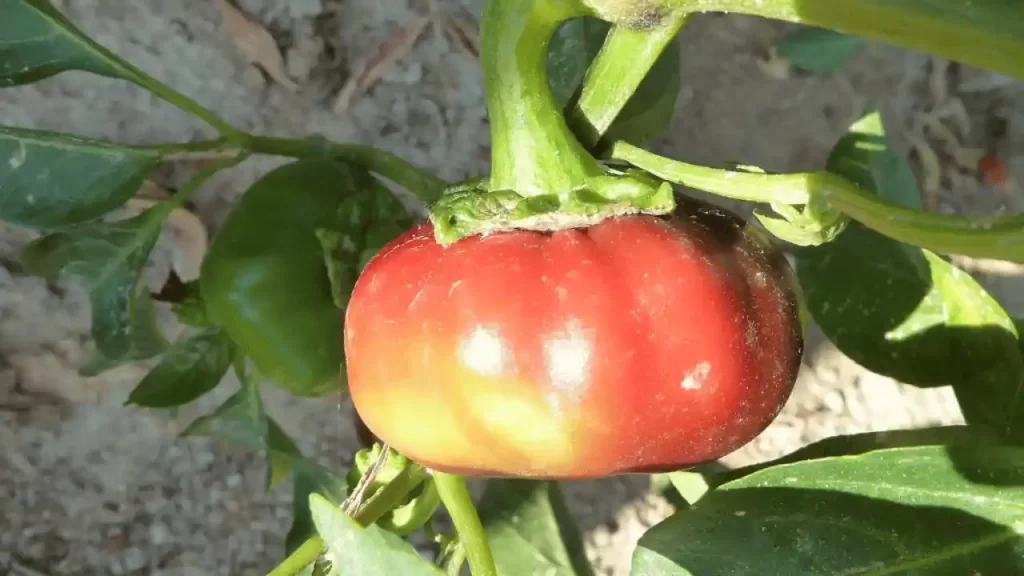
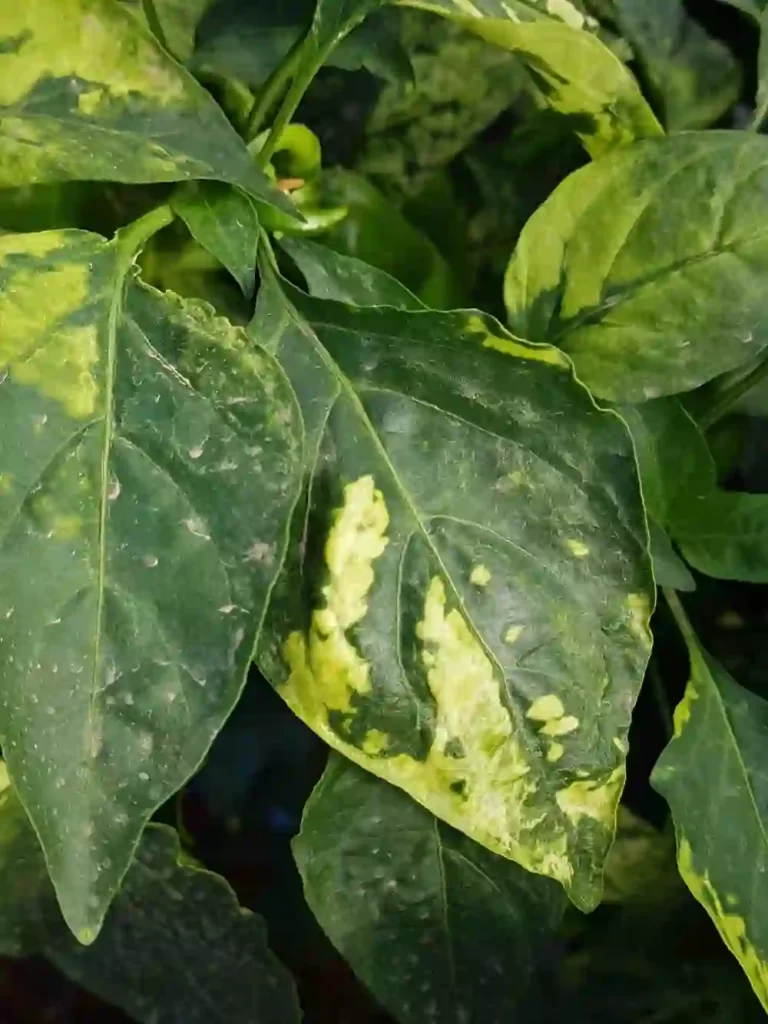
Though tomatoes are sun-loving crops if directly exposed to the sun in excessively hot weather, they develop sunscalds. Not only tomatoes but pepper, squash, and watermelon are also victims of sunscald. Due to sunscald, tomatoes turn pale white or blotchy yellow. Fruits and leaves of the tomato plants can also be impacted due to sunscald.
But now the question is, how can you prevent these tomato sunscalds? The best remedy is the prevention step. You cannot treat it, but as it is not an official disease, it does not impact all your tomato fruits.
What Does Tomato Sunscald Look Like?
When your tomatoes are directly exposed to sunlight in excessive heat, they form:
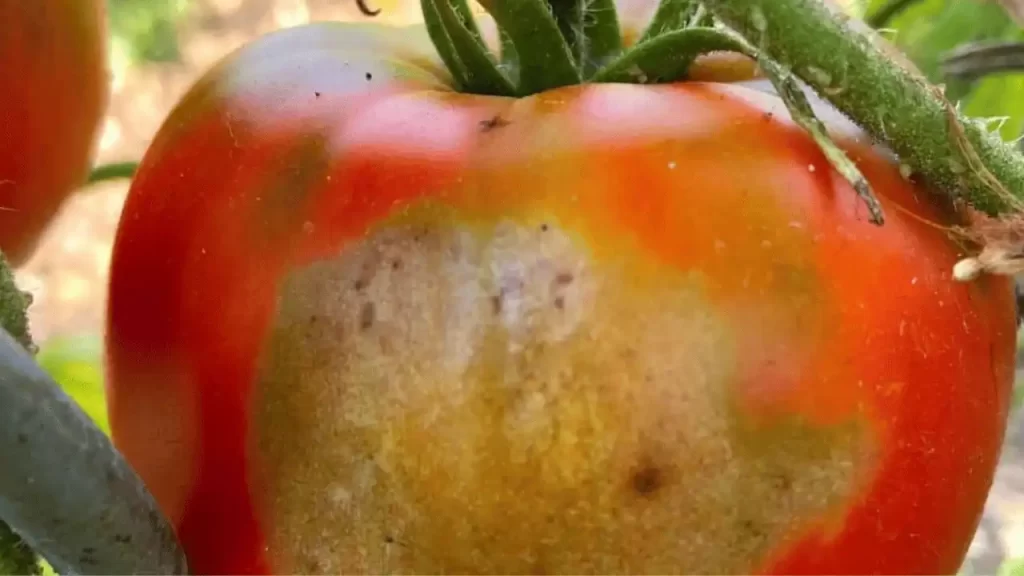
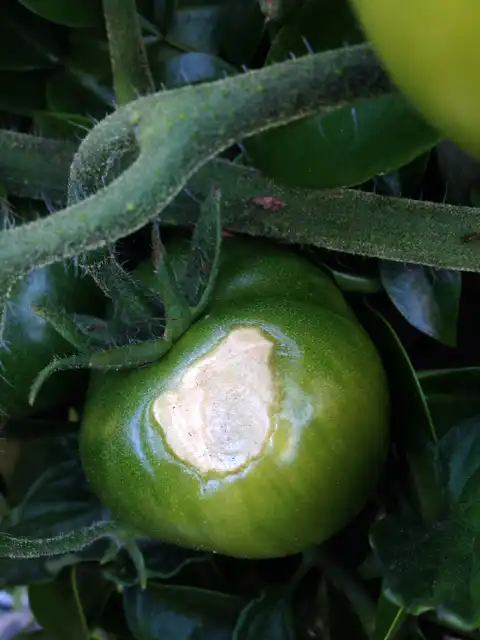
Unripe tomatoes develop white light patches, or yellowish patches are formed on ripened tomatoes.
The white or yellow patches turn bleb.
The affected area turns flat or sunk, the layer seems thin and papery, and the color becomes grayish-white at this stage.
If you still notice the growth in the affected tomato fruit, the affected area remains the same and won’t grow, and even it would split.
The splitted area can form a black molt, and the fruit starts to rot from the affected area of the fruit.
Identifying Sunscald in Tomatoes
Sunscald can be recognized by white patches, faded skin tone, and blistered spots.
Various symptoms of sunscald are as follows:
Unripe or ripe fruit develops whitish or pale gray patches.
The area of fruit exposed directly to the sun turns large and pale.
The patches turn bleb.
The growth is continued in the sunken area and causes a split in the fruits.
The sunscald area develops black mold and rot.
The affected area’s skin becomes thin and becomes pale.
Many tomato diseases seem like sunscald, so you can differentiate them by noticing the following:
When the sun directly falls on the tomato and enters the garden, it is mostly sunscald.
If the bottom part of the tomato has a spot and it is turned to black color, it is bottom end rot.
The white or fluffy area on the tomato is most probably powdery mildew.
Many more tomato diseases look similar to sunscald than we have discussed above.
Causes of Sunscald Tomatoes
The main reason for tomato sunscald is direct exposure to sunlight in scorching weather conditions.
I have listed a few common mistakes of gardeners which directly exposes their developing fruits to sunlight.
When gardeners cannot shade their exposed tomatoes either by shading them or readjusting them under the plant’s foliage.
Especially in the case of indeterminate varieties of tomatoes, if vines are disturbed during harvesting, tomato sunscald arises.
Excessive or unplanned pruning of tomato plant’s leaves fails to provide shade to the fruits.
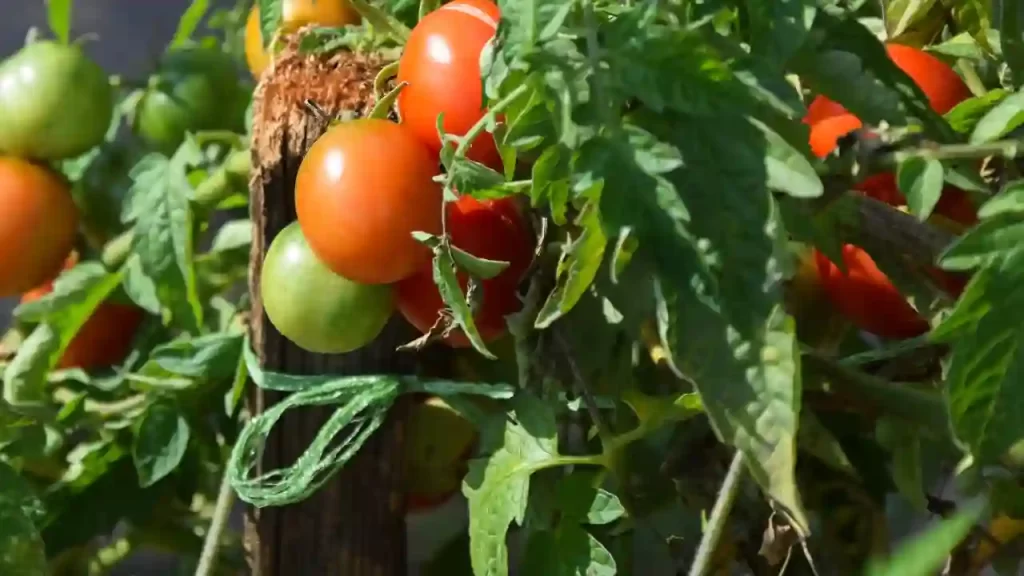
Can You Eat Sunburned Tomatoes?
If the tomatoes are diagnosed only with sunscald, and if it has no other infection like bottom rot, black mold, etc., you can trim the affected area, and the good part of your tomatoes are safely edible.
If your tomatoes are already impacted due to sunscald, unfortunately, they cannot be treated and are considered damaged.
Fortunately, it is not a disease or pest, so you can easily prevent your other developing tomatoes from getting sunscald.
You can pluck the affected fruits and use shade cloth for rest of the tomatoes to prevent them from too much direct sunlight. You can use a tomato tube cover or mesh cloches.
7 Ways To Prevent Sunscald in Tomatoes – My Proven Ways
Obviously, it is not tough to control sunscald, but it requires a few precautions and planning while planting tomatoes to prevent sunscald.
For beautiful and delicious red, purple, or orange juicy tomatoes, go through the below seven tips and tricks to avoid tomato sunscald.
Keep Tomato Fruit Shaded
Tomatoes do not necessarily require light to ripen. When fruits are directly exposed to sunlight, it prevents the actual color of the fruit, leading to sunscald.
You can prevent it easily by keeping the tomato plant’s leaf healthier and protecting the tomatoes from direct exposure to sunlight.
The foliage cover act as a natural sunscreen for the tomatoes. It provides the exact quantity of shade needed for the healthy growth and development of the fruits.
For healthy growth of plants, enough watering, rich and nutrient soil, and good exposure to sunlight is quite essential. After this, all these preventive care would be helpful to maintain a good leaf layer.
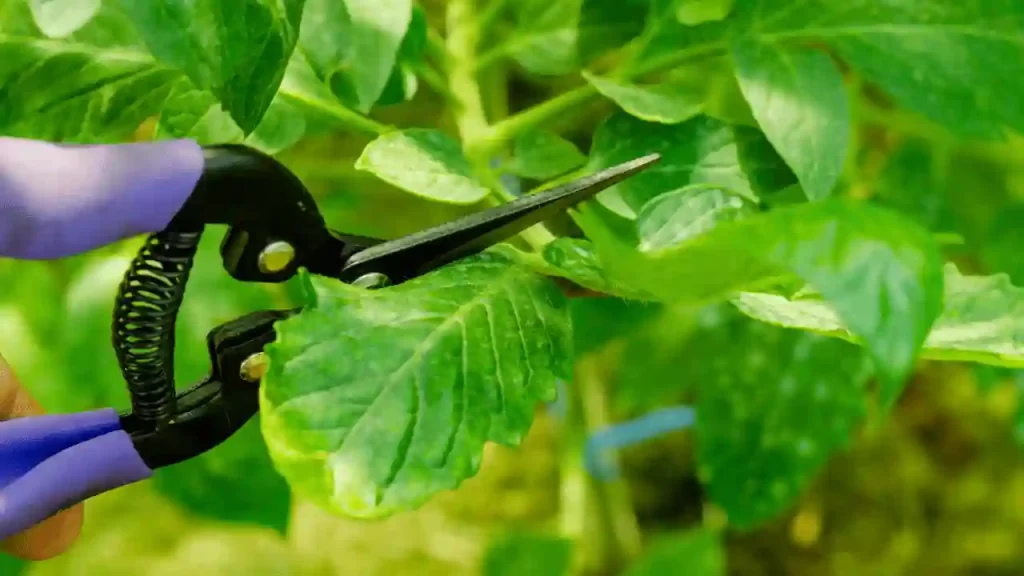
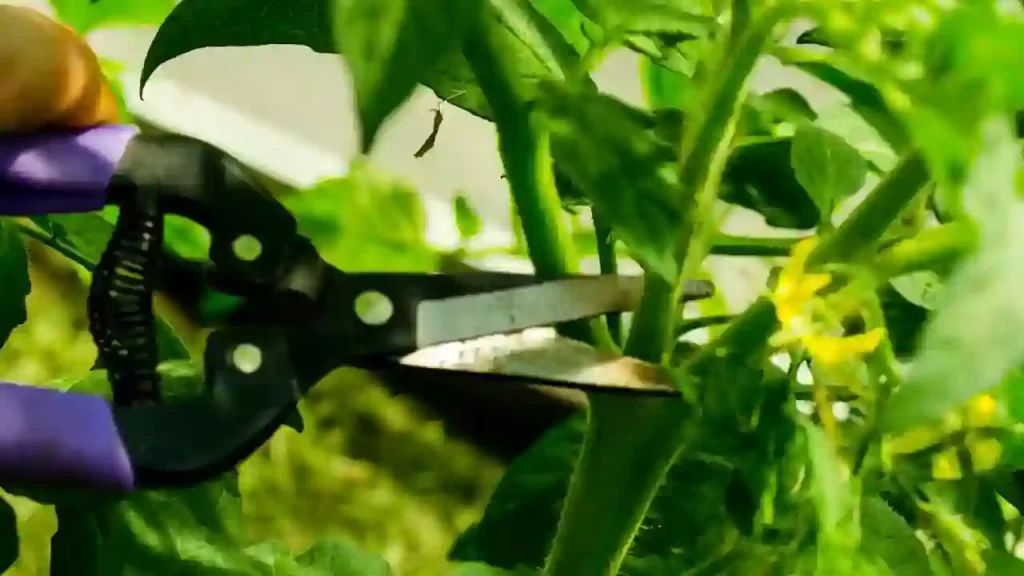
Prune Tomato Plant Carefully
For setting a high number of tomatoes, pruning the plants is an important step because it helps the plant focus more and use the maximum of its energy to produce fruits.
But most gardeners make the mistake of over pruning, due to which excessive leaves of the plant are removed.
Overpruning leads to exposing the fruits directly to sunlight. It also interrupts the process of photosynthesis and becomes less capable of producing fruits.
Removal of too many tomato leaves can stress the plant because the plants cannot get enough nutrients. It would result in less fruit production and more disease.
Limited pruning can increase the yield and become less susceptible to disease. It is recommended to avoid over-pruning your tomato plants. So ensure to keep at least 1-2 leaves above every flower to protect the maturing fruits.
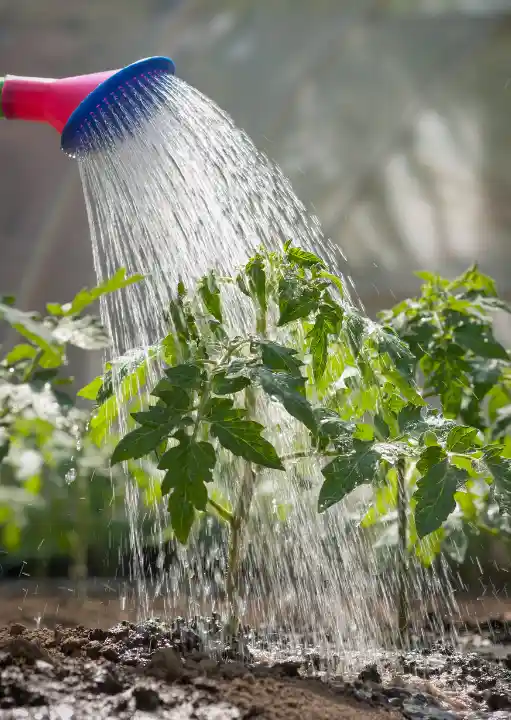
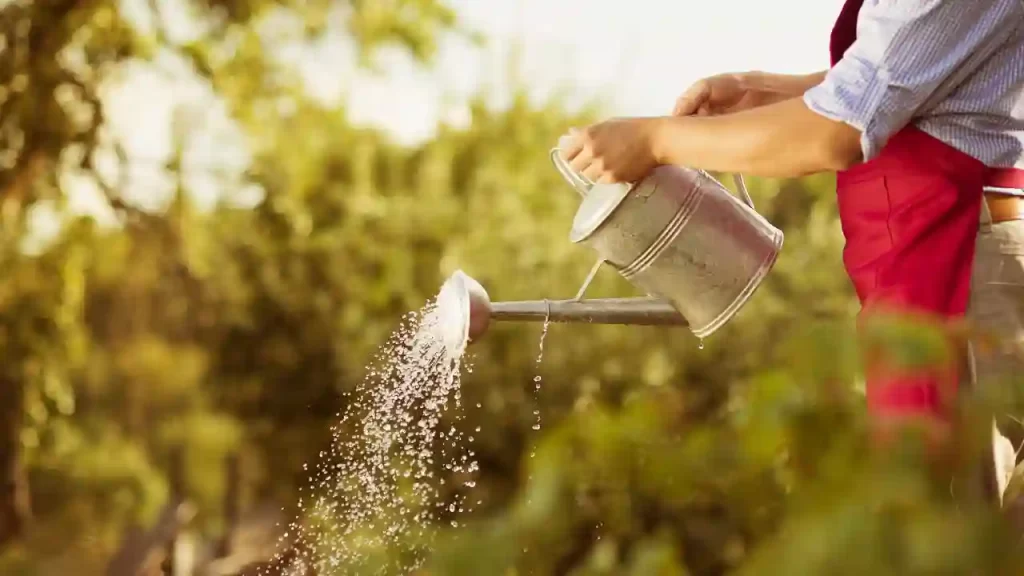
Avoid Overhead Irrigation
Due to overhead irrigation, water can settle on the fruits, which attracts more sunlight, and sunscald happens on the fruits. It is better to water the base of the tomato plant.
Water droplets on the fruits attract more sunlight and even make the situation worse. Overhead irrigation also attracts various diseases, which can even kill the plant and worsen the quality of the fruits.
It is better to use soaker hoses and drip lines to water on the base of the plants. It would let your plant’s leaves and fruits dry.
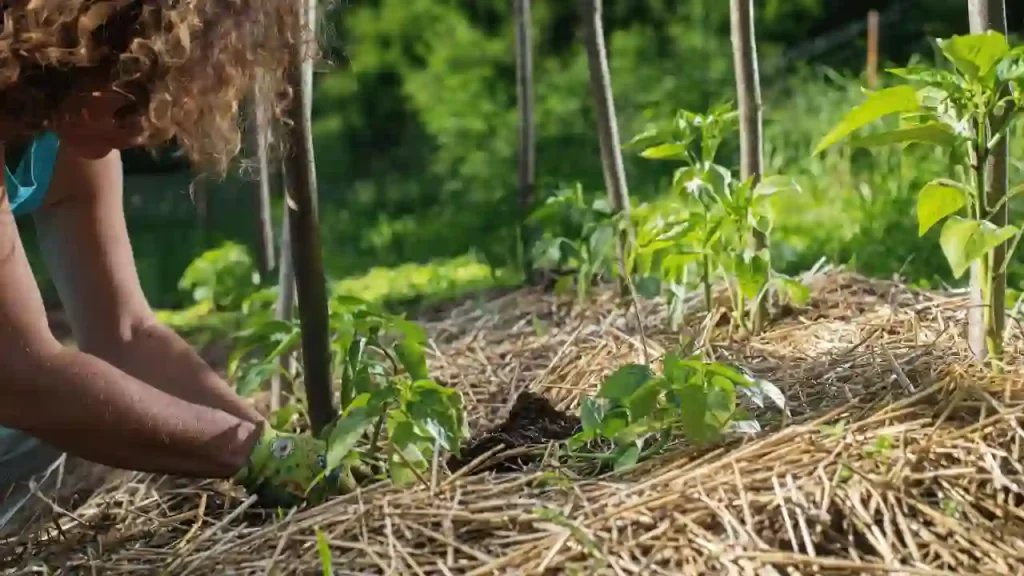
Mulch Your Plants
Mulching your plant at least 1-2 inches can help manage the good moisture level in your plant and keeps the low-hanging leaves and fruit dry.
Mulching is proven to be much more effective, especially during rainy climates.
Splashing water due to rain causes droplets on the leaves, fruits, and the lower portion of the plant, and mulching helps reduce this risk.
You can prevent soil-borne diseases using straw, chipped leaves, and landscape fabric. It also suppresses weeds and maintains proper moisture in the soil.
Actively Prevent Diseases
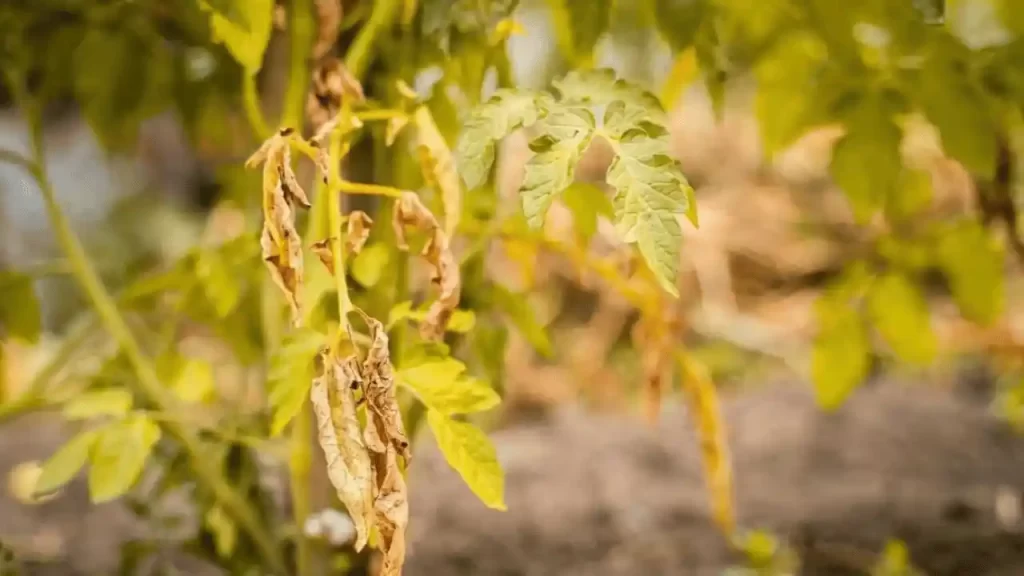
Tomato disease reduces the energy of the plant and makes the plant weak, which ultimately reduces the foliages on the plant.
Due to fewer leaves on the plant, the fruits are exposed to sunlight leading to sunscald.
Leaf curling, yellowing, and wilting lead to foliage falling, and fruits are exposed to the hot sun and trapped by sunscalds.
Tips and tricks that can help you control and prevent many tomato diseases:
Limited pruning helps to maintain the good air circulation in the plant. It helps to reduce the risk of many diseases.
You should avoid overhead irrigation. Soaker hoses and drip irrigation should be used and watered in the base of the plants.
Organic methods should be opted to prevent pathogens. Using neem oil or compost tea can prevent the entry of many pests and harmful caterpillars into your garden.
If any leaves are suspected of any disease, you should immediately remove them.
You should give an adequate amount of water to plants. Do not over or underwater your plant.
Old plants should be removed and disposed of every year.
Grow Heat Tolerant and Disease Resistant Varieties
Tomatoes are very delicate fruits and are prone to many diseases and pathogens. To overcome this problem plant breeders researched and successfully developed tomato seeds that are less likely to get harmful diseases like verticillium wilt, fusarium wilt, bacterial wilt, and others. They are resistant to these diseases.
The pathogen-resilient breed becomes less prone to defoliating diseases, which results in sunscald. Some disease resilient codes are F, LB, V, TSW, EB, and FW. Early Girl, Big Beef, and Sungold are most preferred.
Some of the heat-tolerant tomatoes useful for hot areas with wild sunlight are ‘Grand Marshall’, ‘Estiva’, ‘Florida 91’, and ‘Heatmaster Hybrid’.
These varieties can put up with heat, and their foliages can develop abandoned leaves which can prevent the fruits from sunscalding.
Harvest Early
You can even choose harvesting tomatoes at the “breaker Stage,” where your green fruit would show the symptom of ripening if your tomatoes are developing sunscald and other diseases while ripening fruit in the later stage.
If the tomatoes are plucked at “Breaker Stage” the risk of many other diseases, pests, sunscalds, etc, are also controlled.
Now you can leave your green plucked tomatoes indoors for ripening in paper bags or beside bananas and yet can end up getting delicious and flavorful tomatoes.
Tomatoes become victims of extreme sunlight, which leads them to sunscald. It mainly happens due to fewer foliage on the tomato plant. As a result, the fruits are exposed to direct sunlight and tomato sunscald happens. Tomato plants can naturally shade their flowers and fruits with their leafy foliage above them.
Thus it is highly recommended not to prune your tomato plants over. Also, avoid overhead irrigation (use soaker hoses and drip irrigation for watering) and do your best to protect your plant from various diseases and pests. And your tomato plants’ foliage would be protected, which can later protect its blossoms and fruits in hot climates.
Unfortunately, there is no treatment for sunscald-affected tomatoes; it will keep discoloring your tomatoes if they are not provided with shade.
So an easy remedy is early harvesting and shading your remaining developing fruit with clothes. You can also remove the affected fruit, trim the discolored area, and use them.
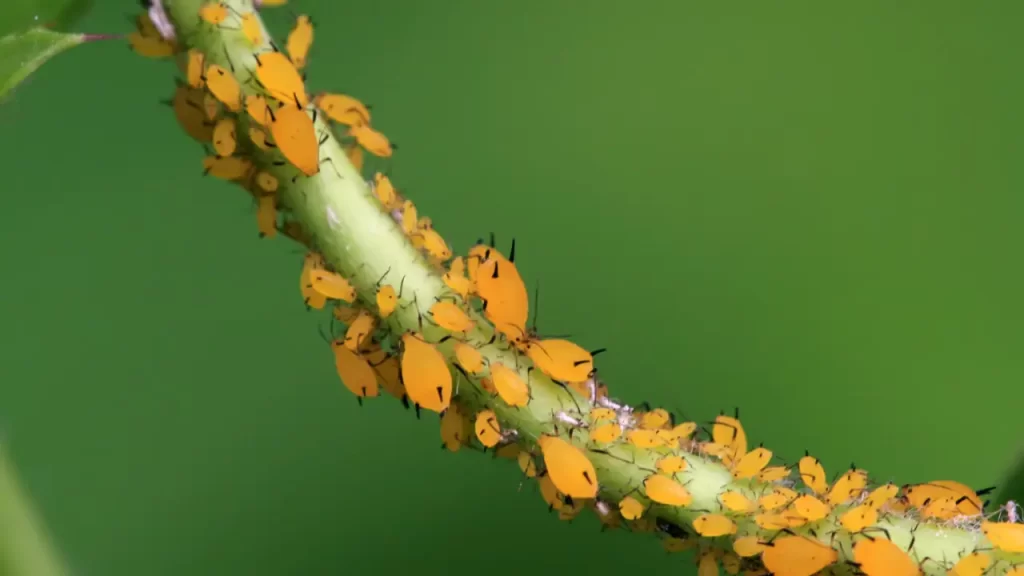
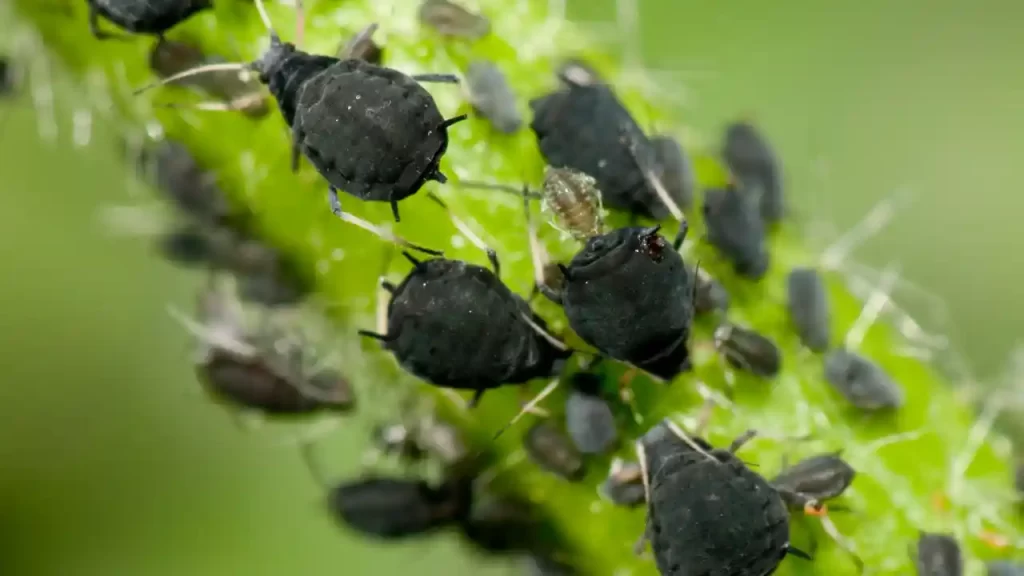
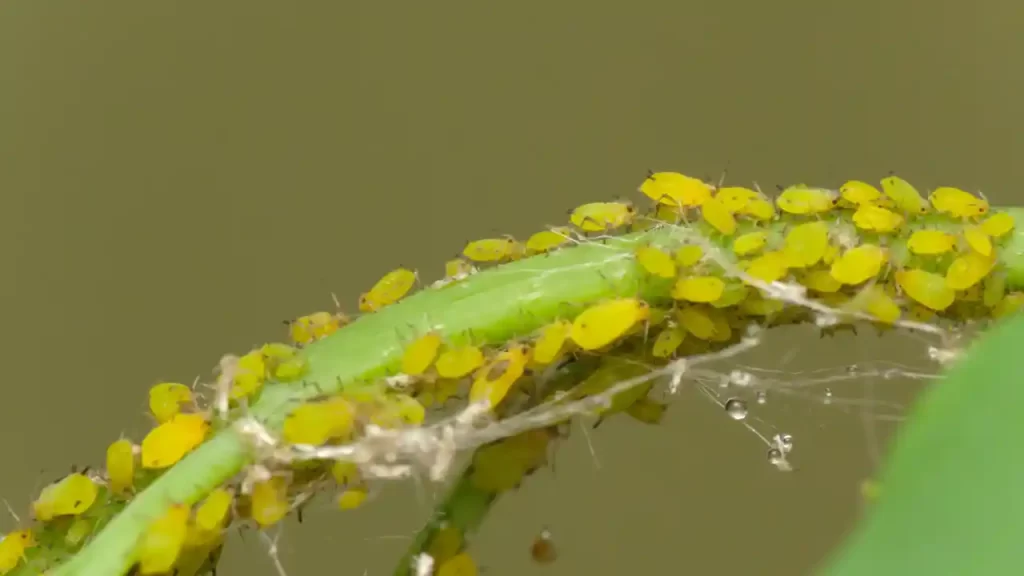
Aphids are the most annoying tomato pests, which are tiny in size, have soft bodies, and are pear-shaped. They are very commonly spotted in organic gardens, and mostly green color aphids are spotted. They can infect almost all sorts of plants and cannot be easily removed from the garden.
Stunted growth, curly or yellow leaves, and a large number of ants in your plant are the common symptoms of aphids in your garden. They can be organically controlled by hand-picking methods, natural repellent spray, and soapy water spray and can be prevented by companion planting, attracting natural predators and birds.
I briefly elaborated all the points in this article to better understand aphids and their controlling and preventing measures.
What are Aphids?
Aphids are from the Aphididae family have soft bodies and tiny in size and are even less than ¼ inch. These pests are generally green, yellow, brown, orange, and black. But the green aphids are more commonly spotted.
Aphids have around 4000 species worldwide and are more prone in moderate and warm climates. A single female aphid can reproduce 80 offspring per week.
They generally come in a group and hence can be easily spotted.
They reside underneath the tomato leaves and new stems. But their presence is not very harmful, and it is very easy to get rid of them.
Due to their rapid reproduction production process, the aphid population and infection both spread quickly. The reproduced aphids are called nymphs, which are very tiny and mature within three weeks of birth but remain smaller in size.
They form their territory in new areas like tomato gardens when they are big in number.
What Do Aphids Look Like?
Aphids are very small in size, have very soft bodies, and almost have a peer shape. Their size varies from 1-10 millimeters depending on their species. They are green, orange, brown, black, or gray in color.
Generally, there are only two common species of aphids on tomatoes, the potato and green peach aphids.
However, Green Aphids are very commonly spotted. They might have a waxy or powdery coating on their bodies. They love to stay on foliage and stem and suck the sap of the plants.
Potato aphids are pink or pale yellow-green in color and attracted by tomatoes.
Symptoms of Aphids on Tomato Plants
If your tomato plant show the below-listed symptoms, then there might be a possibility of aphids in your garden plants.
Stunted Growths: The presence of aphids in your tomato garden can lead to short plant growth. It sucks the nutrients out from leaves and stems, which is one of the vital reasons for the stunted growth of tomato plants.
Curled or yellow leaves: The aphids suck sap from the plants, resulting in the curling and yellowing of leaves. If such symptoms are spotted, inspect the top and under the surface of the leaves along with the stems. Though you can easily spot them with the naked eye, sometimes it can become difficult.
Sticky honeydews: Sticky honeydews are produced due to aphids. It is clear, sweet, and sticky and covers the areas where honeydews are present. As it is sweet, it simply attracts lots of ants. Thus, the presence of many ants is a sign of aphids in your tomato plants. Thus it is advised to closely inspect for aphids if ants are there in your tomato plants. The Honeydew results in the growth of sooty mold, which causes the plants to turn black.
Why are aphids harmful to your tomatoes? How Destructive is It?
Aphids grow rapidly and multiply faster. So it is not that easy to remove them from the garden.
They spread many plant diseases, like tomato mosaic viruses and cucumber mosaic viruses. Then it is spread by host aphids, which suck juices from the leaves and spread to many other plants rapidly.
They harm plants badly as they suck sap from the leaves. So nutrients of the plants are taken out by them due to which plants are left wilted and leaves turn their color to yellow. It also causes stunted growth of the plant and badly impacts the tomato quality and its production.
When Honeydew, i.e., aphid wastes, are spotted, it clearly signifies the presence of aphids in your plants. As it is sweet, it attracts many ants. It also results in the discoloration of plants and turns them black.
7 Organic Methods To Get Rid Of Aphids On Tomato Plants
Yes, you heard it correctly. You can remove aphids organically without harming your plants—just use the methods below for aphid control in an organic and easy way.
Manual Removal
If only a few aphids are spotted, they should be removed by handpicking. Wear globs in your hand, pick them off, and put them in soapy water to destroy them completely.
Inspect the leaves’ undersurface regularly, as they mostly love to stay there.
If you spot many aphids, you can follow other methods to remove them from your garden.
Water Spray
If the hand-picking option is unsuitable because you have many plants or for another reason, you can remove aphids from a sharp blast of water from hoses. The aphids are swiped out from the leaves and stem.
Keep a regular check and repeat the process to remove them. This method has a drawback; along with aphids, it also removes the beneficial insects from the plants.
Plant Bug Repellent
You can also prepare organic repellent using garlic, rosemary, peppermint, water, and dish soap. This repellent won’t kill aphids, but its smell confuses and repel aphids and force them to change their shelter.
You can spray tomato plants with this repellant on the undersurface of the leaves and stem. Keep applying it every few days until they are completely gone.
Water and Dish Soap
You can also make an easy spray only with two ingredients, i.e., water and dish soap. Spraying this spray on the aphids can suffocate them and kill them.
Take one-quarter of water and put a few drops of liquid soap. Either spray it or wipe it on the leaves and stems. If the aphid infestation is vigorous, swiping would be the best option.
Please ensure to apply the solution on all parts of the plants to remove them completely.
Introduce Predatory Insects
Most gardeners attract some predatory insects in their garden, which can feed these aphids. Some of the predatory insects are ladybugs, lacewings and parasitic wasps.
But I would say to go for companion planting as predatory insects might go away from your garden before controlling aphids.
Companion planting with herbs, flowers, and vegetables naturally attracts predatory insects. This method also works to reduce other harmful insects along with aphids.
You should make your garden bird-friendly at the same time. Birds love to feed aphids which can help you to get rid of them.
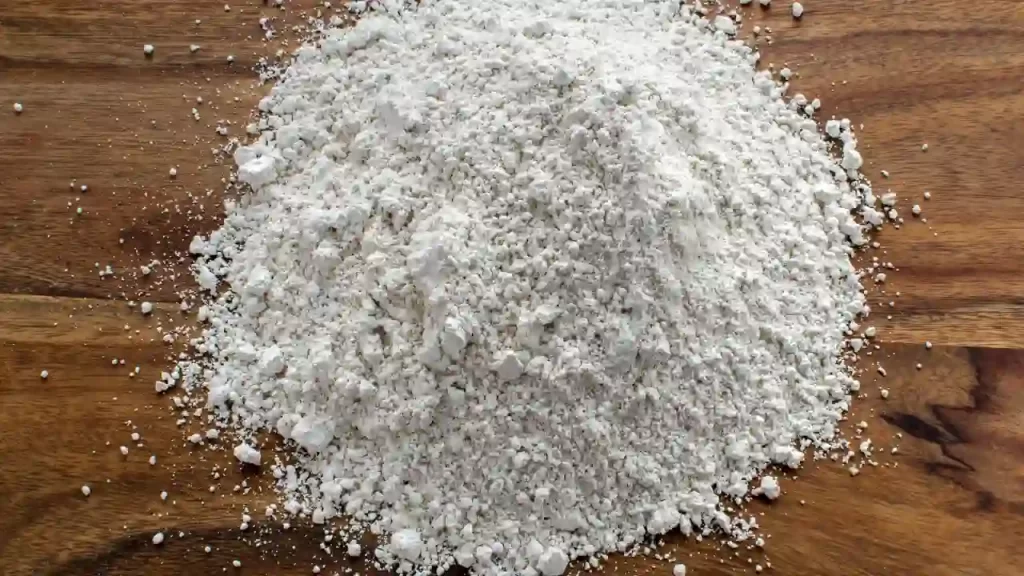
Diatomaceous Earth (DE)
Diatomaceous Earth is composed of silica-rich powder. It does not impact humans but is damn harsh to tiny aphids. The aphids are trapped in DE and cut, which results in their death.
Use food grade DE as it is human-friendly, and avoid using filter grade DE (not human-friendly). DE does not perform while it’s wet.
So it is best to sprinkle them early in the morning or evening after drying of dew on the soil and the plants.
But avoid using them when your plant is in the blooming stage, as they can also kill pollinating agents like bees. You can apply them in the evening when they are inactive and sleeping.
Neem Oil – A Natural Disinfectant
Neem works the same as soap. The application of neem oil can suffocate the aphids and destroy them. It disrupts their feeding and reproductive behavior.
But it should be your last choice as it can also impact the beneficial insects in your garden. Thus it is better to go for other methods to control aphids.
How To Prevent Aphids on Tomato Plants?
Healthy Soil and Healthy Tomato Plants:
Using nutrients and healthy soil to plant your tomato plants is best. Obviously, plants are grown healthy in such soil.
Even if aphids feed on healthy plants, they are not impacted at all. So using good soil should be the primary choice for pest prevention.
Aphids are also attracted due to their yellow color, and weak plants are also yellow. So aphids attack weak/yellow plants more often.
Companion planting:
Companion planting is always considered as the best option to control various pests, diseases, and fungal infections. You can plant herbs and flowers like basil and marigolds.
Planting trap crops like Nasturtiums can easily trap aphids. They attract aphids more than tomato plants. When colonies of aphids are spotted on the plant, pull the flowering plant and completely dispose of it to destroy the aphids.
Sticky Traps:
Yellow color attracts aphids. Sticky boards are a proactive way of preventing aphids from settling on your tomato plants – they attract and catch aphids before it’s too late.
So bring yellow sticky boards to trap aphids. They would definitely get attracted to this board and leave your plant eventually.
Attract aphids predators:
Grow maximum companion plants that can attract more predators, like lady beetles, syrphid flies, and lacewings. You can also develop some birdhouses and Feeders in or around your garden to eliminate the annoying aphids.
What is homemade aphid spray for tomatoes?
Aphids are small insects that feed on plant sap and can cause damage to tomato plants if left unchecked. Fortunately, there are some natural ways to get rid of them without resorting to harsh chemicals.
One such way is by making an effective homemade aphid spray. This homemade solution is made of ingredients such as garlic, pepper, and soap. The garlic acts as a natural repellent while the pepper works to kill the aphids upon contact.
Finally, the soap helps to spread the mixture evenly over your tomato plants so that all of the leaves are covered.
With a little bit of time and effort, you can keep your tomato plants aphid-free and produce a healthy bounty of delicious tomatoes!
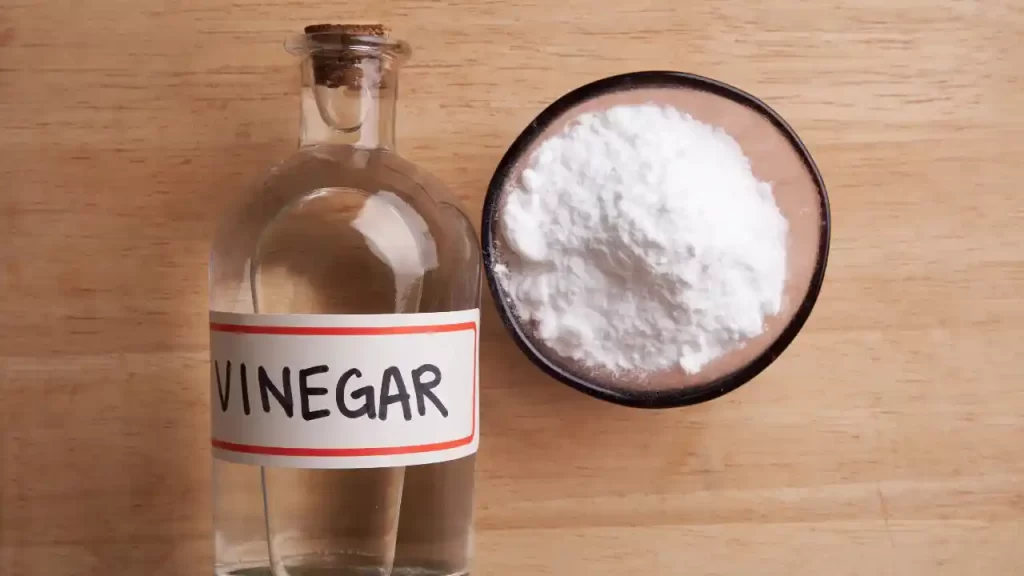
Will vinegar kill aphids on tomatoes?
Yes, vinegar can be an effective solution for killing aphids on tomatoes. Vinegar is a natural and non-toxic substance that works by disrupting the insect’s nerve cells, causing them to die.
To use this method, mix one part white distilled vinegar with four parts water in a spray bottle. Shake the mixture well and spray the affected plants until they are thoroughly saturated.
The solution should be reapplied every few days for at least a week to ensure all aphids have been eliminated. It is important to note that vinegar can also harm beneficial insects, so it should only be used as an absolute last resort.
Additionally, this method may not work on especially large aphid infestations. In these cases, contact a professional pest control service for assistance.
Summary
Yes, aphids are one of the most irritating insects, which can impact your plant and ultimately affect the growth and yield of your tomato plants.
You can quickly and definitely get rid of them by using the tricks discussed in the article above. But prevention is always better than cure. So you should take all the preventive measures to avoid the risk of aphids.
Like always, prefer using the best nutrient soil for planting; create all possible means to attract predators and birds in your garden.
Plant companion plants around your tomatoes and you will probably never come across aphids and can save your lovely tomato plants.
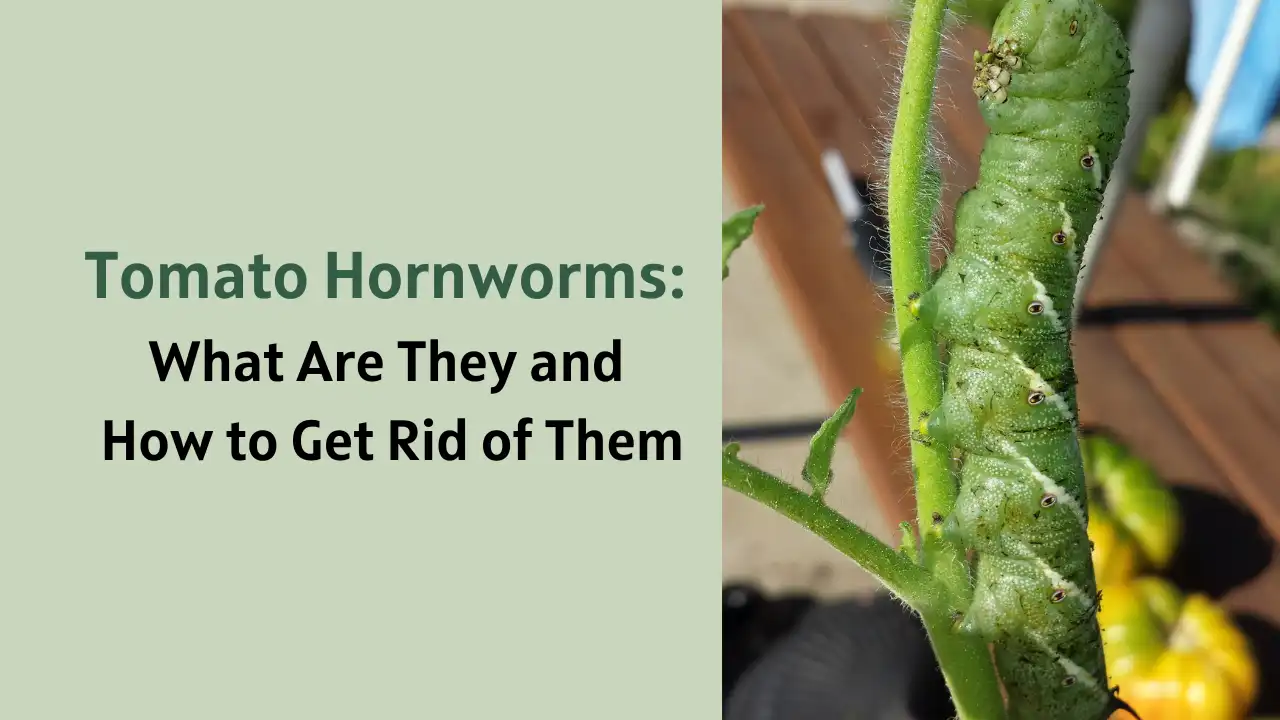
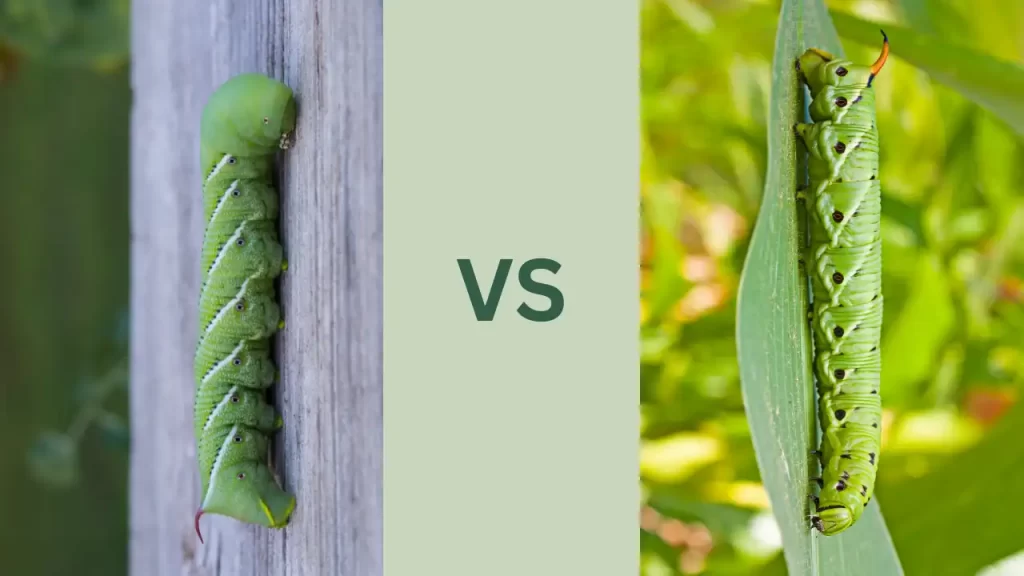
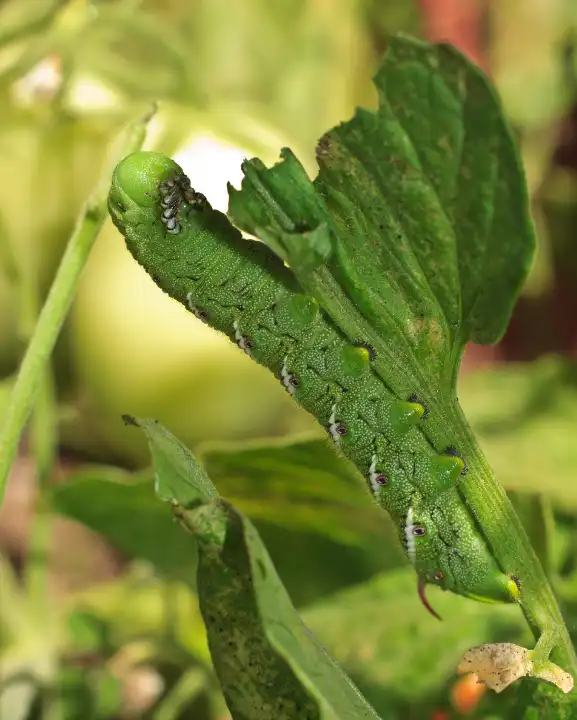
Tomato Hornworms, one of the most circumcised diseases, are caused due to Manduca quinquemaculata, which can harm the nightshade family like tomatoes, potatoes, pepper, and eggplants.
They are large caterpillars with horn-like tails which chew leaves and stems and sometimes chew holes in the fruits. It isn’t easy to spot them as they blend with green tomato leaves.
Physical removal is the most effective way to get rid of tomato hornworm. Using natural pesticides, rotating crops, tilling the soil, and planting companion plants can also help reduce and prevent Hornworms.
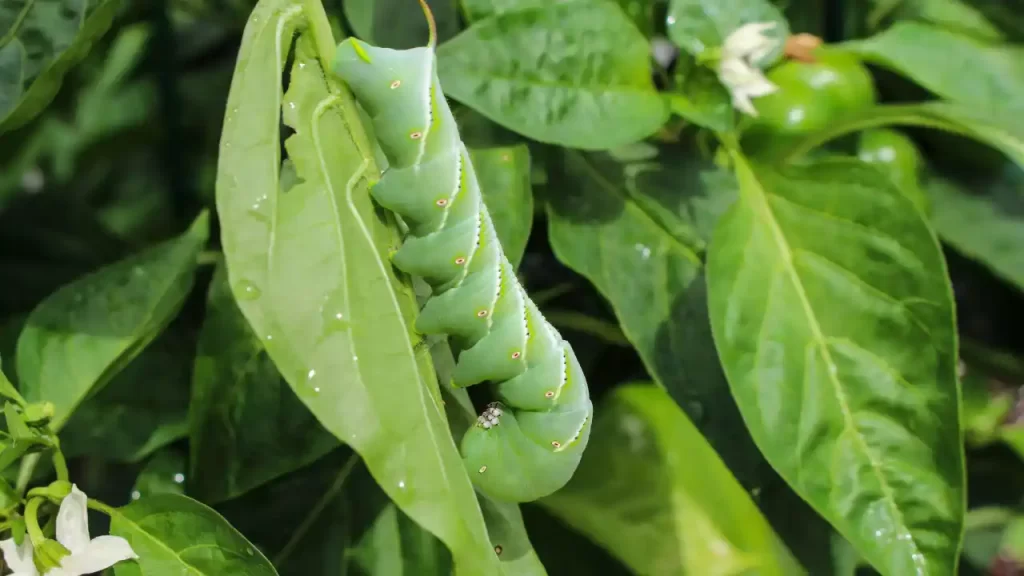
What Are Tomato Hornworms?
Tomato hornworms are one of the most destructive pests, which can destroy all nightshade families, including tomatoes. It consumes leaves, new stems, and pieces of fruit, especially the nightshade family.
They are green-colored caterpillars, 5 inches long, with horn-like tails. They are commonly found in North America & Australia.
It is challenging to spot them because of their appearance on the plants as they blend in green color. They cause defoliation in the plants and destroy them.
Adult Tomato Hornworms are also known as Adult Moths. They are large, have yellow spots on the sides of the abdomen, narrow front wings, and widespreads of 4-5 inches, and the hindwings have light and dark bands.
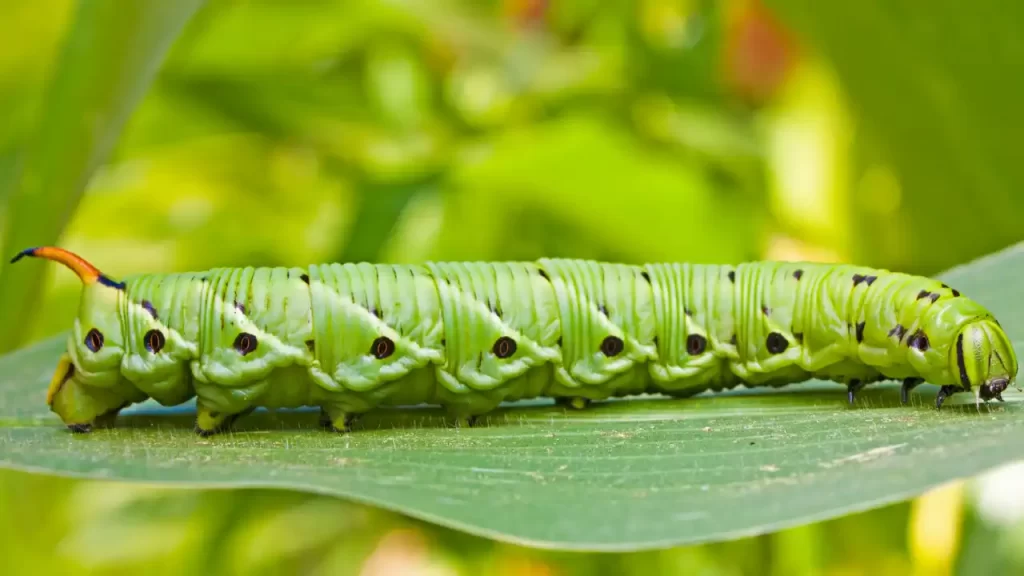
How To Identify Tomato Hornworms?
Tomato hornworms are Green colored, 4-5 inches long, and probably the longest caterpillars in the vegetable garden. They have seven v-shaped white stripes on their body. A red or black horn is spotted on the last abdominal segment.
The young caterpillars are spotted in your plants which become adults and turn into a moth with 5 inches wingspan.
Their green color makes tomato hornworms identifying easy, however, due to their appearance, they easily get mixed with the green leaves of the plants.
Tomato Hornworms vs. Tobacco Hornworms
Tomato Hornworms and Tobacco Hornworms are very similar in looks as they belong to the same species and mostly impact the nightshade family of plants. So it is very tough to differentiate between them.
The Tobacco hornworm possess red-colored horns and have diagonally white stripes, whereas tomato hornworms have black horns and V-Shaped White Stripes.
These are the only two differences that help to identify both categories.
Understanding the Tomato Hornworm Life Cycle
A Tomato Hornworm life cycle consists of 4 parts, but mostly; we notice larvae stage only.
But it is very important for gardeners to know how these pests grow and increase in number.
I have briefly discussed all 4 parts below:
Eggs: After Mating, Female Sphinx Moths lay oval, smooth, light green eggs on the upper and lower surface of the leaves of nightshade family plants, namely, tomatoes, potatoes, pepper, and eggplants.After 3-5 days of lay off, the eggs hatch, and caterpillars grow rapidly and begin to feed. They are fully grown within 3-4 weeks.
Larval Stage: Mostly, hornworms come to the gardeners’ notice on the plants at Larval Stage as they become big, fat, and green.But it is hard to believe that despite their huge appearance, they do not become adults in the Larval Stage. The Larval Stage is split into five stages known as instar stages. This Stage takes almost 3-4 weeks to get fully completed. Finally, the caterpillars grow up to 5 inches and weigh 10 grams.
Pupae stage: after becoming large caterpillars, Tomato Hornworms fall and get burrow into the soil to form large red-brown pupae.
Adult Hornworm: Adult is the last stage of Tomato Hornworm. At the end of the spring, five-spotted hawk moths or the sphinx moth are formed.
They are difficult to spot as they do not come out during the day and feed on the nectar of different flowers from the evening till morning.
Later the adult Hornworms also lay off the eggs to continue their life cycle.
Damage Caused by Tomato Hornworms
Most of the time, hornworm damage is seen before the hornworms in the tomato plants. The signs of hornworms are very similar to other weeds.
Some signs can help you to identify the damages caused due to the hornworms.
Black Droppings:
As the hornworm keeps feeding on the plants, they leave dark green or black droppings on the plants.
Check in The Evening:
Tomato Hornworms do not come out during day time. They feed on the plant from evening till morning. So checking them in the evening with the flashlight can help you to spot them in your plants.
UV flashlights are the best to use as they glow in UV flashlights and seem like a bulb on your plant.
Large Holes in the plant leaves:
Tomato Hornworms eat the leaves unevenly and leave holes and open spots where they feed. They leave the plant weak by removing the green foliage and chewing the fruits, which leads to holes in the fruit.
Keep checking for these dangerous hornworms, or else they can destroy the whole plant.
How To Get Rid of Tomato Hornworms Naturally?
You can use a natural rather than a chemical method to remove Tomato Hornworms.
Tilling of soil
Gardeners should till the soil at the beginning as well as at the end of the season to destroy the larvae. The success rate in killing the hornworms is seen to be up to 90%.
Tilling of soil also brings out the pupae, which is killed when it comes in contact with cold weather.
Use companion planting
Planting companion plants in your garden can prevent the invasion of hornworms. Making basil plants, a neighboring plant of tomatoes, can not only prevent them from hornworms but also enhance their flavor.
Planting borage can prevent hornworms and attract pollinator insects in your garden, which increases the yield also.
Trap plants are planted near the infected plants to repel the pests. You should plant it in such a way that you are pulling pests far from your garden.
Planting flower tobacco plants as trap plants for hornworms can work best. It attracts sphinx moths.
Rotate Crops
Crop Rotation is another efficient way to prevent hornworms in your garden. It would reduce the number of pupae.
So they cannot lay eggs on the plants, which would result in the prevention of Hornworms.
Hand Pick Tomato Hornworms Off Your Plants
Nothing works as great as picking off the Tomato Hornworms from your plant. But it would be worse to touch them directly. So wear gloves while removing them.
If you have chickens, you can give them these Hornworms as they love to eat them.
If you do not have chickens, you can put them in a soapy water bucket or crush them from your foot to destroy them.
While handpicking tomato hornworms, inspect your plants twice weekly as they can simply deceive you about their appearance.
Release Natural Predators and Beneficial Insects
Welcoming beneficial insects and Natural Predators reduce the number of hornworms in your garden. A couple of effective ones are Ladywing and green Lacewings.
You can easily get them from nurseries and garden stores as they eat eggs of many pests in the garden.
Releasing paper wasps also reduces the hornworms in your garden as paper wasps eat all caterpillars.
Spray Plants with a Homemade Cayenne Pepper Spray
You can easily prepare homemade spray with Cayenne, pepper, water, and soap and spray it on your plants instead of using any chemical spray.
A substance called capsaicin is found in Cayenne peppers which pulls the hornworm on the ground and can also kill them.
A regular spray of this homemade garden spray works well to destroy the tomato hornworm from your plants.
How To Get Rid of Tomato Hornworms with Chemicals?
If the stubborn Hornworms are not going from your garden through natural remedies, you should now opt for a chemical treatment to get rid of them. And yes, it is true that all chemicals are not hazardous.
Use BT: Bacillus thuringiensis, also known as BT, is a very useful chemical that can help you to get rid of tomato Hornworms. It is a very useful and natural chemical that treats your plant without causing any harm and destroys especially young caterpillars.
When this natural bacterium is found in soil, if consumed by Hornworms or any other pests, their digestive system gets paralyzed, and they become totally inefficient to feed, which results in death.
BT is best to use as they never impact humans, pets, and kids. The best recommended BT is Monterey BT Concentrate.
Use Garden Insect Spray:You can use Monterey Garden Insect Spray to get rid of Tomato Hornworms. It controls many pests, including Tomato Hornworms.
The best part is it never smells and functions great in removing weeds.
Use Garden Dust: I recommend using Safer Brand garden dust to throw Hornworms from your garden. It is also OMR certified. At the same time, it is safe for your beneficial insects in the garden and would never harm them.
Use Caterpillar killer Concentrate:Caterpillar killer from safer Brand kills caterpillars from plants, trees, and shrubs. And the good thing is it never harms honey bees and ladybugs in your garden.
Spray Neem Oil: Gardeners often use Neem Oil as the last option. If nothing is working, then spray Neem Oil. But the main disadvantage is it kills bad pests along with beneficial insects in your garden. So it should always be your last option.
How To Prevent Tomato Hornworms?
There are various measures to prevent and control Tomato Hornworms and keep your garden safe from them.
I have discussed some measures that can help protect your garden and plant from these caterpillars.
Use Row Cover: The most effective way to prevent the risk of Tomato hornworms is restricting the invasion of these caterpillars.
While planting nightshades, try using floating row coverand remove them while pollinating the plant, and moths won’t be able to lay eggs on the plants.
Use black plastic: Covering your garden with black plastic can break the lifecycle of the tomato hornworm moth, and it would prevent them from emerging in spring. This would result in the death of the Tomato Hornworms before they lay any egg on your plants.
You can also substitute black plastic with cardboard, and it can be used around the plants to avoid the risk of tomato hornworms.
Use of Diatomaceous Earth: The use of Diatomaceous Earth can control and prevent Tomato Hornworms. It would not harm humans and pets until and unless inhaled.
So you should always wear a mask while using it. It can kill the caterpillars when they walk on it; it feels like broken pieces of glass when they crawl on it and dehydrate them, resulting in their death. It can tremendously kill young caterpillars.
Where do tomato hornworms go during the day?
During daytime, the hornworms hide beneath the leaves and comes out at dusk to feed on fruits and leaves.
Summary
Though Tomato Hornworms are a curse for gardeners, don’t be impatient if you spot any hornworms. Follow the tips discussed above, and you can easily eliminate them.
At the same time, always take necessary steps at the beginning of the cultivation to restrict the entry of the hornworms into your garden, and you will always be blessed with healthy cultivation and a large harvest of tomatoes.
Who doesn’t want to keep their tomato plant free of diseases? But they are very delicate plants and may catch serious disease and pests even if you neglect to care even a little.
First, you must be proactive, so your healthy plants don’t catch any disease. You need to keep a close look at your tomato plant to identify the disease, if any, at the initial stage only. Your tomato plant may struggle with a physiological disorder due to different types of Viruses and pathogens.
You can choose a disease-resistant variety of tomatoes, identify and remove the leaves with signs of disease, do not stress the plant while tomato foliage is wet, keep a good airflow facility and mulch them properly.
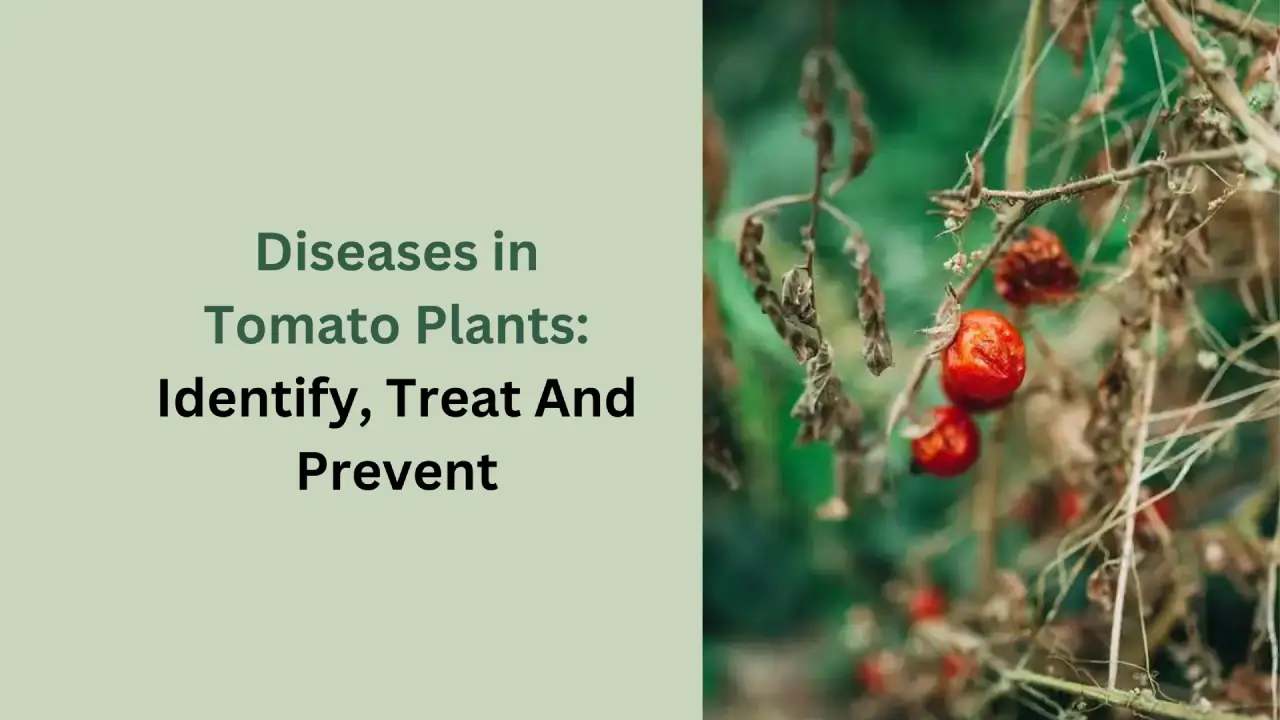
Types of Common Tomato Plant Diseases With Pictures
Tomato plants can get infected by various pathogens, which can cause vital diseases, and some of the diseases even kill the plants.
I have explained some of the diseases in this article caused by different types of pathogens.
So firstly, it is better to discuss different types of pathogens and their preventive measures to keep your garden safe from their attack.
There are several viral, fungal and bacterial pathogens that cause tomato diseases. Their spreading rate varies on the wind, temperature, water stress, disease resistance capacity of your tomato plant, the health of your plant, and many more.
If you diligently care for and keep your plant healthy, they become more resistant to disease.
Tomato Plant Diseases Caused by Fungal Pathogens
Fungal pathogens are a great threat to tomato plants and they can damage all the parts of the tomato plant, including its flowers and fruits.
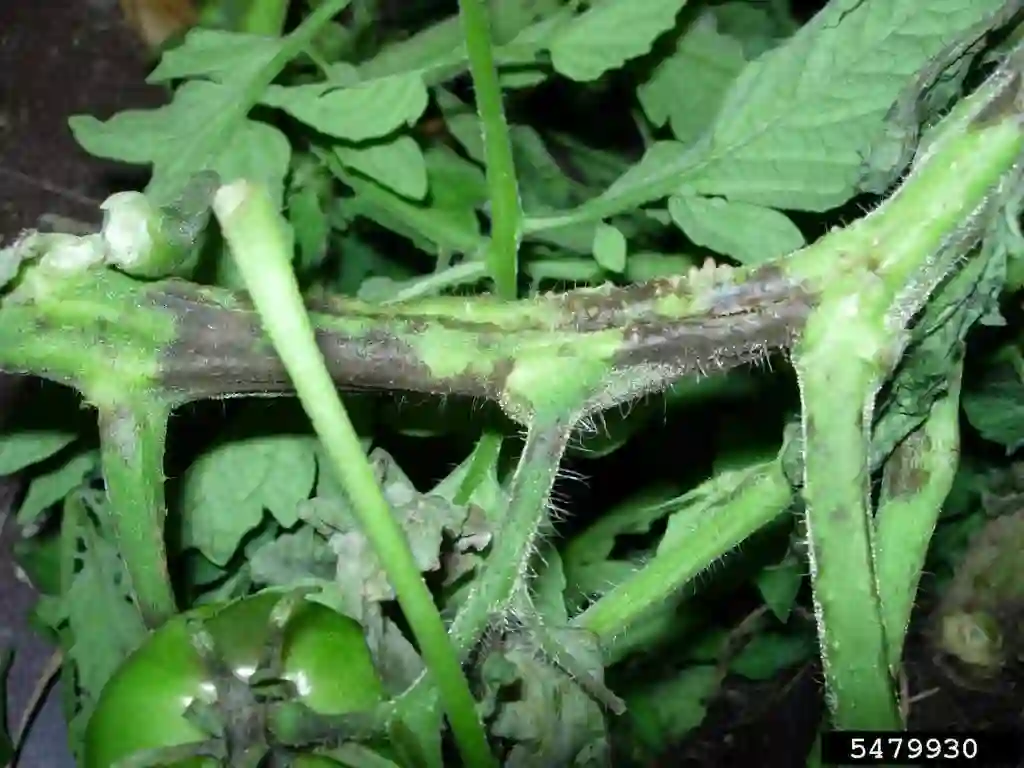
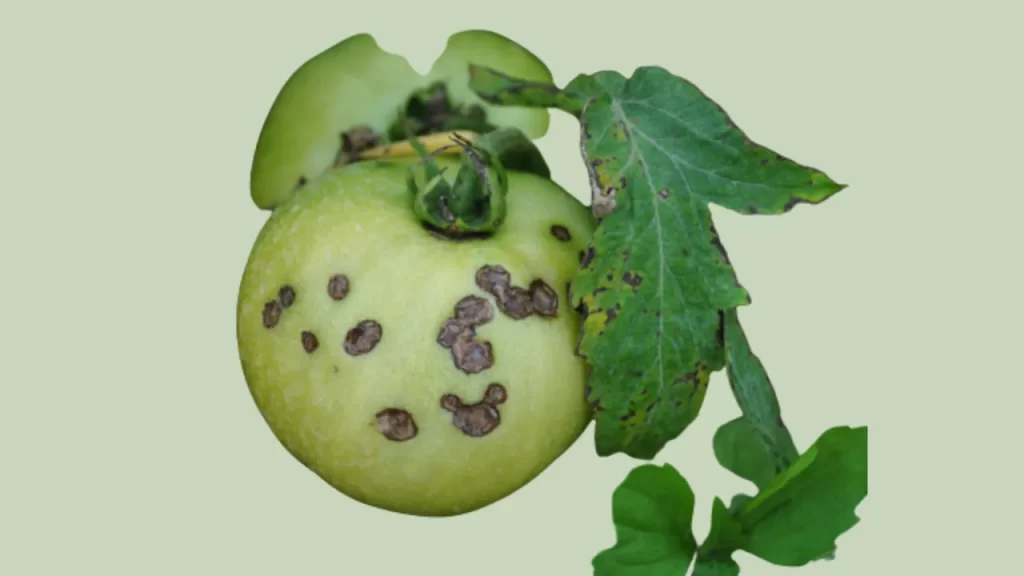
Alternaria Stem Canker, as the name suggests, attacks the stems of tomato plants, but it also damages the leaves and fruits of the plants. It is similar to the disease which spreads early blight in tomatoes.
The cankers are developed on stem, fruit, and leaves and turn their color dark brown and sometimes black. This happens as the toxin produced damages the tissue between the leaf veins. They are developed on the stem near the soil line or aboveground.
Alternaria Stem Canker often develops concentric rings on green fruit.
When airborne spores come in contact with tomato plants or when the soil reaches the plant, Alternaria Stem Canker is spread in the tomato plants.
The plant is impacted due to this disease in excessive heat, especially when the temperature is above 77F.
Avoid overhead watering; instead, ensure to water in the soil line; use a soaker hose or Drip irrigation to water your tomato plants.
Watering the tomato plant at night keeps the plant healthy as the risk of overmoisture in the soil is reduced.
Resistant varieties of the disease are Phoenix & Mariana. Though these plants can also get impacted due to the disease, it would be the first step towards a good start for your plantation.
Using chlorothalonil as a fungicide before 4-6 weeks of your expected harvest can protect your tomato plant from the disease.
Other fungicides might be needed if your harvest is maturing in the fall.
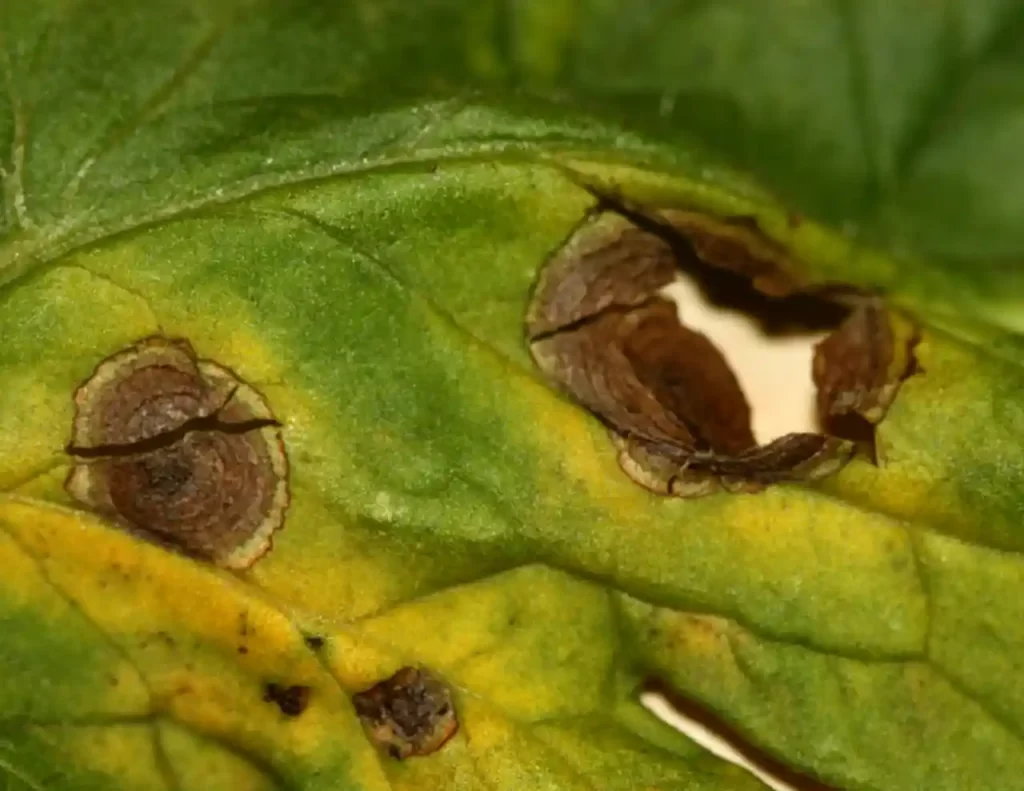
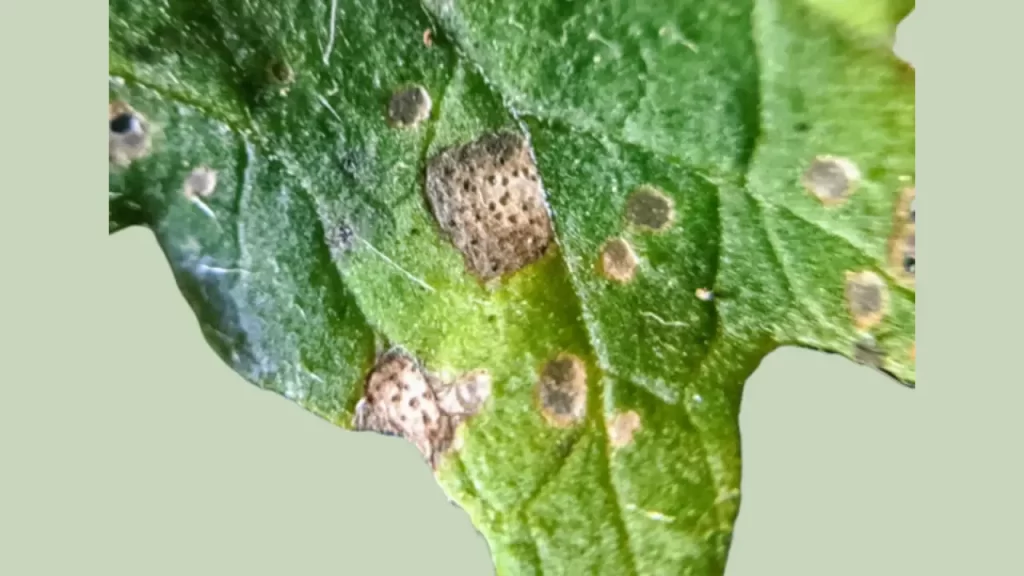
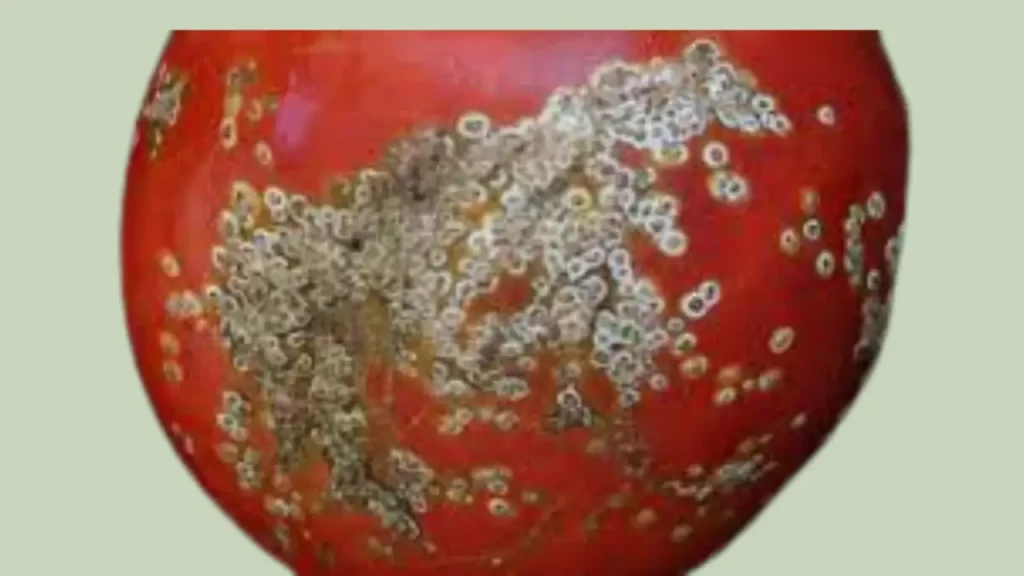
Anthracnose
Anthracnose disease is a curse for varieties of plants that directly attack their leaves, fruits, and flowers, and in the case of tomato plants, matured tomatoes or over-ripened tomatoes are impacted.
Anthracnose is caused by Colletotrichum coccodes and spreads in the lower part of the leaves, which are infected by early blight. Later, spores are developed on the tomatoes.
The disease is spread in immature and green tomatoes, and the impact is traceable when the tomatoes are ripened. Slightly sunken, small ring spots are developed on the tomatoes. These ring spots expand to half an inch and form concentric rings. The lesions seem like blacky patches.
The lesions become vigorous during moist weather, and many spores are formed in the lesions.
Tomato plant Root rot due to Anthracnose is called black dot root rot.
The tomato plants become more prone to disease when they are wet. Avoid overhead irrigation, especially when the tomatoes are maturing and ripening.
Crop rotation each year is the best way to prevent the disease. Facilitate your plant with a good drainage system to avoid the risk of this disease.
The fungicides depend on the climatic conditions of the region where you are located. Fungicides are not needed in dried climatic conditions, whereas in humid climatic conditions areas like New York, fungicides are recommended to be applied.
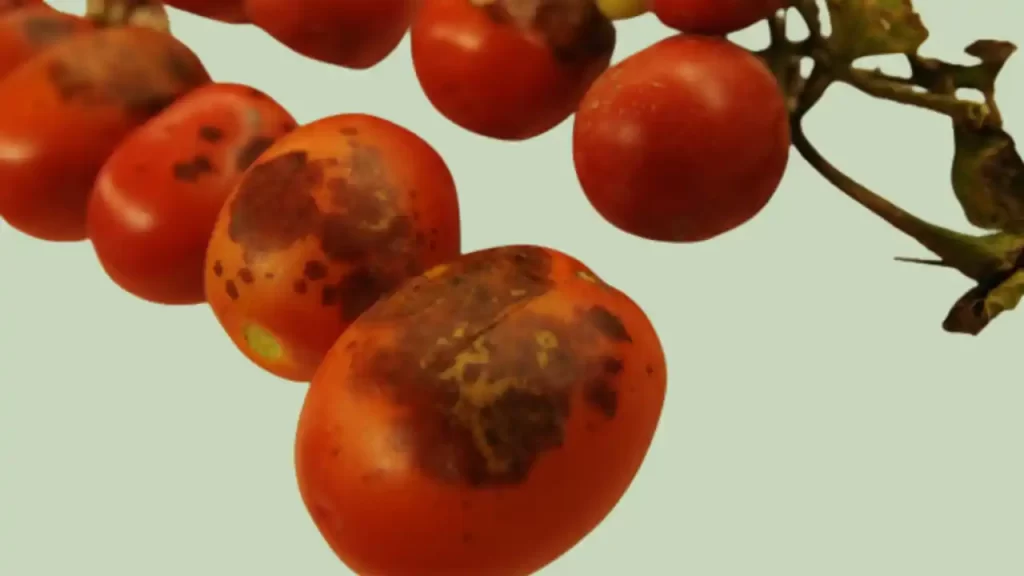
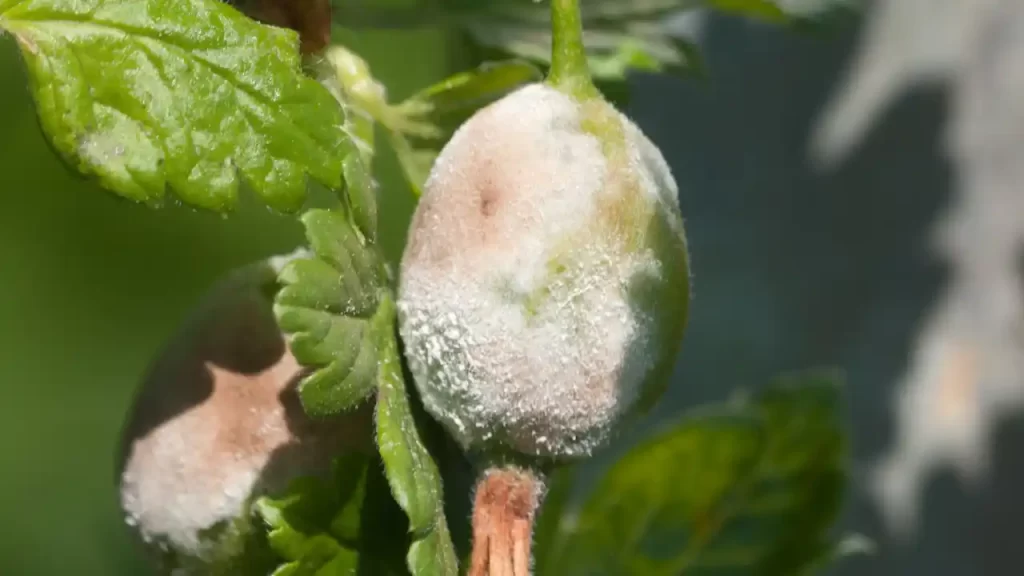
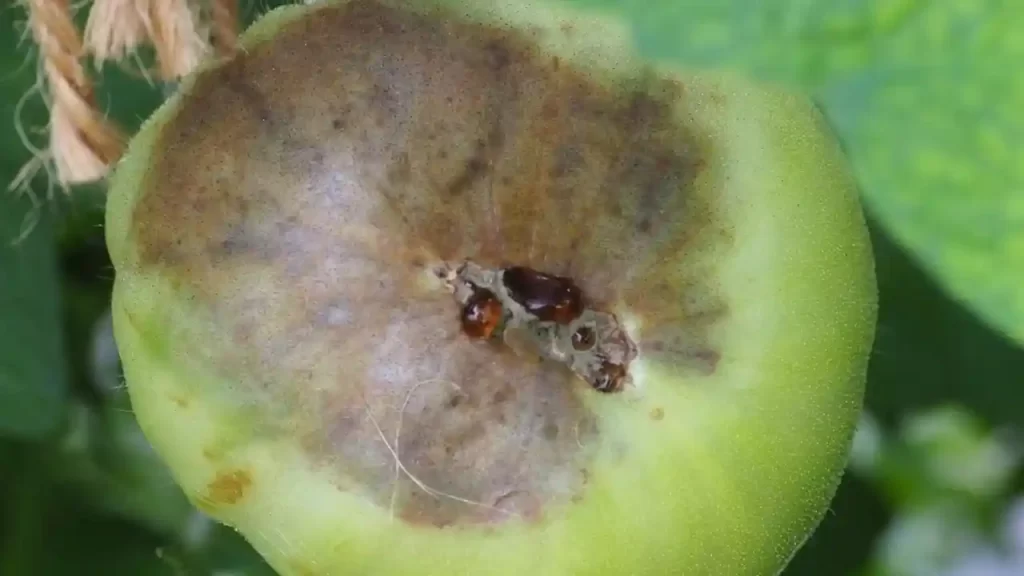
Black Mold
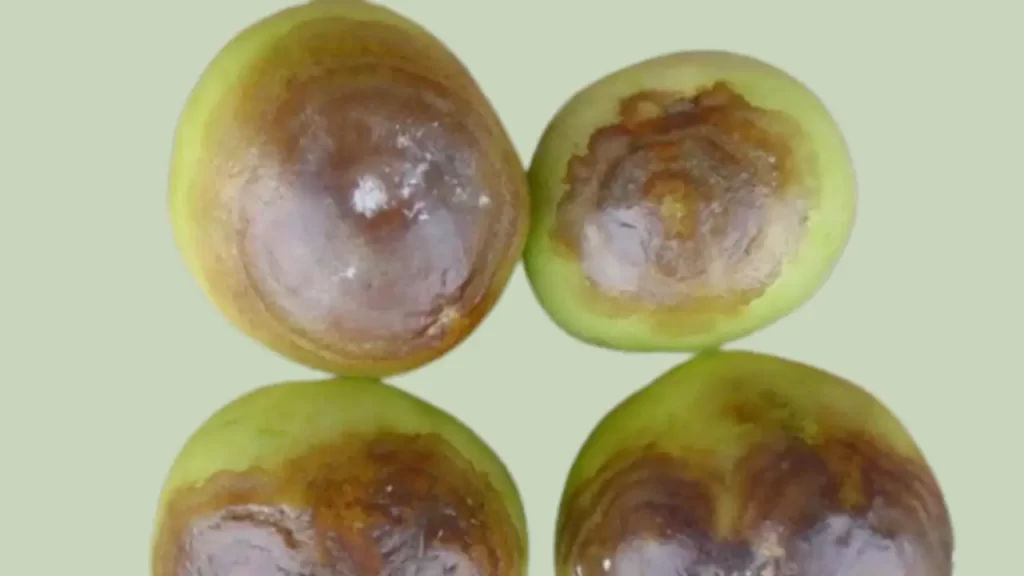
Ripened tomatoes are prone to Black Mold disease, which becomes active in late-season rainfall. It is caused by Alternaria alternata.
The symptoms are seen as light to dark brown lesions on the ripe tomato’s surface, vary from small to large in size, and destroy the epidermal tissue of the tomatoes in circular sunken lesions and spread deep into the fruit.
The lesions formed are like black velvet on the surface of the tomatoes. The fungus encourages forming wounds at the sunburned surface of the fruit.
If you find the spread of this fungal diseases in your garden, harvest the tomatoes as and when they are ripened and stop overhead irrigation.
Fungicide application is needed in heavy rainfall and for a late harvest of tomatoes. As discussed above, you can use the same fungicide used to treat Alternaria Stem Canker.
Botrytis Gray Mold is caused by one of the most vigorous pathogens, which can destroy more than 200 varieties of plants, vegetables, fruits, and ornamental plants.
It is caused by Botrytis cinerea and causes postharvest decomposition of tomatoes.
It infects all parts of the tomato plants, like flowers, fruits, stems, and leaves, and is a matter of concern in the greenhouse.
The wind spreads the spores caused by the fungus. When the plant is moist due to rain, fog, or irrigation, Botrytis Gray attacks the plant.
The fungus can infect immature and green tomatoes, form white ring spots, and the color turns yellow when the tomato ripens.
Maintaining a good airflow system, disinfecting the gardening tools, and avoiding overhead irrigation habits are the best measures to prevent your tomato plants from Botrytis Gray Mold.
It is best to check for fungicides with your country’s extension person to determine the effective fungicide for your area if you want to use them.
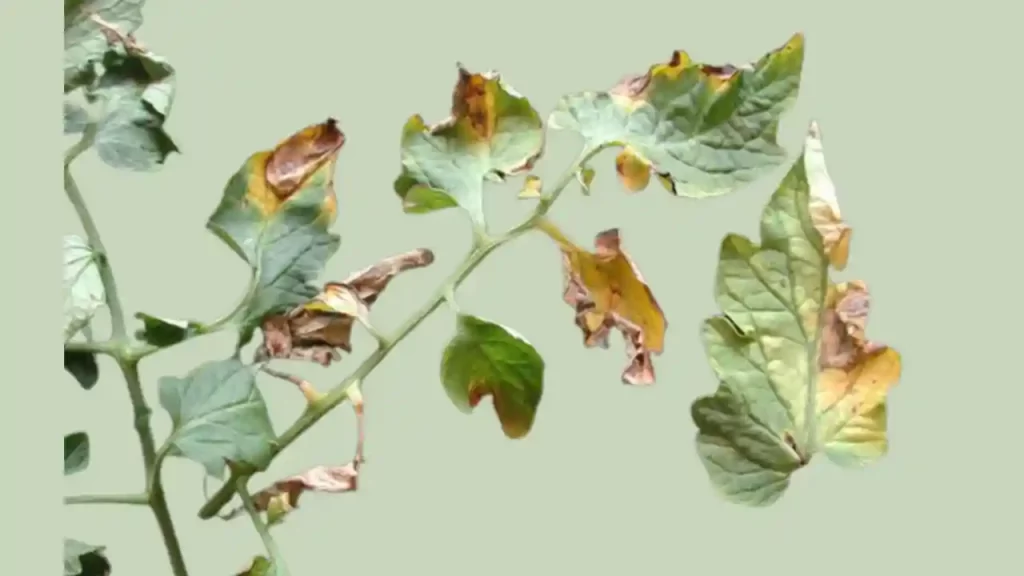
Alternaria solani promotes Early Blight. Tomato leaves, stems, and fruits are mainly impacted, and small brown and black spots are formed in classic concentric rings.
Your tomato plant becomes more prone to get infected with Early blight, especially during rainy weather. The spores are spread when the plant is wet and even spread by wind.
Early blight resists tissues from infected tomatoes, nightshade weeds, and potatoes. It is better to destroy the infected plants and discard them.
Please do not use them as compost, as the fungus may spread in your garden and simply destroy the harvest.
The fungus can sometimes vanish in dry weather conditions. You can also use fungicides chlorothalonil and fenamidone to control the disease.
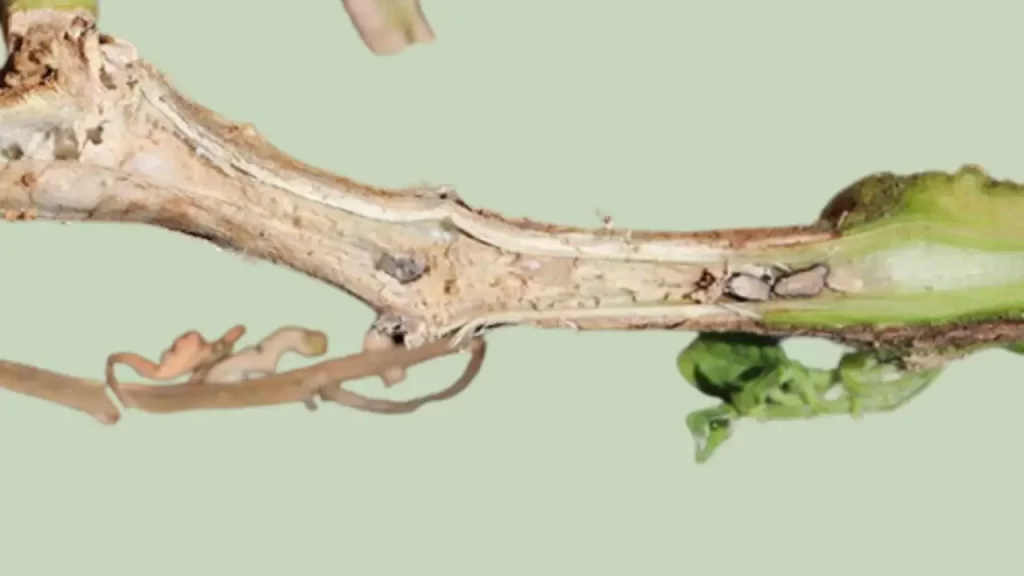
Fusarium Wilt
Tomatoes with Fusarium Wilt by F. D. Richards
Fusarium Wilt is spread by the fungus Fusarium oxysporum f. sp. Lycopersici. It causes wilt in the tomato plants, and the fungus survives in the soil for several years.
The affected leaves turn yellow and wilt. The impact of the Fusarium Wilt is seen only on one side of the plant, denoted as the “Yellow Flag Effect.” The impacted plant is totally destroyed.
Wilts caused by Fusarium and Verticillium are almost similar. So gardeners often need clarification to confirm the type of wilt. It can only be confirmed with a lab diagnostic.
It is best to plant Beefmaster and Better Boy as they are resistant to Fusarium Wilt. But other pathogens can impact these varieties of tomato plants. So it is always safe to choose the variety resistant to your area.
Fusarium Crown and Root Rot
Fusarium oxysporum f. sp. Radicis-lycopersici is the main cause of the Fusarium Crown and Root Rot. It stays in the soil for so many years.
Bad soil drainage facilities and cooler temperatures between 50 -70F result in the spread of infections—in various crops and weeds, including tomato plants. Pepper and eggplants can be destroyed due to the infection.
The infections affect the oldest leaves and turn the color of the leaves, including their margin, to yellow. You can also notice discoloration and lesions of dead tissues in the stem. This infection is enough to destroy the roots of the plant and results in the death of the plant.
Fusarium Crown and root rot cause stunted seedlings, root rot, wilting, and discoloration of the stem, ultimately killing the plant.
Rarely is there any treatment for the disease? It is better to plant a resistant variety to the disease. You can refer to the listed varieties on Cornell University Vegetable Website. For planting tomatoes in greenhouses, sterilize the soil before planting.
Pull the infected plant from the roots and dispose of them. Do not use them as compost in your garden to reduce the risk of spreading the infection.
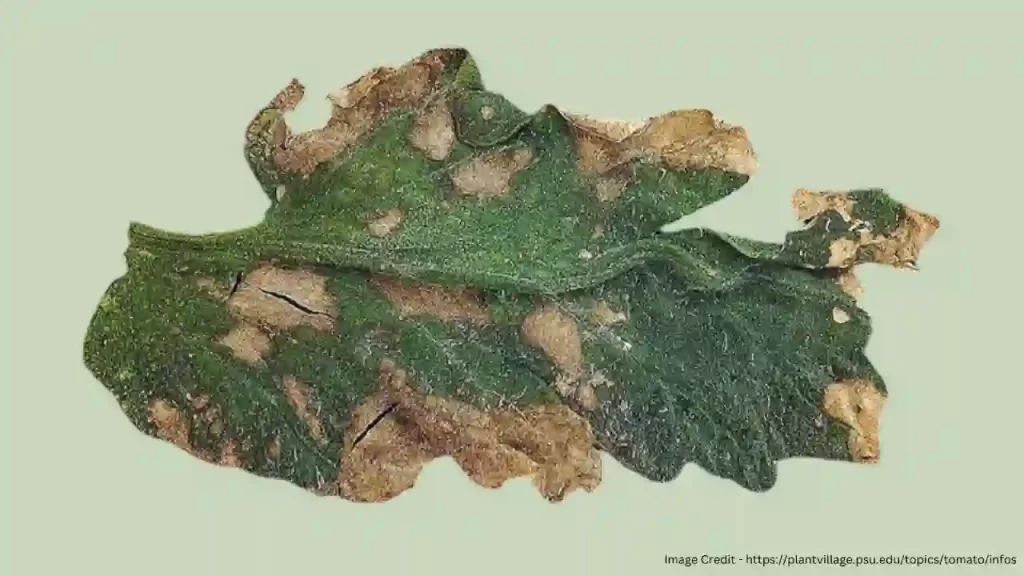
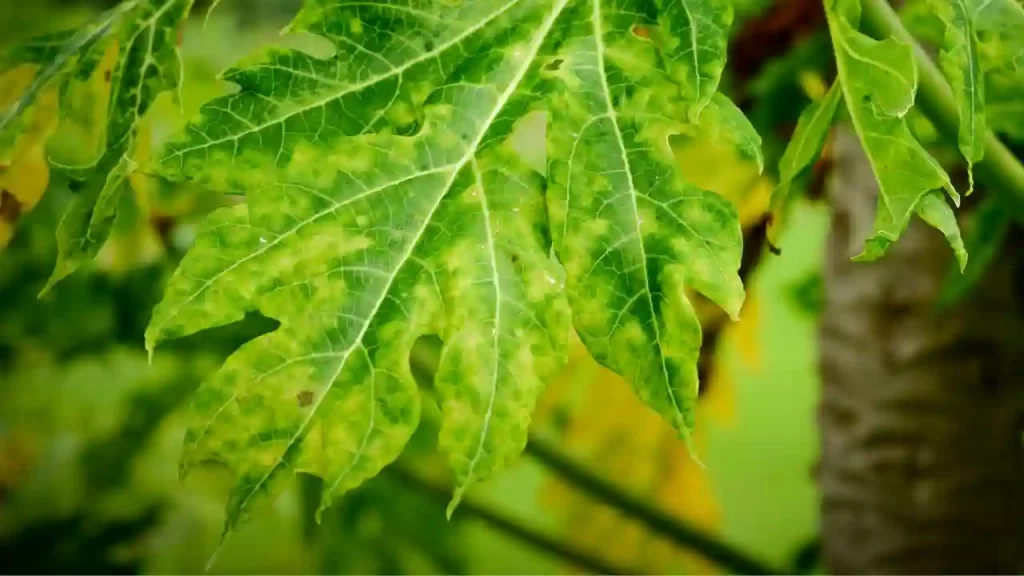
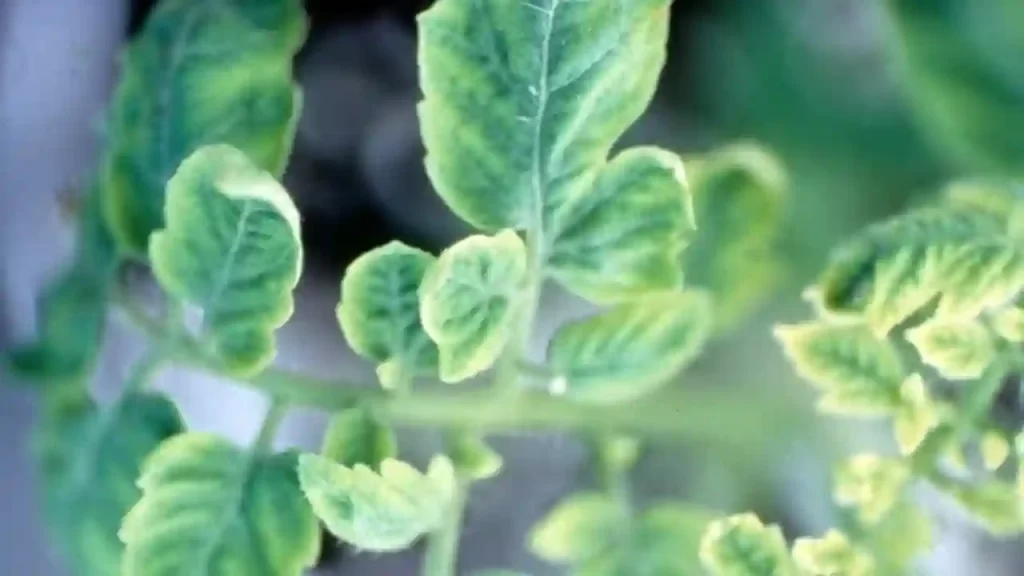
Oidium neolycopersici causes Powdery Mildew which mainly impacts leaves. It turns the leaf color yellow, making it dry and causing necrosis and defoliation.
Dead tissues on the lower and old leaves are also found. They do not infect stems and fruits, but 50% of the crop can be destroyed due to the fungus.
Solanaceae family crops and weeds like tomato, potato, pepper, and eggplants are infected due to the fungus. The ideal temperature for the infection is 60-77F, and a humid climate also encourages powdery Mildew.
Planting resistant varieties like ‘Geronimo F1’, ‘Granadero F1’, ‘Massada F1, and ‘Striped Stuffer’ can reduce the disease risk. The use of fungicides, neem oil, and Bacillus pumilus can help to prevent the disease.
Septoria Leaf Spot
Septoria lycopersici causes Septoria Leaf Spots, also known as Leaf Canckers. It infects tomatoes and other Solanaceae families like potatoes, pepper, and eggplants.
The disease can infect plants at any stage of their development. But mainly older leaves are impacted when the plant is setting fruits on it. Small circular water-soaked spots are formed on the older leaves.
After some time, the spots enlarge and coalesce. The disease forms pimple-like structures which are dark brown in color called pycnidia. This helps to distinguish the Septoria leaf spot from Early Blight.
The spores of the infection are spread in the rain, wind, insects, and gardening tools. Always clean and disinfect your gardening tools before and after use.
The spores can stay on the debris of the infected plants. Always clean your garden at the end of the season and discard all the infected plant debris thoroughly to reduce the risk of disease spread.
Remove the infected leaves and dispose of them, maintain good airflow, and keep proper mulching. The application of fungicides helps prevent infection.
Southern Blight
Southern blight is caused due to Sclerotium rolfsii fungus. Due to its resting structure, it can stay in the soil for longer. The ideal temperature for the disease is above 85F.
Lesions on the steam or near the soil line are formed, which develops lesions and results in wilting of the plants and spreads rapidly.
Mycelia white mats are developed on the stem and in the adjacent soil.
Rotation to non-host crops like corn, sorghum, rice, or small grains for a couple of years helps to prevent the disease.
Pull and destroy the infected plants and do not use them as compost. Simply burn and discard the infected plants.
Keep the soil surface dry to reduce the risk of spreading the disease.
Verticillium Wilt
The disease is caused by Verticillium dahlia and V. albo-atrum.
There is hardly any treatment for the disease as it survives in the soil because of its resting structure and can infect many plants and crops.
The infection turns the color of the leaf to yellow in its V shape, then turns brown, and finally results in the death of the leaf, which leads to sunscald on the tomatoes.
The production of fruits is mainly impacted due to the disease, but the plant may not die.
It is very difficult to differentiate between the Verticillium and Fusarium wilt. Only a lab test can tell the difference.
Ensure to clean and disinfect the gardening equipment and tools between the pants and rotating crops to avoid spreading infection.
Maintain a good drainage facility of the soil, and plant the resistant varieties of the tomatoes with VF indication in the plant description. It is resistant to both Verticillium and Fusarium wilt.
White Mold (Timber Rot)
Sclerotinia causes White Mold, an uncommon but very severe disease for tomato plants and affects rotten flowers falling on the plant’s stem.
This disease is also known as Timber rot, as water-soaked lesions are developed on the stems that dry out and appear bleached.
It possesses a resting structure, due to which it can survive in the soil for many years. The spores of the disease are formed in cooler climates and spread mainly by wind.
Ensure maintaining limited soil moisture by using drip irrigation. The spores of the fungus are less likely to develop in dry soil.
Tomato Diseases Caused by Water Molds
Water Mold is a type of fungi as well as Oomycetes. They possess destructive pathogens dangerous to tomato plants.
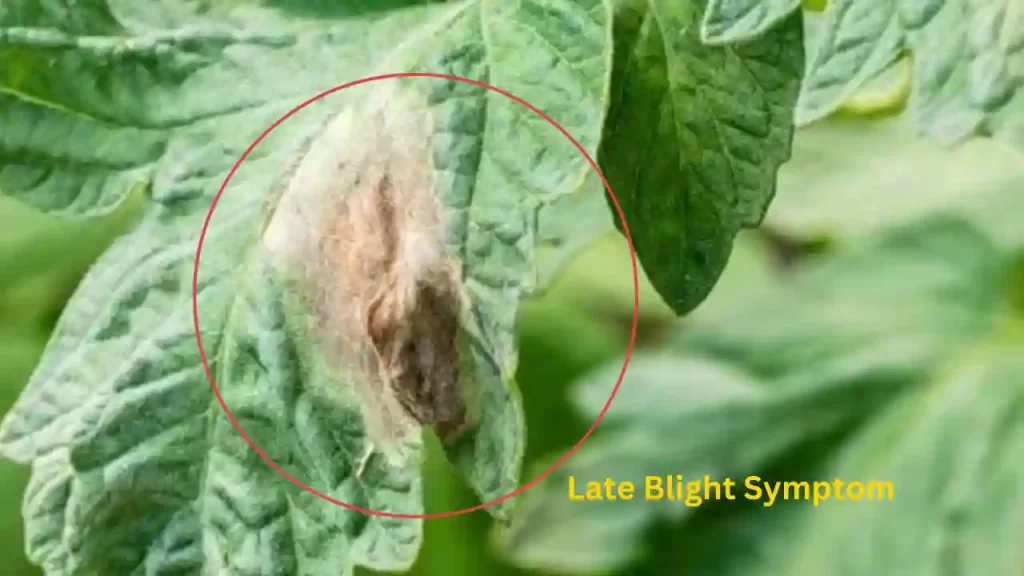
Late Blight
Phytophthora infestans cause Late blight in tomatoes and potatoes. It is a very dangerous pathogen that resulted in Irish potato famine. Millions of people were killed due to the infection.
The ideal temperature for the occurrence of the disease is 60-78F. It can occur in 10 hours in a high-humidity climate.
Older foliage develops small oily dark purple spots which are round and brown and can increase up to half an inch in diameter. Large spots are more prone to forming concentric rings. Water-soaked leaves are the targeted leaves.
It results in the death of the leaves and the spread of the disease in new young stems.
The upper surface of the fruit is infected as the spores are spread from the upper side and the color of the fruit is turned to brown.
It is a highly contagious disease that can spread not only to its neighboring plants but also to its neighboring gardens.
They can survive in the debris of tomatoes: potatoes, and some other nightshade plants.
Pull the infected plants and burn or dispose of them. Also, ensure to remove the neighboring plants even if it is not show any symptoms.
Ensure not to use the infected plants as compost to reduce the risk of spreading the disease.
Phytophthora Root Rot/Buckeye
Phytophthora parasitica and P. capsici cause Phytophthora Root Rot/Buckeye. They infect the plant at the stage of development when the soil is excessively moist.
The disease is spread in hot climates. Wilting and root rot of the plants is the main symptom of Phytophthora Root Rot/Buckeye. Damping off in the seedling stage can also be experienced.
Keeping the soil moist in the right amount and consistent water supply to the plant can prevent the spread of infection.
Also, maintain a good drainage system of the soil to keep your plant stay away from infection.
Brown spots with lathery tan are formed, which is called buckeye rot.
Application of fungicides and crop rotation with cereals can help reduce the disease risk.
Diseases Caused by Bacterial Pathogens
Bacterial Pathogens mainly attack outside-grown and greenhouse-grown tomato plants. The bacteria are multiplied through infected seeds and transplants and spread through water, insects, and gardening equipment.
To reduce the risk of the spread of the disease, clean the gardening tools and equipment regularly and keep your garden insect free.
Bacterial Canker
Clavibacter michagensis subsp. Michiganesis causes Bacterial Canker and mainly attracts greenhouse plants and destroys the crops drastically.
It impacts tomato plants’ home gardens and commercial fields, especially during wet weather.
Sometimes the seeds from infected fruits are used for transplanting the tomatoes. Obviously, it would result in an infected plant.
Sometimes certified disease-free seeds can possess the bacteria, or infections are spread to the seedlings even after germination.
Two types of infections are there. The primary one is a systemic infection that badly impacts the plant.
Wilting in the plants can be seen, and the development of plants is also stopped. It prevents new growth in the oldest branch of the plant first.
The leaves start curling, then become yellow, wilt, turn brown again, and finally collapse. Sometimes green stripes on the stem are visible, which later turn brown.
In secondary infection, the root, stem, and fruits are infected. Due to this, spots on leaves and fruits are developed, also called “Birds Eye Spots.” These spots later turn into lesions.
Wet weather and gardening in damp situations attack Bacteria Cankers.
There is hardly any treatment for the infection; it is better not to plant the infected seeds. This would prevent Bacterial Cankers from occurring in your garden.
Properly sanitize the gardening tool and disinfect the greenhouses if previously impacted by the disease around ten months. You can apply bactericides in infected plants during wet weather.
The use of Copper might be helpful in secondary infection but does not show any benefits for systemic infections.
This bacteria can easily stay in tomato debris, but if it decomposes in the soil, it can never survive and get destroyed. But decomposition of all the infected plants in the soil is not that easy. So avoid planting in the same garden for at least a year.
Bacterial Speck
Bacteria Speck arises in cold weather and gets destroyed when the temperature rises 75F.
Pseudomonas syringae pv. Tomato is the bacteria that causes Bacterial specks. And it can resist the soil because of its resting structure.
The disease can stay in the debris of dead plants and on the surface of seeds.
The infection impacts tomato fruit, leaves, and stems and forms dark brown and black lesions, and its outline looks yellow halo.
Avoid overhead irrigation and use drip irrigation methods and soaker hoses for consistently watering your tomato plants. The copper spray helps to reduce the infection in the plants.
Rotation of unsusceptible crops like corn helps prevent the disease for a couple of years. The plantation is recommended in the spring when the weather warms up.
Consult your local extension office to find out the effective fungicide in your area, as some races of bacteria are now resistant to copper spray.
Bacterial Spot
Xanthomonas campestris pv. vesicatoria bacteria causes Bacterial Spots in tomato plants. It attacks mature plants and seedlings.
It is very difficult to distinguish between Bacterial Spots and specks. Only lab tests can diagnose the disease.
It continues from one season to the next season and survives in dead tissues and debris.
The infection spreads from seeds, and it is very tough to control if spread in the garden or field. Leaves of infected plants are shaded. And it mainly attacks the water-soaked leaves. You can spot spots on leaf margins because of the disease.
Cultural controls and copper spray can help to reduce the spread of Bacterial spots in tomato plants.
You should avoid overhead irrigation and use soaker hoses to irrigate the plants. Always choose disease-free certified seeds for planting tomatoes.
Rotate your crop with corn to prevent the subsequent disease with corn as it belongs to the Solanaceae family.
Diseases in Tomato Plants Caused by Phytoplasma
Phytoplasmas are parasitic and act like viruses, and are smaller than bacteria. They can only exist in live hosts.
Tomato Big Bud
Photo by Dr Parthasarathy Seethapathy, Tamil Nadu Agricultural University, Bugwood.org, via CC BY-SA.
The beet leafhopper causes Tomato Big Bud. The infected plant has large, swollen green buds that cannot form fruit. The plant appears to be bushy with small yellow-green leaves.
The Beet Leafhoppers in your garden can stress your tomato plant, reduce their capacity to produce fruit and impact their development.
Using insecticides and attracting insects like butterflies and native bees can prevent Bett Leafhoppers from existing in your garden.
Tomato Plants Diseases Caused by Viral Pathogens
Many viruses affected plants brutally damage and result in discoloration of leaves, leading to underdevelopment or slow development of tomato plants and making them inefficient in producing quality fruits.
Insects spread the disease to the tomato plants. Thus it is very important to keep your garden insect free.
Alfalfa Mosaic Virus
Image by saillog.co/AMV.html
Never plant your tomato plant near Alfalfa as the plant is more prone to get Alfalfa Mosaic Virus.
In the USA, so many Alfalfa fields are impacted by Alfalfa Mosaic Virus and are contagious. So they easily get spread to the neighboring plants.
The affected plant’s leaves molt, and their color changes to yellow. Dead tissues in a circle shape are formed on the tomatoes. The plant becomes incapable of delivering nutrients as the phloem is also destroyed and turns brown.
Alfalfa Mosaic Virus can not be treated or controlled even with insecticides or chemicals. Prevention can only save your tomato plants from Alfalfa Mosaic Virus; it is better not to plant your tomato near Alfalfa.
While planting, use silver reflective polythene as a mulch to protect your plant from Alfalfa Mosaic Virus.
If any plant is already infected, it is better to discard the plant to protect other plants from spreading the disease.
Tobacco Mosaic Virus
Tobacco Mosaic Virus is consistent in nature. They can exist for around 100 years in dried plant debris. It infests tomato plants and damages gardens, files, and greenhouses, and they can also spread from tobacco.
The TMV-infected tomato plants look stunted, leaves develop a mosaic pattern of yellow and light or dark green, and leaves have malformation and leave yellow spotting. The disease is commonly seen in young plants and fresh tomatoes available in the market.
Avoid using the infected plant as compost, as you can easily spread the disease to the rest of the plants.
Maintain proper hygiene while gardening. Disinfect all your gardening tools. Bring the disease-resistant variety seeds like “Geronimo” and “Arbason” to ensure preventive measures against TMV diseases.
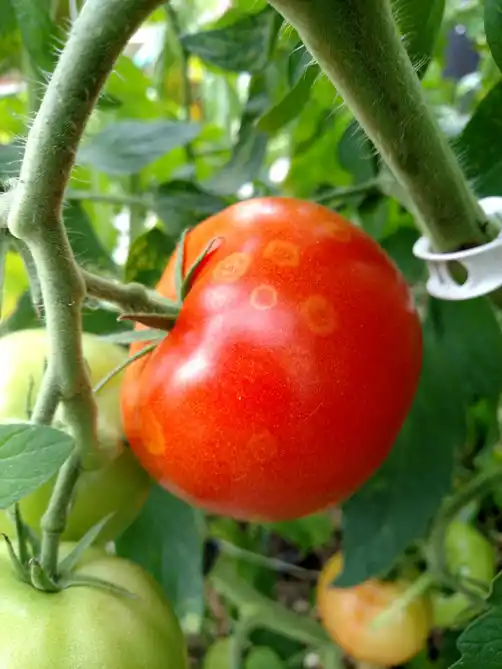
Tomato Spotted Wilt Virus
Tomato Spotted Wilt Virus is a very uncommon type of Virus in plants as TSWV is also spread to ornaments.
Only in tropical areas, this disease is traced, but it is alarming the world now. Mainly new leaves are impacted due to TSWV and turn their color to brown with some dead tissue spots on them. The affected tomatoes develop ring-yellow spots on them, but you can trim the affected areas and use them normally.
The Virus is spread by insects called thrips, such as flowers, onion, and chili thrips. Infected plants should be removed immediately from the garden to reduce the risk of spreading the disease to the neighboring plants.
Keep your garden sanitized, weed free and use reflective mulches as a prevention of the disease.
Summerpick and Quincy can be planted as they can resist the disease.
Tomato Plants Diseases Due To Physiological Disorders
Gardeners often make mistakes in identifying the physiological disorder of tomato plants and infections in the plants.
Changes in Environmental conditions like climate change, changes in climate, pollution, poor care of plants, and poor watering techniques lead to physiological disorders in the plants.
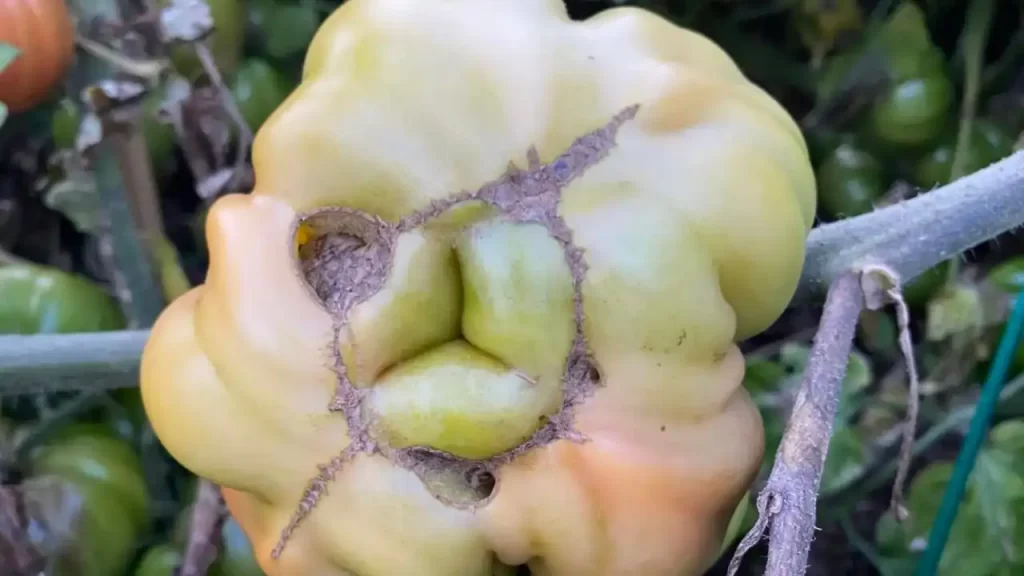
Blossom End Rot
The first tomatoes of the season are more prone to Blossom End Rot. The Main reason behind Blossom End of Tomatoes is calcium deficiency in the plant.
Even if you have planted the tomatoes in the most fertile soil, BER can happen in the tomato plants. It mainly happens because of improper moisture.
Blossom End Rot usually happens in drought conditions and produces lesions forming concentric rings on the surface of tomatoes.
You can prevent it by providing proper support to the plant before the roots of the plants are developed.
Also, do not walk or cultivate in nearby areas of the tomato plants. This would help not to stress the root system.
Mulching can maintain adequate moisture in the soil, and drip irrigation and soaker hoses can also ensure the adequate water supply in the correct way.
Catfacing
When tomatoes form puckered surfaces and distorted shapes with brown line-type scars, it is the symptom of a cat facing disorder. The disorder can be minor or large.
This disorder is common in large-sized tomatoes and the earliest harvest of the season.
The disorder happens when flowers are unnecessarily stressed while blooming, sudden cold or hot temperatures shock, and too much nitrogen content in the soil.
If your tomatoes are facing this disorder in every crop season, choose the resistant varieties of tomatoes like Countil, Duke, and Walter.
You can easily prevent the disorder by watering your tomatoes in the right amount and in the right way, not using excessive fertilizers, and stop pruning.
Fruit Cracking
Fruit cracking and catfacing look very similar to each other. But both disorders happen because of different reasons.
Suddenly, when plenty of water is delivered to the plant, the developing and developed fruits crack.
This happens due to heavy rainfall or overwatering in the plant. The roots deliver too much water to the plant and the flesh of the fruits swells. As a result, the skin of tomatoes is cracked.
Growing resistant varieties like Marglobe and Daybreak can prevent the disorder.
Consistent water supply to the tomato plants and maintaining proper soil drainage facility by mulching can prevent the fruits from cracking.
Preventing Tomato Plant Disease and Saving Infected Plants
It is well said that prevention is better than cure. I always take preventive measures to make sure my tomato plants won’t catch any disease.
The below tips can help you prevent diseases in your plant:
Do not plant your tomatoes in the same place each season. Keep rotating your crop and this helps to save them from different pathogens already present in the soil.
If you have traced any infected leaves in your tomato plant, pin them off and discard them immediately. This prevents the spreading of infections.
Avoid working in the garden while the tomato foliage is wet; otherwise, it would spread pathogens from one plant to another.
Choose the variety of tomatoes that are more resistant to diseases at the time of seeding your tomatoes.
Dispose of all the diseased tomato plants and do not use them as compost to prevent the spreading of disease in your uninfected tomato plants.
When you plant to keep the same tomato plant for the next season, ensure that the plant is free from any disease.
Maintain around 18-24 inches of spacing between each plant to maintain good airflow.
Mulching your tomato plants keeps the soil moist adequately. You can use leaf mold, compost, or straw to prevent soil fungus during excessive rain.
Keep tomato plant foliage dry. You should avoid overhead irrigation; instead, you should use hand irrigation or Soaker hoses to water the tomato plants, and water directly reaches the root of the plant. Thus wet foliage is not experienced by the plants and the risk of the fungus spread is also reduced.
If you are growing tomatoes in pots or containers, disinfecting and cleaning the pots is a very important step.
Final Thoughts
Various types of tomato diseases can destroy the entire plant. It is very important to take preventive measures before and during the plantation process so that your tomatoes never get attacked by any disease. Research which disease is common in your area and choose the resistant variety of tomatoes to plant them.
Many of the diseases are contagious in nature. If you are discarding the infected plant, never use them as compost; simply dispose of them. This would reduce the risk of the spread of infection in other plants as well as in your garden.
By following all the above preventive measures, you can keep your tomato plant free of any infection and disease and get rewarded with fresh and juicy tomatoes every harvest.
Diagnosing and Controlling Fungal Diseases of Tomato in the Home Garden, Andy Wyenandt, Extension Specialist in Vegetable Pathology, Rutgers University, Peter Nitzsche, Agriculture and Natural Resources Agent, Morris County
At least for once you must have come across Powdery Mildew in your garden. But still, if you haven’t, then you are lucky! Gardeners like us become really frustrated to see Powdery Mildew in our gardens.
The plants become inefficient to thrive due to this disease. Thus we need to inspect the reason for its spread and take an instant action to treat and prevent such infection.
If the plant is diagnosed with Powdery Mildew at its early stage, it becomes easier for us to treat them. But we need to start the treatment proactively for our plants.
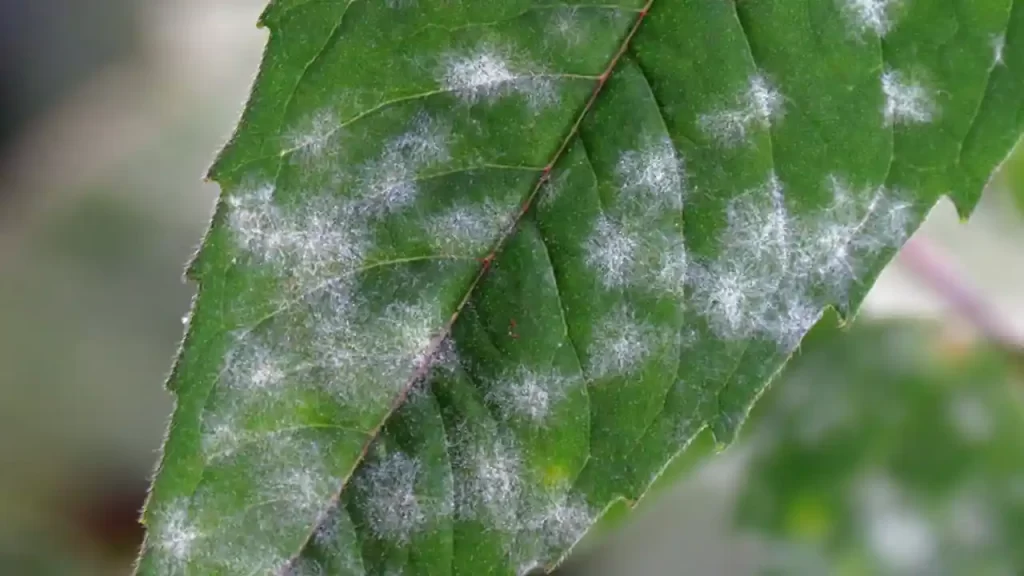
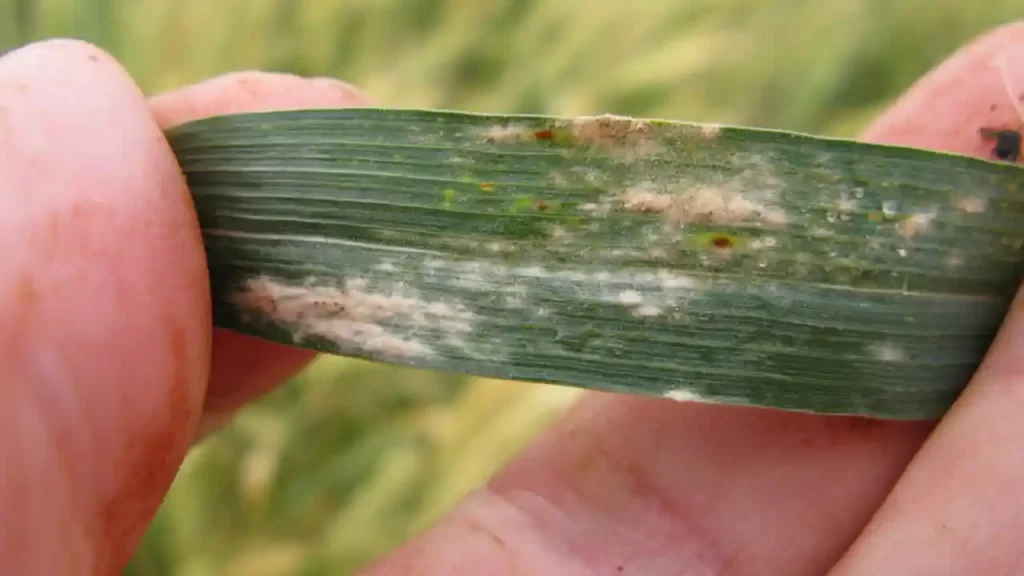
The foliage seems like it is coated or dusted with flour-like dust, and they commonly spread on the upper leaf surfaces. The leading causes of the infestation are:
Humid and warm climates.
Poor air circulation.
Deficiency of nutrients.
Susceptible varieties of crops.
It is good to plant resilient varieties of crops, adopt good watering techniques, maintain good airflow, and use effective fungicides to prevent the spread of such diseases.
In this article, I have briefly discussed this issue with its preventive measures.
Powdery Mildew is a fungal disease that impacts multiple plants. A powdery mildew genus is there, which is proven to be hazardous for many plants.
Plants like tomatoes, cucumber, squash, watermelon, roses, peppers, peas, beans, etc., are mainly affected.
This fungal disease is highly contagious and can easily spread from one plant to another. The fungi are spread through airborne spores or infected soil. It blooms mainly in warm climates.
Overcrowded planting, bad air inflow in the plants, and high humidity result in the emergence of Powdery Mildew.
Due to Powdery Mildew, your plant would not be able to grow and develop properly, which results in low harvest, and the production quality is compromised.
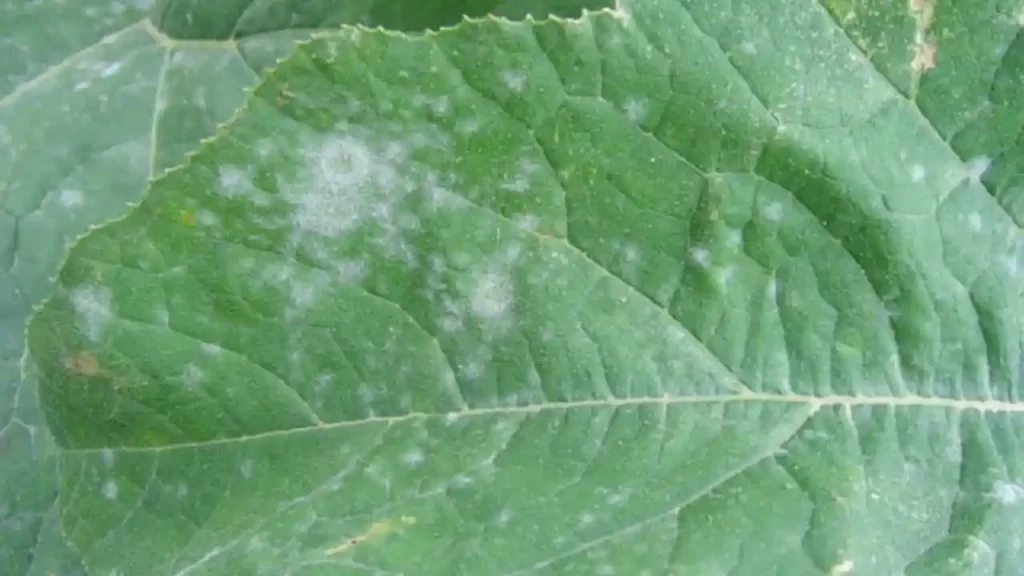
How to Identify Powdery Mildew on Plants?
Identifying powdery mildew on plants is easy. Plants Infected due to Powdery Mildew show the following signs:
The plants will look coated or dusted with a flour-like substance.
The plant’s leaves, stem, and flowers develop a whitish or grayish powdery coating.
Commonly the upper surface of the leaves is affected by powdery Mildew. Sometimes leaves underneath are also affected.
It mostly targets new leaves and results in yellowing, browning, and dry leaves.
It also results in premature leaves dropping, curling, breakage, and uneven figure of leaves.
The white spots always try to cover most of the leaves and other parts of the plants.
The shape of leaves, buds, and growing tips becomes uneven. It occurs mainly in growing seasons.
Stagewise symptoms of Powdery Mildew have been explained briefly below, and you will be able to understand how powdery Mildew thrives at early and later stages.
Early Detection
Powdery Mildew initially infects a very little part of the plants, and these fungi spores commonly flourish in moderate climates.
If you can’t spot these fungi spores on your plants, then they can rapidly spread all over it, and if not controlled, mycelia is formed, which looks like a network of fine white thread. Mycelia encourages the fungus to spread all over the plant.
With the rapid increase of powdery mildew fungi, the whole plant system is disturbed and becomes inefficient in absorbing necessary nutrients and water. As a result, the growth and development of the plant is also compromised.
The plant’s immunity is also reduced, and plants become less resilient to diseases. Leaves’ shape seems uneven and is turned yellow or brown and eventually drop from the plants. These fungi also develop fruiting bodies which totally hampers the yield of the plants.
Species of Powdery Mildew
I have listed the names of a few plants which are highly susceptible to powdery Mildew. But the infection prevention method remains the same for all the plants.
Sunflower: The lower foliage of the healthy plants is infected, which leaves white spots on the plants, and later black spots also appear, resulting in the total destruction of the plant.
Wheat: Lower leaves of the plant are attacked first. Then small blisters are formed on the whole surface of the leaves, resulting in the leaves’ death.
Barley Plants: Powdery Mildew infects the plant the same way it infects wheat. But it develops blisters that are more stippled.
Legumes: The developed white spots seem like talcum powder on the plants at the initial stage. The leaves appeared to be wrinkled and brown.
Grape: It infects the leaves, fruits, canes, and flowers. Initially, the lower surface of the leaves develops green-white patches.
Onions: Whitish and gray patches are formed on the leaves and mycelia is developed. It reproduces and increases and destroys the affected leaves of onions.
Apples and Pears: Leaves of apple plants get impacted and eventually turn red. Fruits of pear are mainly affected due to powdery mildew and they turn black and result in its rotting.
Gourds and Melon: Zucchini powdery mildew develop white spots in the Centre of the leaves. Cucumber powdery mildew also impacts in the same manner but it also infects the fruits. Squash powdery mildew also impacts in the same way but it causes more infection to fruits.
Lilacs: The top portion of the leaves of the plant form cloudy patches and it is seen as the primary symptom in lilacs.
Strawberries: The leaves begin to curl and powdery mildew spread underneath the leaves and then spread to the fruits as well.
Tree Leaves: Underside of old leaves are impacted due to powdery mildew. It can develop cloudy white dust like spores and it can be carried from top to bottom foliages.
Arabidopsis: Hydrangea powdery mildew is developed underneath the leaves and turns the leaves color to yellow and then brown and finally causes leaf curling.
Cannabis: Whitish flour like dust appears on the upper leaves area then leaves turn yellow, then it is dried and finally falls on the ground. It also results in Irregular bud shapes.
Roses: White spots on the leaves and upper shoots are formed and later turn it to purple texture.
How Does Powdery Mildew Spread?
The release of airborne spores from pre-infected material of the plants is the vital cause of powdery Mildew in the plants. The spores are spread by wind and water.
It mainly flourishes in warm and humid climates at 60-80 degrees Fahrenheit (15-27 degrees Celsius). They cannot spread in cooler and rainy climates.
When the temperature reaches 90 degrees Fahrenheit/32 degrees celsius, powdery Mildew starts to leave your plants.
The plants that remain in the shade are more susceptible to this infection than the plants that get direct sunlight exposure.
Common Susceptible Plants To Powdery Mildew
Almost all the plants may get infected due to powdery Mildew, but some of the plants are more prone to get infected due to powdery Mildew.
The list of susceptible plants is as follows:
Begonias
Sunflowers
Chrysanthemums
Dahlias
Roses
Zinnias
Melons
Zucchini
Squash
Lettuce
Cucumbers
Potatoes
Parsley
Pumpkins
Grapes
Peppers
Tomatoes
Powdery Mildew Treatment
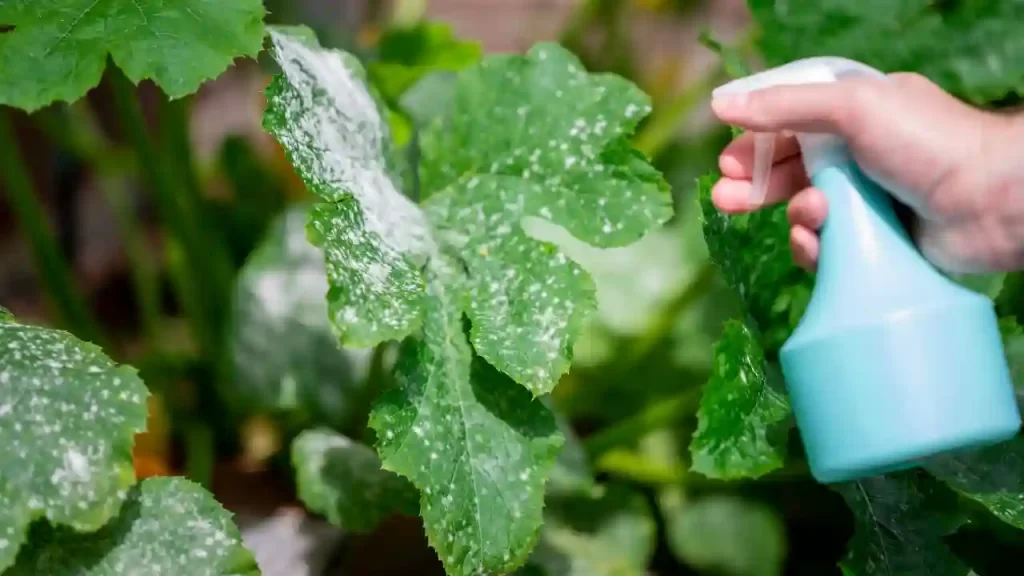
How to Prevent Powdery Mildew Infection?
You can prevent powdery Mildew if good cultural practice is adopted and proper plant care is ensured.
Please go through the below-mentioned points. It can definitely help you to control the Powdery Mildew.
Always prefer an area where your plant can receive at least 6-8 hours of direct exposure to sunlight.
Choose to plant Powdery Mildew resistant varieties of tomatoes.
Maintain a good facility of air circulation in the plants. You can also adopt the pruning practice but always ensure to disinfect your gardening tools before and after pruning your plants. It reduces the chance of the spread of diseases in plants.
Pluck the infected leaves and dispose of them immediately. Remove all the residuals left on the ground.
Use Garden Compost or mulch your soil with leaves, straw, and bark chips after cleaning the area. Mulching helps reduce the water splash on the leaves, and powdery Mildew is reduced.
Avoid overhead irrigation and choose drip irrigation or soaker hoses to water your plant. Never water the leaves of the plants, ensure watering in its base and soil.
Use fertilizers with moderate content of Nitrogen. Excessive use of Nitrogen can set more leaves and even makes your plant bushy. New, soft leaves are more prone to get infected with powdery Mildew. I recommend using slow-release and organic fertilizers.
How To Get Rid of Powdery Mildew? (Treating Powdery Mildew)
Milk Spray
Take 40% milk and 60% water to make a solution. You can spray this solution on your plant once every 10-14 days and get rid of powdery Mildew.
Baking Soda
Baking soda works well in the treatment of these fungal diseases. You must take one tablespoon of baking soda, a gallon of water, and half a teaspoon of liquid soap. Mix everything and pour the solution into a spray bottle. Now you can spray this solution on the affected areas of the plant.
You can use this solution as a preventive measure or on the already infected part of the plants to reduce infection.
Wash Plant Foliage
Spores releasing cycle of the fungi is broken if the leaves of the plants are washed at times.
Neem Oil has antifungal properties which is helpful to cure powdery mildew.
Apply them on your plants once every seven days, and fungal infections in the plants can be prevented.
Sulfur or Copper-Based Fungicide
Sulfur fungicides possess broad spectrum activity which can control widespread fungal diseases. Copper-based fungicides release copper ions which reduce fungal growth on your plants.
It is best to apply these fungicides on your plants at the early stage of the infection.
You can spray these fungicides on your plant every 8-10 days until harvesting for better results.
Potassium Bicarbonate
Applying Potassium Bicarbonate to your plants raises the pH level of the leaves surface, making it more alkaline and reducing fungal growth and other diseases.
Mix ½ tablespoon of Potassium Bicarbonate with one gallon of water and apply on the bare parts of the plants. Using it in the initial stage of infection of Powdery Mildew is very beneficial.
Broad-Spectrum Fungicide
You can efficiently cure powdery mildew fungus in your plants with Serenade Garden. It contains Bacillus Subtilis, which can be used for organic gardening. It is secure to apply on your plants, and you can even pluck crops on the same day.
Sulfur Burner for Indoor Plants
You can use Sulfur Burner, which transforms sulfur prills into dust and improves the foliage’s pH level. It discourages fungal spores and mold from forming on the plants, and it is also researched that it can prevent spider mites.
How To Control Powdery Mildew?
Once your plant is already infected with Powdery Mildew, it becomes very difficult to treat them. So the mantra, “Prevention is better than cure,” fits well here. Ensure all possible preventive measures to control their spread in your plants.
Remove the infected stem, leaves, and fruits from the plants and dispose of them. This helps the healthy part of the plants to remain safe.
Ensure not to use these infected things as compost, or else it increases the chances of spreading the disease by the wind in the future.
Remove all the debris from your garden.
Ensure to clean the used gardening tool with alcohol after pruning the infected parts of your plant to prevent the further spread of the disease.
While pruning the infected areas, ensure healthy leaves are not touched.
Control Treatments To Avoid
Many chemical treatments are promised to be effective in controlling Powdery Mildew.
They might control this issue but at the same time, it can harm your plant in either way.
So it is better not to practice such treatments on your plants.
Sprays containing liquid soaps are hazardous to your plant’s health. Mostly it includes surfactants responsible for reducing Powdery Mildew, but it also destroys the cells of the plants. It also acts as a repellent for beneficial insects, which is a great loss for your plants.
Washing the leaves of the plants is also suggested to prevent Powdery Mildew. But the fungus spores are dropped into the soil enough to infect other plants in your garden.
Thus you can choose to apply Neem Oil and milk spray on your plants to prevent such diseases.
Also, planting resilient varieties is one of the best options.
Summary
Powdery Mildew is one of the common plant diseases that can infect all types of plants like fruits, veggies, herbs, etc. It forms a white powdery substance on the plants initially and, if left vigorous, can badly impact your plant and reduce their capacity to thrive, develop and produce crops.
If they are diagnosed initially, it can be easily prevented. So always be proactive and keep inspecting your plant at regular intervals. Use effective and safe fungicides to cure the infection.
Remove the infected plant debris and dispose of them ASAP. Ensure to maintain good hygiene for the plants.
If you use all the preventive measures shared in this article, you can definitely get rid of powdery Mildew and free your garden from it.
Frequently Asked Questions
Can plants recover from powdery Mildew?
If the plant is diagnosed at the early stage and is not severely infected due to Powdery Mildew, it can obviously recover.
You can remove and dispose of the infected leaves, take care of proper air circulation, apply effective fungicides, and take preventive measures (Discussed Above), and your plant will recover from Powdery Mildew.
What is a natural remedy for powdery Mildew?
You can treat powdery Mildew naturally with Milk Spray, Baking Soda, and Neem Oil. It has been briefly discussed in this article.
Which fungicide is best for powdery Mildew?
I strongly recommend Potassium Bicarbonate and Sulfur or Copper-based fungicides to treat Powdery Mildew.
Does vinegar help powdery Mildew?
Vinegar can help you to prevent Powdery Mildew. You can prepare a solution by mixing three tablespoons of vinegar with one gallon of water. Now put it in a spray bottle. You can spray this solution on your infected plants once every 10 -14 days.
Should I destroy plants with powdery Mildew?
It is not always necessary to destroy the infected plants. You can prune the infected areas of the plant and dispose of the pruned parts. Never use them as compost, or spores can come back by winds and spread easily.
After this step, take all the preventive measures to keep your plant’s infection free and keep monitoring your plant at regular intervals.
Can I reuse soil that had powdery Mildew?
It is better not to reuse the soil which had powdery Mildew. It can survive in the soil and can re-occur as its spores can stay in the ground for a longer period of time. Still, if you want to reuse the soil, you can plant resilient varieties of crops.
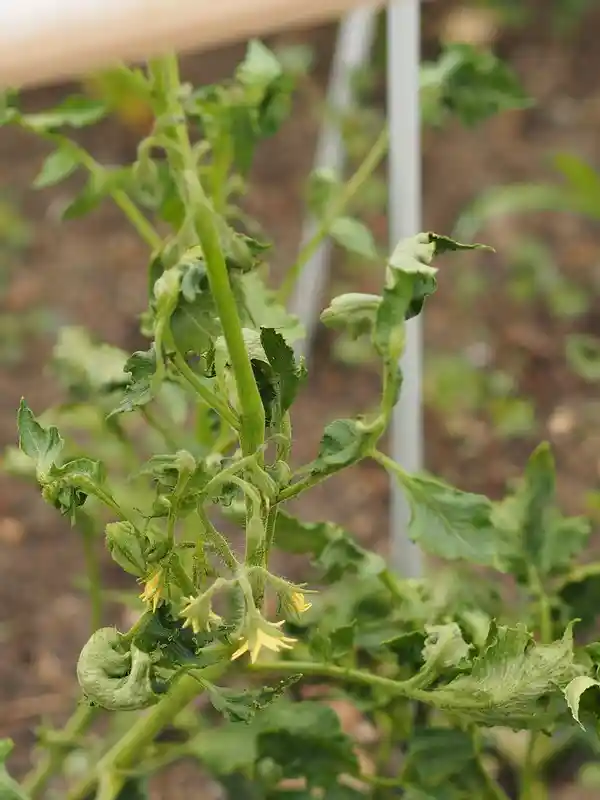
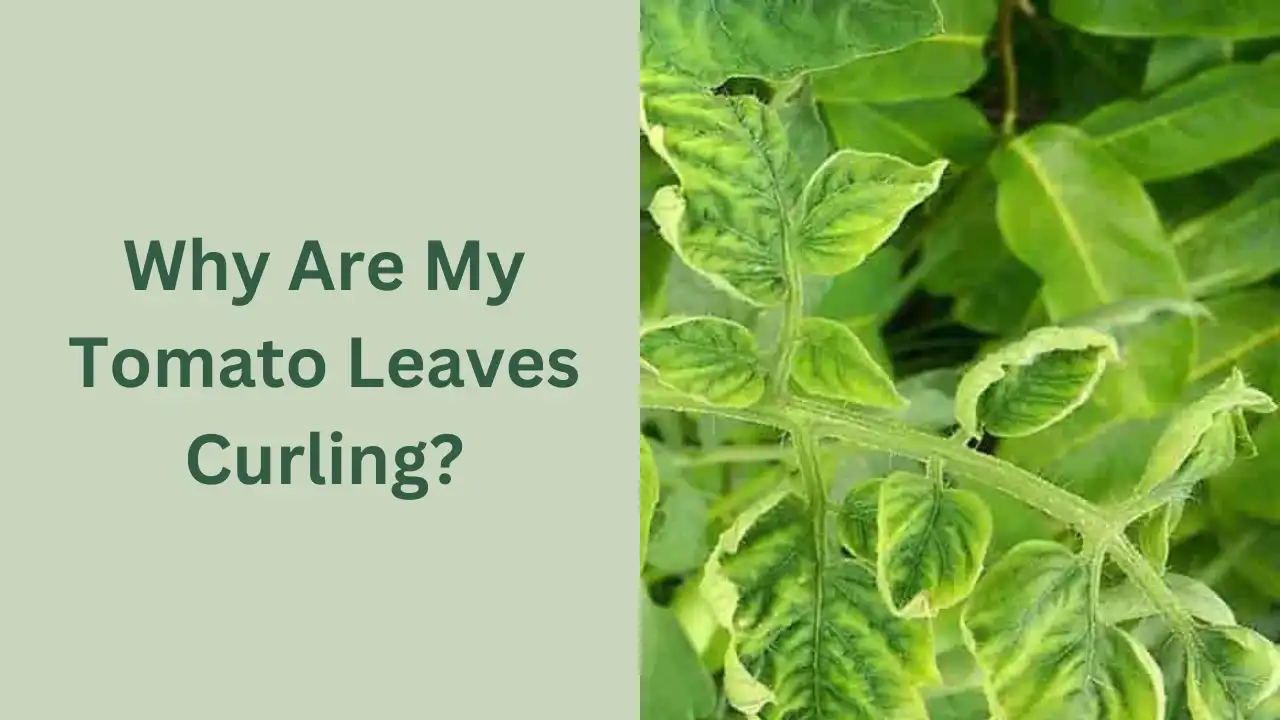
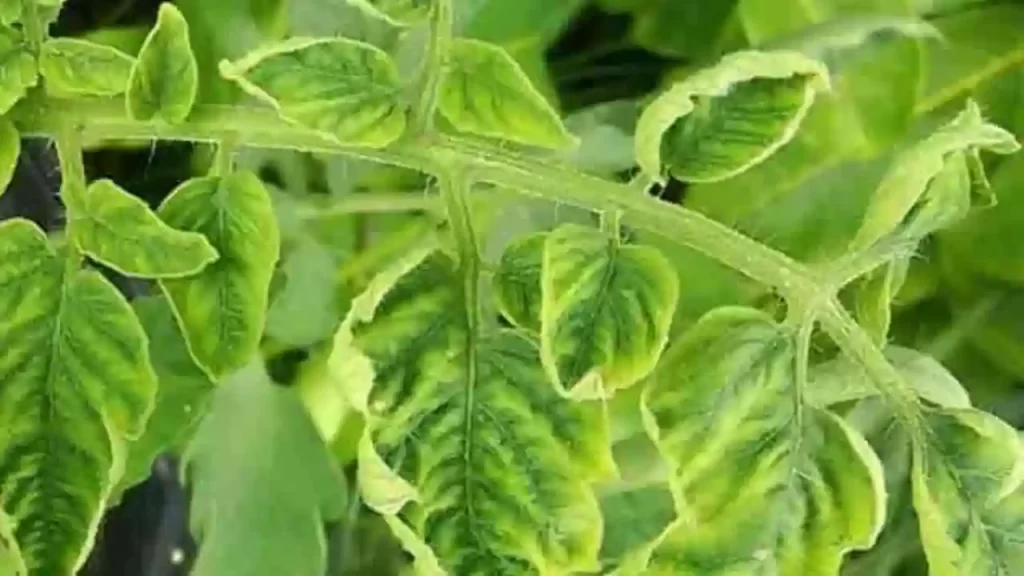
When you see curling tomato plant leaves, you should know it’s a sign of sickness. It reflects the state of distress of your tomato plants and can happen for several reasons. It may be your watering style, soil quality, extremely low or high temperature, or sometimes pests attack on your tomato plants.
If you take the correct measures to take care of your plants, like using appropriate fertilizer, rich soil mix, watering them timely, keeping the soil moist, etc., you can save them and give them a healthy life.
What Does Tomato Plant Leaf Curl Mean and Its Types?
Many challenges are faced while planting tomatoes as they are very delicate and more prone to getting infected and caught by diseases and pests.
Non-heirloom varieties of tomato plants are more prone to get infected. When their leaves start curling, it means they are infected, and it is time to cure your plant to save them.
But let me make it clear that every time curling is not a negative thing. This article has covered how to track when curling is a bad sign for your tomato plants. (1)
Here are the the types of curling seen in Tomato plants:
Leaves Curling Up
Almost 98 percent of the time, tomato leaf curl due to sudden weather changes, like exposure to excessive heat due to increased temperature, water deficiency, or increased wind.
It is the inherent capacity of plants to curl up their leaves in order to protect themselves from environmental stress.
Leaves curling up is very general for tomato plants; they automatically get into a normal state when the environmental stress becomes normal.
Leaves Curling Down
When you notice the leaves of your tomato plant are curling down, then this is alarming because it is a sign of the root rot of your precious tomato plants.
The leaves start curling down when your plant is overwatered, and the drainage system of the soil needs to be better.
In this situation, the roots try to hold the pressure of water to save the plant. Due to this, the root starts decomposing and becomes inefficient in delivering adequate water and nutrients to the plants, leading to the curling down of leaves.
To fix this problem, wait for your soil to be moist only up to 2.5 CM before watering them again and arrange a better soil drainage system.
Leaves Curling at the bottom
Curling leaves at the bottom is a symptom of a deficiency of micronutrients. This happens when the soil loses its nutrition, and adequate nutrition is not delivered to the plants.
You can also track this problem when yellow leaves are seen on the plants.
You can quickly fix this problem using Azomite clay, which contains the necessary nutrients. The use of rich soil mix also helps to reduce this problem. Compost and Trifecta+ are safe to use and help enhance soil nutrition without damaging the plant.
Leaves Curling on the Top
Leaves start curling on the top due to the attack of the pest or bug. The leaves would be small and curled on the top, and this disease is called a curly top virus.
This disease stops the plant growth, but fortunately, it does not spread to other plants.
If the plant has already produced fruit, it grows to maturity. It is always advised to dispose of the plant after the harvest and use that space to plant new tomato plants.
Sometimes, it takes a lot of work to resolve the top curling issues.
Causes of Tomato Plant Leaves Curling
The tomato plant is very delicate, and harvesters face plenty of challenges while cultivating tomatoes, and leaf curling is one of those common and major problems.
This leaf roll situation is not always dangerous. It happens due to various reasons, and the distressed environment is one of those reasons.
This problem is not that tough to be resolved when identified.
When the leaves curling is due to environmental plants, your plants return to healthy conditions when the environment becomes normal
Besides environmental stress, if the leaves start curling, it becomes damn difficult to save the plant.
But if you can detect the problem at an early stage, you will be able to solve and maintain the health and long life of your tomato plants.
Here are some other causes responsible for the tomato leaf curling.
Incorrect Watering
We all know that watering is very important for any plant and tomato plants are no exception. It is very important to water your tomato plants in the correct amount as both overwatering and underwatering are dangerous for the plant.
Due to underwatering, plants won’t get enough hydration, and overwatering results in root rot.
The leaves curl inward when you don’t water tomato plants correctly.
If your plant is overwatered, it will give many other signs before curling up the leaves, but under-watered tomato plants are more prone to get their leaves curled as enough water is not supplied to the plant.
The ideal temperature for tomato plants is 21-26 degree Celsius. When the temperature goes beyond the ideal temperature during the summer, the plant goes through underwater stress. This happens when the temperature rises and plants are more exposed to the sun.
Stomatal transpiration is caused due to excessive heat, and leaves start curling inward to prevent more water loss and protect themselves from the sun. You can also have this problem when your plants don’t get adequate water.
To save your plant from excessive heat, you can create physical barriers with the help of clothes and arrange shade for your plants in extreme heat.
If you have potted tomato plants, bring them indoors during excess heat. With the temperature fall, the leaves start getting normal automatically.
Too Much Nitrogen
We use Nitrogen-content fertilizers when we first plant tomatoes. Fertilizers containing nitrogen, phosphorus, and potassium (18:18:21) are best recommended at this stage.
But at the fruit-producing stage, only phosphorus and potassium-contained fertilizers should be used as these are the nutrients tomato plants need for flowering and fruiting.
Using nitrogen at this stage leads the leaves to curl inward, as the plant focuses more on producing leaves rather than fruits.
If your tomato plant’s leaves are curling due to excess nitrogen, it can be naturally resolved over time.
In this situation, always opt for the right and good fertilizers and avoid overuse of nitrogen-rich fertilizers to maintain a good nutrition level in the soil.
Excessive Pruning
Anything beyond the limit causes the worst impact only. The pruning of tomato plants is good, but only if it is limited. The problem of tomato leaf curl is more common because of excessive pruning.
The plants face more direct sunlight after pruning which causes heat stress to the plant, and the curling of leaves happens due to dehydration, as discussed before.
You should do very little cutting of leaves from the lower and upper stems if you have planted indeterminate plants, as it improves airflow and growth. But never opt for pruning of determinate tomato plants.
If your plant is going through the stress of pruning, just leave the plant as is and let it recover itself. With the growth of new leaves, this problem will resolve itself.
Transplant Shock
We can also notice the tomato leaves curling after transplanting (due to transplant shock).
If these plants are transplanted, the chances of root damage are high. The damaged roots become inefficient in delivering adequate nutrients and water to the plants; you notice wilting and yellow leaves.
When plants go through transplant shock, we should be calm and allow them at least two weeks to recover on their own.
Herbicide Exposure
Tomato plants cannot bear herbicide exposure as it causes leaves to curl when it comes in contact with the plant.
In this situation, leaves curl downward, which is a dangerous sign for the tomato plants as it causes severe loss to the plant, and there is no remedy to overcome this leaf curling situation.
Plants can still grow with little damage, but the yield is negatively impacted. And if the plant is heavily impacted by herbicide exposure, they do not even survive.
But the best part is that this problem is very rare; therefore, you should refrain from using herbicides in your garden.
Tomato leaves also curl down because of various diseases and fungus infections.
Viral Diseases
The disease is a curse for any plant, and when it comes to leaf curling causing due to viral disease, it feels like a nightmare for any harvester.
When the tomato leaves turn yellow or pale green at the edges and start to curl upward, it is a sign of infected plants due to a viral disease called tomato yellow leaf curl virus.
The newly grown leaves turn into a cup shape and cause the leaves to curl upward. This stress is caused when the viruses have already attacked the plant.
The other reason is the whiteflies, whichare the enemy of tomato plants, spread the disease all over the plant in your garden. The plant’s growth is inhibited, and fruit production is also reduced.
You can use horticulture oil and insecticidal soaps to control the whiteflies, which in turn helps reduce the disease’s spread.
When the fruit color changes to brown, and you notice spotty leaves in the plant, it is a sign of tomato mosaic virus.
Due to the spread of this virus, the leaves curl inward, and newly grwing leaves grow small in size. This virus is transmitted by aphidswhich are also known as plant lice.
Unfortunately, there is no treatment to save the plants when infected due to the viruses. The only way is to dispose of the infected plant.
The only mantra to save your plants from these viruses is to keep your garden weed free, as they are one of the main reasons for the transmission of viruses in tomato plants.
How To Save Your Tomato Plant Leaves From Curling?
Tomato plant leaves curl due to various reasons and it is a sign which shows that the plant is sick. It happens due to environmental stress, wrong choice of fertilizers, watering issues and many more. Sometimes the plants die even without producing the fruits.
Firstly we need to figure out the number of leaves curling, curling direction, is it getting recovered on its own within a few days, whether new or old leaves are curling and even the fruit is also getting any adverse impact at the same time. After giving a close observation, you can take appropriate action against it.
We can overcome some of the curling reasons by using certain tips which are discussed below in brief.
Save them from Excessive Heat and Stress
Tomato is a warm environment-loving plant, but when the temperature goes beyond ideal, the leaves start curling inward due to excessive heat. It happens especially in summer when the temperature goes beyond 26 degrees Celsius and plants struggle a lot for survival.
Due to excessive heat, underwater problems arise, and plants do not get enough water. Due to lack of water, the leaves curl down to protect the plant from excessive heat.
Leaf curl also happens due to loss of soil moisture, sudden heat waves, and other environmental stress.
Actions to be taken:
Water your plant properly to overcome heat stress. Before watering, always measure the soil moisture. If it’s dry till 2.5 inches deep, then it’s right to water your plants.
Avoid frequent watering during the rainy season as it may cause root rot which leads to leaf curling.
Create some physical barriers with clothes to provide shade to your plants if it is going through heat stress. You should keep potted plants indoors during excessive heat.
Short-term environmental stress won’t harm the plants, and they recover naturally when the environmental condition is normal.
Use fertilizer containing a good mixture of nitrogen
Using good fertilizers for tomato plant cultivation is an excellent option. Always choose fertilizers containing nitrogen, phosphorus, and potassium in the ratio of 18:18:21.
You should stop the use of nitrogen at the time of fruit producing season. Otherwise, lumpy, thick, and bad-quality leaves would develop on the plant, and curling of leaves happens.
I always recommended limited use of the best fertilizer for tomato plants.
Water Them Well if Pruning
Over-pruning tomato plants can leave the plant in danger; therefore, you should always avoid over-pruning.
Plants get energy from their leaves, and when they are pruned, they feel an excess loss of energy, and the growth and longevity of the tomato plant are compromised.
If you have already over-pruned your tomato plants, water them in adequate amounts to keep them hydrated and allow at least two weeks for the plant to recover on its own.
Minimize transplant shock
After germination and seedling, the next process is transplanting the tomato plants. Due to transplanting shock, the delicate roots of tomato plants get damaged, and they are unable to supply proper nutrients and water to the plant. As a result, the leaves start curling up.
Points to remember:
The plant recovers from transplanting shock on its own for almost within two weeks.
You should water the plant properly for its speedy recovery.
Don’t rush hardening off your tomato plant. Slowly and gradually, bring them into outside environments after seedlings.
Create physical barriers with the help of clothes to provide shade.
Prevent Exposure To Herbicide
Tomato plants cannot bear herbicide exposure. It causes curling of tomato leaves when it comes in contact with the plant.
In this situation, leaves curl downward, which is a very dangerous sign for the tomato plants as it causes severe loss to the plant, and there is no remedy to overcome this leaf curling situation.
Plants can still grow with little damage, but the yield is negatively impacted. And in case the plant is heavily impacted with herbicide exposure, they do not even survive.
But the best part is that this problem is very rare. It is best not to use herbicide in your garden. Tomato leaves also curl down because of various diseases and fungus infections.
Use Weed Killers
If you are using manure and compost for your tomato plants and at the same time curling tomato leaves problem is also identified, then it must be because of the use of weed killers in the manure and compost used.
Always use good quality manure and compost and try buying it from a trusted source. You should avoid the use of weed killers near tomato plants. Plants affected due to this die without even producing fruits.
Identify and Remove the Leaves (Plant With Viral Disease)
Leaf curl is a dangerous disease for tomato plants. The edge of the leaf becomes pale yellow or green and curls. The virus forces the leaves to curl upward and form a cup-like shape when stressed.
Whiteflies are the main reason behind the cause of this disease in tomato plants or even in any of the plants.
The tomato leaves are rolled inward due to Tomato Mosaic Virus. They impact the leaves by forming spots on the leaves, and fruits turn their color into brown from the inside.
If you have figured out this virus in any of your tomato plants, pull the plant and destroy or dispose of them.
Do not even use them as compost, or the disease would spread in your whole garden.
Summary
Curling of tomato leaves is a major problem that can be taken care of easily if identified early. So always watch your tomato plants to detect any such issues.
With the above-discussed tips and trips, you can keep your plant long & healthy and save them from curling.